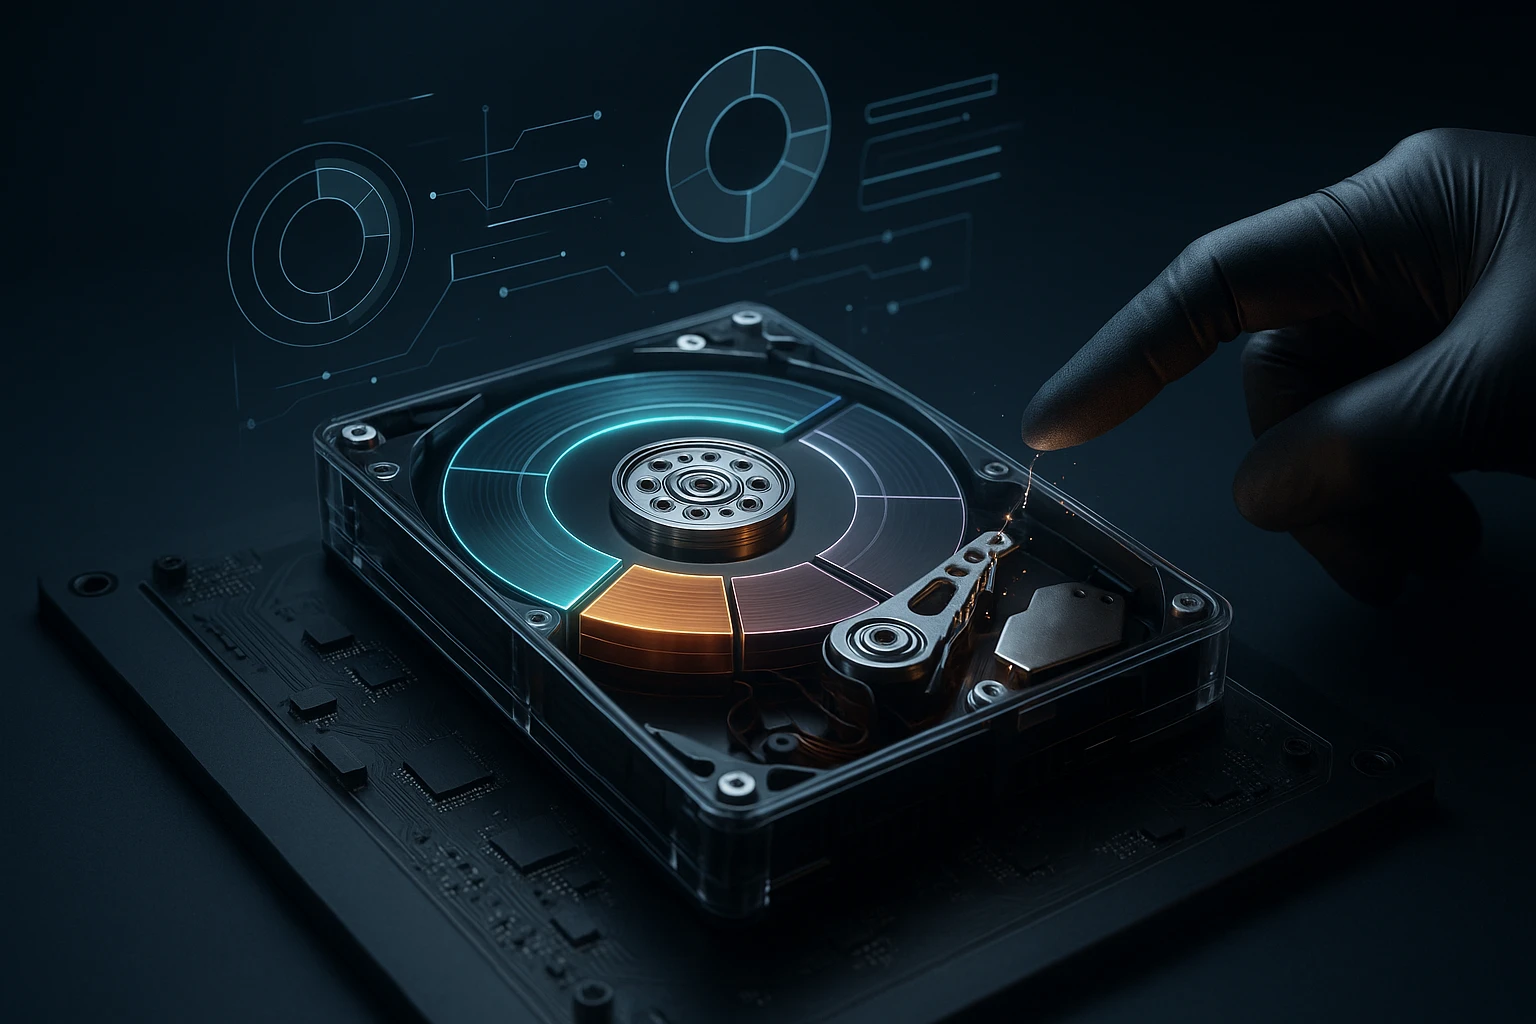
Checking and Managing Disk Partitions
Sponsor message — This article is made possible by Dargslan.com, a publisher of practical, no-fluff IT & developer workbooks.
Why Dargslan.com?
If you prefer doing over endless theory, Dargslan’s titles are built for you. Every workbook focuses on skills you can apply the same day—server hardening, Linux one-liners, PowerShell for admins, Python automation, cloud basics, and more.
Checking and Managing Disk Partitions
Storage management forms the backbone of every computing system, from personal laptops to enterprise servers. Without proper organization and oversight of disk partitions, data can become fragmented, systems can slow to a crawl, and valuable information might be lost forever. Understanding how to check and manage these partitions isn't just a technical skill—it's an essential competency for anyone who wants to maintain control over their digital environment and ensure their systems run smoothly.
A disk partition is essentially a defined segment of physical storage that the operating system treats as a separate unit. Think of it as dividing a large warehouse into distinct sections, each with its own purpose and inventory system. This guide explores the multifaceted world of partition management from various angles: the technical foundations, practical tools across different operating systems, troubleshooting strategies, and best practices that prevent disasters before they occur.
Throughout this comprehensive exploration, you'll gain actionable knowledge about identifying existing partitions, understanding their structures, modifying them safely, and implementing strategies that protect your data while optimizing performance. Whether you're a system administrator managing dozens of servers, a developer setting up dual-boot configurations, or simply someone who wants to better understand what's happening beneath the surface of your computer, this guide provides the insights and techniques you need.
Understanding the Foundation of Disk Partitions
Before diving into management techniques, it's crucial to understand what disk partitions actually are and why they exist. At its core, a partition is a logical division of a physical storage device. When you purchase a hard drive or solid-state drive, it comes as a single block of storage space. Partitioning divides this space into separate areas that the operating system can manage independently.
The concept dates back to the earliest days of computing when storage was expensive and systems needed efficient ways to organize data. Today, partitions serve multiple purposes: they allow multiple operating systems to coexist on the same physical drive, they separate system files from user data for easier backup and recovery, they can improve performance by reducing file fragmentation, and they provide organizational structure that makes storage management more intuitive.
Two primary partitioning schemes dominate modern computing: Master Boot Record (MBR) and GUID Partition Table (GPT). MBR, the older standard, has been around since the early 1980s and supports drives up to 2TB with a maximum of four primary partitions. GPT, the modern successor, supports drives larger than 2TB, allows for virtually unlimited partitions, and includes redundancy features that make it more reliable. Understanding which scheme your system uses is fundamental to effective partition management.
"The most common cause of data loss isn't hardware failure—it's human error during partition operations. Understanding the structure before making changes is not optional; it's essential."
Partition Types and Their Purposes
Not all partitions are created equal. Different types serve distinct functions within your storage architecture. Primary partitions can contain operating systems and are bootable. In MBR systems, you're limited to four primary partitions, which led to the creation of extended partitions—a special type that acts as a container for multiple logical partitions. This workaround allowed users to exceed the four-partition limit of MBR systems.
Modern GPT systems eliminated these restrictions, treating all partitions essentially the same way. However, they introduced special partition types like the EFI System Partition (ESP), which stores bootloader files for UEFI-based systems, and Microsoft Reserved Partitions (MSR), which Windows uses for system operations. Understanding these distinctions helps you make informed decisions when creating or modifying partition layouts.
File systems add another layer to partition management. A partition without a file system is like a warehouse without shelving—just empty space with no organization. Common file systems include:
- NTFS – The standard for modern Windows systems, offering journaling, encryption, and large file support
- ext4 – The default for most Linux distributions, known for reliability and performance
- APFS – Apple's modern file system optimized for flash storage and featuring native encryption
- FAT32 – An older system still used for compatibility across different operating systems
- exFAT – Designed for flash drives and external storage, combining compatibility with large file support
Checking Existing Partition Configurations
Before making any changes to your disk partitions, you need to understand what currently exists. Different operating systems provide various tools for examining partition layouts, each with its own strengths and use cases. Knowing how to access and interpret this information is the first step in effective partition management.
Windows Partition Inspection Tools
Windows offers several built-in utilities for checking disk partitions. The most accessible is Disk Management, a graphical tool that provides a clear visual representation of all connected drives and their partitions. To access it, right-click the Start button and select "Disk Management," or press Windows + X and choose the same option. The interface displays each disk with color-coded sections representing different partitions, showing their size, file system, status, and drive letter assignments.
For more detailed information, the diskpart command-line utility offers powerful inspection capabilities. Open Command Prompt as administrator and type "diskpart" to enter the utility. From there, several commands reveal partition details:
- 💾
list disk– Shows all physical disks connected to the system - 💾
select disk #– Chooses a specific disk for detailed examination - 💾
list partition– Displays all partitions on the selected disk - 💾
detail partition– Provides comprehensive information about a selected partition - 💾
list volume– Shows all volumes with their drive letters and file systems
The Windows Management Instrumentation Command-line (WMIC) provides yet another method for querying partition information. The command wmic diskdrive list brief returns basic information about physical drives, while wmic partition list brief shows partition details. PowerShell users can leverage cmdlets like Get-Disk, Get-Partition, and Get-Volume for programmatic access to partition information, which is particularly useful for scripting and automation.
Linux Partition Examination Methods
Linux systems provide an even richer set of tools for partition inspection, reflecting the operating system's philosophy of offering multiple approaches to accomplish tasks. The fdisk utility has been a staple of Linux partition management for decades. Running sudo fdisk -l lists all disks and their partitions with detailed information about partition types, sizes, and boot flags. For interactive examination, sudo fdisk /dev/sda (replacing "sda" with your actual disk identifier) enters fdisk's command mode, where pressing "p" prints the partition table.
The parted tool offers a more modern interface and supports both MBR and GPT partition tables. The command sudo parted -l lists all available disks and their partitions, displaying information about the partition table type, partition numbers, start and end points, sizes, file systems, and flags. For GPT disks, parted provides more detailed information than fdisk, which was originally designed for MBR systems.
"Always verify partition information from multiple sources before making modifications. What one tool reports might differ slightly from another, and cross-referencing ensures accuracy."
The lsblk command presents partition information in a tree-like structure that clearly shows the relationship between physical disks, partitions, and mount points. Running lsblk -f adds file system information, while lsblk -o NAME,SIZE,TYPE,FSTYPE,MOUNTPOINT,UUID provides a customized view with specific columns. This command is particularly useful for quickly understanding the overall storage layout.
For detailed information about currently mounted partitions, the df command is invaluable. The command df -h displays human-readable sizes for all mounted file systems, showing total size, used space, available space, and mount points. Adding the -T flag includes file system types in the output. The /proc/partitions file provides a raw view of partition information as seen by the kernel, accessible with cat /proc/partitions.
macOS Partition Discovery
macOS users have access to both graphical and command-line tools for partition inspection. The Disk Utility application, found in Applications > Utilities, provides a clean interface for viewing disk and partition information. Selecting a disk in the sidebar displays details about its partitions, including their names, formats, sizes, and mount points. The "Info" button reveals additional technical details.
From the command line, the diskutil command offers comprehensive partition information. Running diskutil list displays all disks and their partitions in a format similar to Linux's lsblk. For detailed information about a specific disk, diskutil info disk0 (replacing "disk0" with the appropriate identifier) returns extensive details. The diskutil info command can also target specific partitions, such as diskutil info disk0s2.
| Operating System | Primary GUI Tool | Primary CLI Tool | Quick List Command | Detailed Info Command |
|---|---|---|---|---|
| Windows | Disk Management | diskpart | list disk | detail partition |
| Linux | GParted (third-party) | fdisk / parted | sudo fdisk -l | sudo parted /dev/sda print |
| macOS | Disk Utility | diskutil | diskutil list | diskutil info disk0 |
Creating and Modifying Partitions Safely
Creating new partitions or modifying existing ones requires careful planning and execution. Unlike many computer operations that can be easily undone, partition changes can result in permanent data loss if performed incorrectly. Understanding the proper procedures and precautions is essential for anyone who needs to modify their storage layout.
Pre-Modification Preparation
Before touching any partition, backing up all important data is non-negotiable. Even experienced administrators make mistakes, and hardware can fail at inopportune moments. A complete backup to an external drive or cloud storage ensures that no matter what happens during the partition operation, your data remains safe. Verify the backup by attempting to restore a few test files before proceeding with partition modifications.
Understanding your current partition layout is equally important. Document the existing structure, noting partition sizes, file systems, mount points, and the data each partition contains. Take screenshots of your partition management tool's interface or save command output to a text file. This documentation serves as a reference point and helps you verify that modifications were applied correctly.
Check for sufficient unallocated space if you're creating new partitions. Shrinking existing partitions to create free space is possible but carries more risk than working with already-available unallocated space. If shrinking is necessary, defragment the partition first (on Windows) to consolidate data and maximize the amount of space that can be reclaimed safely.
"The time to discover your backup is incomplete is before you modify partitions, not after. Test restores are not paranoia—they're professional due diligence."
Creating New Partitions on Windows
Windows Disk Management makes partition creation relatively straightforward. Right-click on unallocated space and select "New Simple Volume" to launch the wizard. The wizard guides you through selecting the partition size, assigning a drive letter, choosing a file system, and performing a quick or full format. For most users, NTFS is the appropriate file system choice, as it supports large files, security permissions, and journaling.
For more advanced scenarios, diskpart offers greater control. After opening diskpart and selecting the appropriate disk, the create partition primary size=#### command creates a new primary partition of the specified size in megabytes. The create partition extended command creates an extended partition that can contain logical drives. After creating a partition, use format fs=ntfs quick label="PartitionName" to format it with NTFS.
Linux Partition Creation Techniques
Linux users typically turn to parted or fdisk for partition creation. With parted, the process begins with sudo parted /dev/sda to enter interactive mode. The mkpart command creates new partitions, with syntax like mkpart primary ext4 1GB 100GB to create a primary partition with ext4 file system starting at 1GB and ending at 100GB. After creating the partition, exit parted and format it with sudo mkfs.ext4 /dev/sda1.
The fdisk utility follows a different workflow. After entering fdisk with sudo fdisk /dev/sda, press "n" to create a new partition, then follow the prompts to specify partition type, number, and size. Press "w" to write changes to disk. Like parted, fdisk only creates the partition structure; formatting requires a separate command like sudo mkfs.ext4 /dev/sda1.
For users who prefer graphical interfaces, GParted provides a powerful yet intuitive environment for partition operations. Available as a standalone application or a bootable live CD, GParted displays partitions visually and allows operations through point-and-click interactions. Right-clicking unallocated space and selecting "New" opens a dialog where you can specify partition size, file system, and label. GParted queues operations and applies them all at once when you click the apply button, allowing you to review changes before committing them.
Resizing Existing Partitions
Resizing partitions is one of the more complex operations, as it involves moving data boundaries while preserving the data itself. Shrinking partitions is generally safer than expanding them, as it moves the end boundary inward without affecting the beginning where critical file system structures reside. On Windows, Disk Management's "Shrink Volume" option analyzes the partition and suggests a maximum shrink size based on where data is currently located.
Expanding partitions requires unallocated space immediately adjacent to the partition being expanded. Windows Disk Management's "Extend Volume" option only works if free space exists to the right of the partition. Linux tools like parted and GParted offer more flexibility, allowing you to move partitions to consolidate free space, though this operation takes longer and carries slightly more risk.
"Resizing the system partition while the operating system is running is like performing surgery on yourself. It's possible, but using a bootable environment is significantly safer."
For critical partitions, especially those containing operating systems, using a bootable partition manager eliminates many risks. Tools like GParted Live, Clonezilla, or commercial solutions like EaseUS Partition Master can boot independently, allowing full access to all partitions without the complications of modifying partitions that are currently in use. This approach prevents file locks, reduces the risk of corruption, and allows operations that would be impossible from within the running OS.
Advanced Partition Management Concepts
Beyond basic creation and modification, advanced partition management involves understanding logical volume management, disk encryption, and multi-boot configurations. These concepts enable sophisticated storage architectures that provide flexibility, security, and functionality beyond what simple partitioning can achieve.
Logical Volume Management
Logical Volume Management (LVM) adds an abstraction layer between physical storage and the file systems that use it. Instead of creating partitions directly on physical disks, LVM creates physical volumes (PVs) from partitions or entire disks, combines them into volume groups (VGs), and then allocates logical volumes (LVs) from those volume groups. This architecture provides tremendous flexibility for resizing, snapshotting, and managing storage.
The primary advantage of LVM is that logical volumes can span multiple physical disks and can be resized dynamically without the constraints of traditional partition boundaries. Need to expand a volume? Simply add another physical disk to the volume group and extend the logical volume. Need to shrink a volume? Reduce the logical volume size and potentially remove physical volumes from the volume group if they're no longer needed.
LVM also enables snapshots—point-in-time copies of logical volumes that can be used for backups or testing. Creating a snapshot before performing risky operations provides an instant rollback point. If something goes wrong, you can revert to the snapshot rather than restoring from a traditional backup, saving significant time.
Setting up LVM on Linux involves several steps. First, create physical volumes from partitions using sudo pvcreate /dev/sda1. Next, create a volume group that combines one or more physical volumes: sudo vgcreate my_volume_group /dev/sda1 /dev/sdb1. Finally, create logical volumes from the volume group: sudo lvcreate -L 50G -n my_logical_volume my_volume_group. After creating the logical volume, format it with a file system and mount it like any other partition.
Encryption and Secure Partitions
Encrypting partitions protects data from unauthorized access, essential for laptops, portable drives, and any system that might be physically compromised. Modern operating systems include built-in encryption capabilities: BitLocker for Windows, LUKS (Linux Unified Key Setup) for Linux, and FileVault for macOS.
Windows BitLocker encrypts entire volumes, requiring authentication before the operating system can access the data. Enabling BitLocker on a partition involves opening the partition's properties in File Explorer, selecting "Turn on BitLocker," and following the wizard to choose an authentication method and save a recovery key. BitLocker uses AES encryption and integrates with TPM (Trusted Platform Module) chips when available for hardware-based key storage.
Linux LUKS provides similar functionality with greater flexibility. Setting up LUKS encryption typically happens during partition creation. The command sudo cryptsetup luksFormat /dev/sda1 initializes a partition for LUKS encryption, prompting for a passphrase. After formatting, sudo cryptsetup open /dev/sda1 encrypted_partition unlocks the partition, making it available at /dev/mapper/encrypted_partition. You then format this mapped device with a file system and mount it normally.
"Encryption is not about whether you have something to hide—it's about maintaining control over who has access to your data. In an era of increasing digital threats, it's a fundamental security measure."
Multi-Boot Partition Strategies
Running multiple operating systems on a single computer requires careful partition planning. Each operating system needs its own partition (or multiple partitions for system and user data), and a boot manager must coordinate which OS to load at startup. The most common approach involves creating separate partitions for each OS, plus a shared data partition formatted with a file system that all operating systems can access, typically FAT32 or exFAT.
For a Windows and Linux dual-boot system, a typical layout includes: an EFI System Partition (ESP) for UEFI boot files, a Windows partition with NTFS, a Linux root partition with ext4, a Linux swap partition, and optionally a shared data partition with exFAT. The Linux boot manager, typically GRUB, installs to the ESP and provides a menu at startup for selecting which operating system to boot.
Installation order matters in multi-boot configurations. Generally, install Windows first, as its installer tends to be less flexible about existing operating systems and might overwrite boot configurations. Install Linux second, and its installer will typically detect Windows and configure GRUB to include both operating systems in the boot menu. After installation, tools like os-prober can scan for operating systems and update the boot menu if changes are needed.
| Partition Purpose | Recommended Size | File System | Mount Point (Linux) | Notes |
|---|---|---|---|---|
| EFI System Partition | 100-500 MB | FAT32 | /boot/efi | Required for UEFI systems; contains boot loaders |
| Windows System | 50-100 GB minimum | NTFS | N/A | More space needed for applications and updates |
| Linux Root | 20-50 GB | ext4 / btrfs | / | Contains OS and installed applications |
| Linux Home | Variable | ext4 / btrfs | /home | Optional; separates user data from system |
| Linux Swap | Equal to RAM | swap | N/A | Used for hibernation and memory overflow |
| Shared Data | Variable | exFAT / NTFS | /mnt/shared | Accessible from all operating systems |
Troubleshooting Common Partition Issues
Even with careful planning and execution, partition-related problems can occur. Understanding common issues and their solutions helps you respond quickly when problems arise, minimizing downtime and preventing data loss.
Partition Not Showing Up
One of the most common issues is a partition that exists but doesn't appear in the operating system. This can happen for several reasons. On Windows, the partition might not have a drive letter assigned. Open Disk Management, right-click the partition, and select "Change Drive Letter and Paths" to assign a letter. On Linux, the partition might simply not be mounted. Use sudo mount /dev/sda1 /mnt/mountpoint to mount it manually, or add an entry to /etc/fstab for automatic mounting at boot.
File system corruption can also prevent a partition from appearing or mounting. Running file system checks can often resolve these issues. On Windows, use chkdsk /f X: (replacing X with the drive letter) to check and repair file system errors. On Linux, unmount the partition first, then run sudo fsck /dev/sda1 to check and repair the file system. Always ensure the partition is unmounted before running fsck, as checking a mounted file system can cause further corruption.
Cannot Delete or Modify Partition
Sometimes a partition refuses to be deleted or modified, usually because it's in use or protected by the operating system. On Windows, system partitions, recovery partitions, and the EFI System Partition are protected by default. Disk Management won't allow you to delete them through normal means. If you're certain you want to remove such a partition, diskpart can override these protections. After selecting the partition with select partition #, use delete partition override to force deletion.
On Linux, a partition cannot be modified while it's mounted. Use sudo umount /dev/sda1 to unmount it first. If the system reports the partition is busy, use lsof /mount/point or fuser -m /mount/point to identify which processes are using it. Close those processes or reboot into a live environment where the partition isn't in use.
"The partition you can't delete is usually protecting something important. Before forcing deletion, triple-check that you're targeting the correct partition and understand the consequences."
Boot Issues After Partition Changes
Modifying partitions, especially those containing operating systems or boot files, can result in boot failures. The most common symptom is an error message like "Operating System Not Found" or "No Bootable Device." This typically indicates that the boot loader has been damaged or can't find the OS partition.
For Windows systems, the Windows Recovery Environment provides tools to repair boot issues. Boot from Windows installation media, select "Repair your computer," then "Troubleshoot," then "Advanced options," and finally "Startup Repair." This automated tool attempts to fix common boot problems. For more control, use the Command Prompt option and run bootrec /fixmbr, bootrec /fixboot, and bootrec /rebuildbcd in sequence to repair the boot configuration.
Linux boot issues often relate to GRUB configuration. Boot from a Linux live USB, mount your root partition (sudo mount /dev/sda1 /mnt), mount the EFI partition if using UEFI (sudo mount /dev/sda2 /mnt/boot/efi), then chroot into your system (sudo chroot /mnt). From there, reinstall GRUB with grub-install /dev/sda and update its configuration with update-grub. Exit the chroot environment and reboot.
Partition Shows Wrong Size
Occasionally, a partition reports an incorrect size, showing less space than it should have. This can happen after resizing operations or when partition table information becomes inconsistent with the actual partition boundaries. On Linux, the resize2fs command can expand an ext4 file system to fill its partition: sudo resize2fs /dev/sda1. For NTFS partitions on Windows, chkdsk sometimes resolves size discrepancies.
If the partition table itself is incorrect, tools like parted can sometimes repair it. The rescue command in parted attempts to recover lost partitions and fix partition table inconsistencies. However, partition table repairs carry risk, so ensure you have backups before attempting them.
Best Practices for Long-Term Partition Health
Effective partition management isn't just about creating and modifying partitions—it's about maintaining them over time to ensure reliability, performance, and data integrity. Implementing best practices from the start prevents many problems and makes troubleshooting easier when issues do arise.
Regular Monitoring and Maintenance
Monitoring partition health should be a regular activity, not something you only do when problems occur. Set up automated monitoring for critical metrics like free space, file system errors, and SMART disk health indicators. On Linux, tools like smartctl from the smartmontools package provide detailed disk health information: sudo smartctl -a /dev/sda displays comprehensive SMART data. Windows users can check SMART status through third-party tools like CrystalDiskInfo or through PowerShell with Get-PhysicalDisk | Get-StorageReliabilityCounter.
Establish thresholds for action. When a partition reaches 80% capacity, investigate what's consuming space and consider cleanup or expansion. When SMART indicators show increasing reallocated sectors or pending sectors, prepare for potential disk failure by backing up data and planning for disk replacement. Proactive monitoring catches problems early when they're easier to address.
Documentation and Change Management
Maintain documentation of your partition layout, including the purpose of each partition, its size, file system, and what data it contains. When you make changes, document what was changed, why, and when. This documentation proves invaluable when troubleshooting issues months or years later, especially in environments where multiple administrators might work on the same systems.
Implement a change management process for partition modifications. Before making changes, create a plan that includes the current state, desired end state, steps to achieve the change, rollback procedures if something goes wrong, and verification steps to confirm success. For critical systems, schedule changes during maintenance windows and ensure backups are current and verified.
Backup Strategies for Partition Configurations
While backing up data is standard practice, backing up partition configurations is often overlooked. Save partition table information so you can recreate the layout if it becomes corrupted. On Linux, sudo sfdisk -d /dev/sda > partition_backup.txt saves the partition table to a text file, which can be restored with sudo sfdisk /dev/sda < partition_backup.txt. For GPT partitions, sudo sgdisk --backup=partition_backup /dev/sda creates a backup that can be restored with sudo sgdisk --load-backup=partition_backup /dev/sda.
"A backup of your partition table takes seconds to create and could save hours or days of recovery work. There's no excuse for not having one."
Consider creating full disk images for critical systems. Tools like Clonezilla, Macrium Reflect, or dd can create exact copies of entire disks, including partition tables, boot sectors, and all data. These images provide the ultimate insurance policy—if anything goes catastrophically wrong, you can restore the entire disk to a known good state.
Performance Optimization Through Partition Alignment
Partition alignment affects performance, particularly on solid-state drives. Misaligned partitions cause the drive to perform extra operations for each read or write, reducing performance and potentially decreasing drive lifespan. Modern partitioning tools generally create aligned partitions by default, but older systems or partitions created with older tools might have alignment issues.
To check partition alignment on Linux, use sudo parted /dev/sda followed by align-check optimal 1 (replacing 1 with the partition number). If the partition is misaligned, the only fix is to back up the data, recreate the partition with proper alignment, and restore the data. On Windows, diskpart's list partition command shows the offset of each partition; properly aligned partitions have offsets that are multiples of 1024 KB (1048576 bytes).
Capacity Planning and Growth Management
Planning for future growth prevents the need for disruptive partition resizing operations. When creating partitions, consider not just current needs but projected needs over the system's expected lifespan. Leaving unallocated space provides flexibility for future expansion without the complexity of shrinking existing partitions.
For systems with unpredictable growth patterns, technologies like LVM or storage pools provide dynamic allocation. Rather than committing all space upfront, these systems allocate space as needed, allowing you to start with smaller logical volumes and expand them as requirements increase. This approach maximizes flexibility while minimizing wasted space.
Specialized Partition Scenarios
Beyond standard desktop and server configurations, certain scenarios require specialized partition approaches. Understanding these use cases and their unique requirements ensures you can design appropriate partition layouts for any situation.
Virtual Machine Partition Management
Virtual machines introduce an additional layer of partition complexity. The host system has its own partition layout, and each virtual machine has virtual disks that contain their own partition tables. Managing both layers effectively requires understanding how they interact and where to implement certain features.
For virtual machine hosts, consider dedicating separate partitions or volumes for VM storage. This isolation prevents VMs from consuming all available space and affecting the host OS. It also simplifies backup and migration operations. Using LVM on Linux hosts provides flexibility for allocating storage to VMs, allowing you to create logical volumes for each VM and resize them as needed without affecting other VMs.
Within virtual machines, partition layouts can often be simpler than physical systems. Since virtual disks can be expanded relatively easily (depending on the hypervisor), you might use fewer, larger partitions rather than dividing space into many small partitions. However, for production VMs, maintaining separation between system and data partitions still provides benefits for backup and recovery operations.
Server and Enterprise Considerations
Server environments often require more sophisticated partition strategies than desktop systems. Separating different types of data into distinct partitions or volumes provides isolation, improves performance, and simplifies management. A typical Linux server might separate /, /boot, /home, /var, /tmp, and /opt into different partitions or logical volumes.
This separation serves multiple purposes. Isolating /var prevents log files from filling the root partition and causing system instability. Separating /tmp and mounting it with noexec prevents attackers from executing malicious code in a world-writable directory. Putting /home on its own partition makes it easier to reinstall the OS without affecting user data.
RAID configurations add another dimension to partition management. When using hardware or software RAID, partition the RAID array rather than individual disks. This ensures that partition boundaries align across all disks in the array and that the RAID layer handles redundancy at the appropriate level. For software RAID on Linux, create RAID partitions on each disk (type 0xFD in fdisk), then use mdadm to create RAID arrays from those partitions.
Embedded Systems and Limited Storage
Embedded systems and devices with limited storage require careful partition planning to maximize the use of available space. These systems often use specialized partition layouts optimized for their specific hardware and use cases. For example, many embedded Linux systems use a small boot partition, a compressed read-only root file system, and a separate writable partition for user data and configuration.
Flash storage in embedded systems has unique characteristics that affect partition strategy. Wear leveling, which distributes writes across the storage medium to prevent premature failure, works best when the device isn't completely full. Leaving some unallocated space (often 10-20% of total capacity) improves wear leveling effectiveness and extends device lifespan.
How do I know if my disk uses MBR or GPT partitioning?
On Windows, open Disk Management, right-click the disk (not a partition), and select "Properties." In the "Volumes" tab, the "Partition style" field shows either "Master Boot Record (MBR)" or "GUID Partition Table (GPT)." On Linux, run sudo parted -l and look for "Partition Table" in the output for each disk. On macOS, open Disk Utility, select the disk, and click "Info"—the partition map scheme is listed in the information panel.
Can I convert from MBR to GPT without losing data?
Yes, but with caution. Windows 10 and later include the mbr2gpt tool that can convert system disks from MBR to GPT without data loss, though the system must meet certain requirements (UEFI-capable hardware, Windows 10 version 1703 or later, and specific partition layout). On Linux, gdisk can convert partition tables, but this operation carries risk and should only be performed after backing up all data. For non-system disks, the safer approach is to back up data, reformat with GPT, and restore the data.
What's the difference between quick format and full format?
A quick format creates a new file system structure but doesn't scan for bad sectors or overwrite existing data. It completes in seconds to minutes regardless of partition size. A full format does everything a quick format does, plus scans the entire partition for bad sectors and overwrites all data with zeros. Full formats take much longer but provide verification that the storage medium is functioning correctly and ensure that old data is completely erased. For new drives or when security isn't a concern, quick format is usually sufficient. For drives with unknown history or when you need to securely erase data, use full format.
Why can't I extend my C: drive even though there's unallocated space?
Windows can only extend a partition into unallocated space that's immediately to the right of (after) the partition. If unallocated space exists to the left, or if another partition sits between your C: drive and the free space, Windows Disk Management can't extend it. Solutions include using third-party partition managers that can move partitions to consolidate free space, deleting the intervening partition if it's not needed, or using a bootable partition manager to perform more complex operations that aren't possible from within Windows.
How much swap space do I need on Linux?
Swap space recommendations have evolved over time. Traditional advice suggested swap equal to twice your RAM, but with modern systems having 16GB, 32GB, or more RAM, this creates unnecessarily large swap partitions. Current recommendations vary based on use case: for systems with less than 8GB RAM, use swap equal to RAM; for systems with 8-64GB RAM, use at least 4GB of swap; for systems with more than 64GB RAM, use at least 4GB but probably no more than 8GB. If you use hibernation, swap must be at least equal to RAM size. For systems that will never hibernate and have abundant RAM, you might skip swap entirely, though having at least a small swap partition provides a safety buffer.
Is it safe to partition an SSD the same way as a hard drive?
While the basic concepts are the same, SSDs have some unique considerations. Modern operating systems and partitioning tools automatically handle alignment for SSDs, which is crucial for performance. SSDs don't benefit from defragmentation, so don't defragment SSD partitions. The TRIM command, which helps maintain SSD performance, works at the partition level, so ensure TRIM is enabled for your SSD partitions (it's usually automatic on modern systems). Over-provisioning—leaving some space unallocated—can improve SSD performance and lifespan, though many SSDs include reserved space for this purpose. Otherwise, partition SSDs using the same logical principles as hard drives: separate system from data, plan for growth, and maintain regular backups.