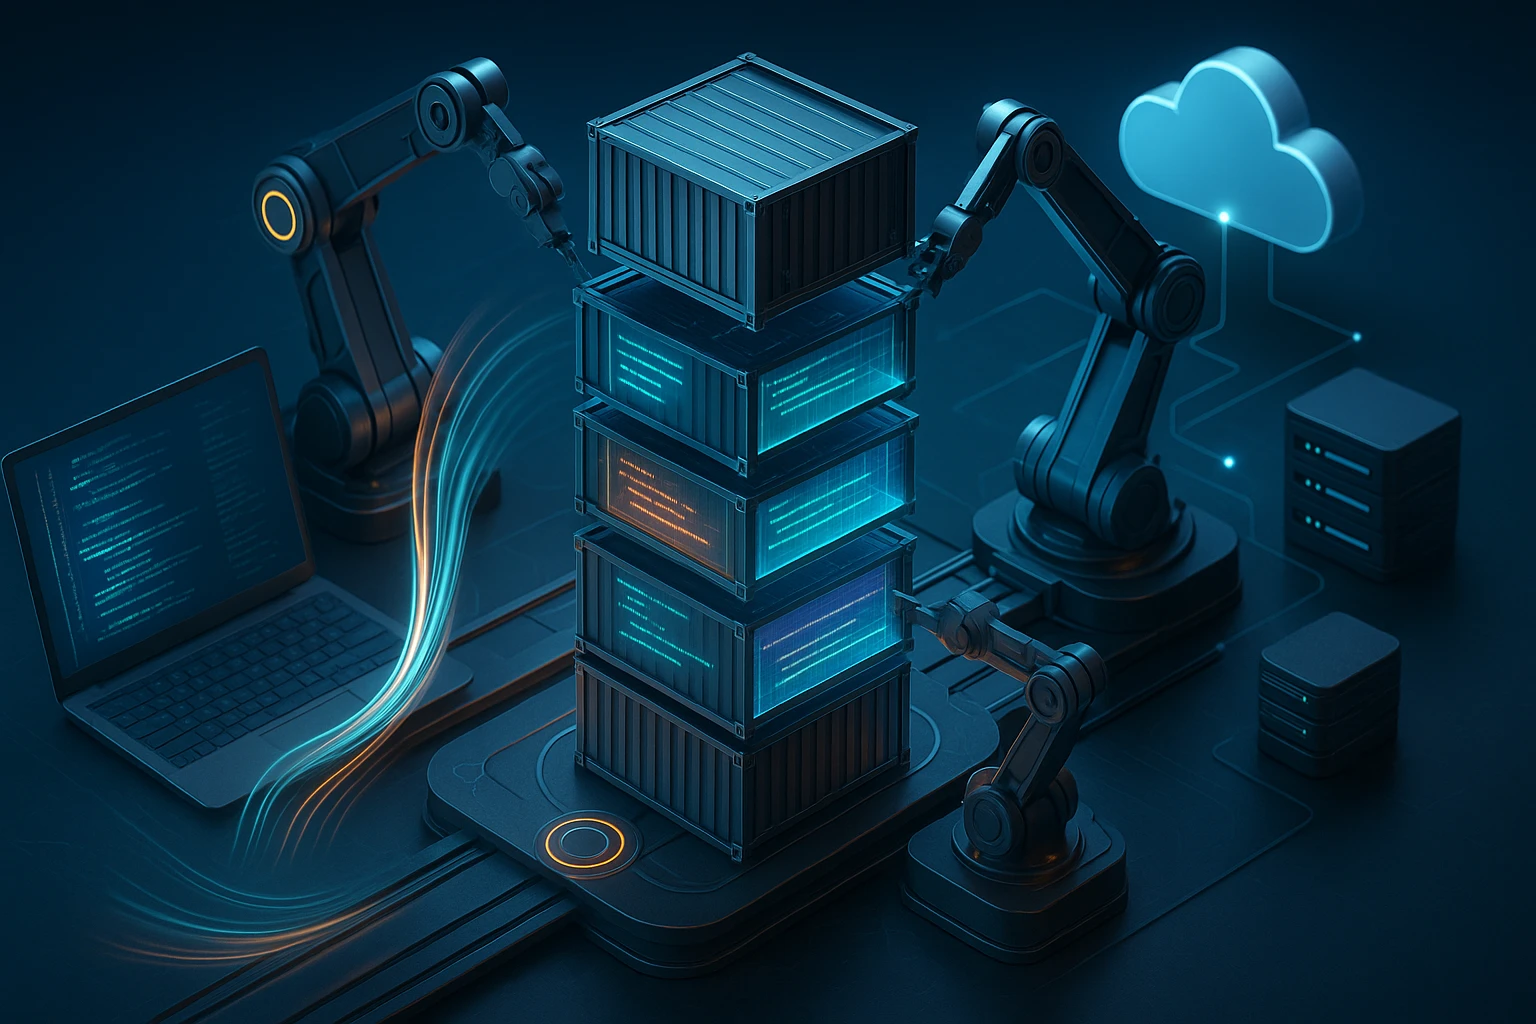
Creating Docker Images Efficiently
Sponsor message — This article is made possible by Dargslan.com, a publisher of practical, no-fluff IT & developer workbooks.
Why Dargslan.com?
If you prefer doing over endless theory, Dargslan’s titles are built for you. Every workbook focuses on skills you can apply the same day—server hardening, Linux one-liners, PowerShell for admins, Python automation, cloud basics, and more.
In the modern software development landscape, the ability to create Docker images efficiently isn't just a technical nicety—it's a fundamental skill that directly impacts your deployment speed, infrastructure costs, and overall development velocity. Every minute spent waiting for builds, every gigabyte of unnecessary storage consumed, and every security vulnerability lurking in bloated images represents real business costs and potential risks that accumulate silently across your organization.
Efficient Docker image creation encompasses the art and science of building containerized applications that are lean, secure, fast to build, and quick to deploy. It's about understanding the nuanced interplay between layer caching, base image selection, multi-stage builds, and optimization techniques that transform a naive 2GB image into a streamlined 50MB powerhouse without sacrificing functionality or reliability.
Throughout this comprehensive guide, you'll discover battle-tested strategies for minimizing image size, accelerating build times, implementing security best practices, and establishing reproducible build processes. Whether you're containerizing a simple microservice or orchestrating complex multi-container applications, the techniques presented here will equip you with the knowledge to build Docker images that are production-ready, maintainable, and optimized for modern cloud-native environments.
Understanding Docker Image Architecture and Layers
Docker images operate on a layered filesystem architecture where each instruction in your Dockerfile creates a new layer. This fundamental concept is crucial because understanding how layers work directly influences every optimization decision you'll make. When Docker builds an image, it executes each instruction sequentially, creating an immutable layer for each step. These layers are then stacked on top of each other, with each layer containing only the differences from the layer below it.
The layering system provides powerful advantages for caching and distribution. When you rebuild an image, Docker can reuse unchanged layers from previous builds, dramatically reducing build times. Similarly, when pulling images from a registry, Docker only downloads layers that don't already exist locally. However, this same system can become a liability when misunderstood—a single poorly placed instruction can invalidate the entire cache chain, forcing unnecessary rebuilds of subsequent layers.
"The difference between a 10-minute build and a 30-second build often comes down to understanding which layers change frequently and ordering your Dockerfile instructions accordingly."
Each layer adds metadata and potentially increases the final image size, even if the instruction appears to remove files. This counterintuitive behavior occurs because Docker layers are additive—a layer that deletes a file doesn't actually remove it from previous layers, it simply marks it as deleted in the current layer. The original file still exists in the layer where it was created, contributing to the overall image size. This characteristic makes the order and structure of your Dockerfile instructions critically important for achieving truly minimal images.
Layer Caching Mechanics
Docker's layer caching mechanism compares each instruction in your Dockerfile with previously built layers. If the instruction and its context (including file checksums for COPY and ADD commands) match a cached layer, Docker reuses that layer instead of executing the instruction again. This cache validation happens sequentially from top to bottom, meaning once a layer cache is invalidated, all subsequent layers must be rebuilt regardless of whether their individual instructions have changed.
| Instruction Type | Cache Invalidation Trigger | Optimization Strategy |
|---|---|---|
| FROM, WORKDIR, ENV | Instruction text changes | Place at top of Dockerfile; rarely changes |
| COPY, ADD | File content checksum changes | Copy dependency files before source code |
| RUN | Command string changes | Chain related commands; place volatile operations last |
| ARG (before FROM) | Build-time argument value changes | Invalidates entire build; use sparingly |
| CMD, ENTRYPOINT | Instruction changes | Place at end; doesn't affect build cache |
Base Image Selection Impact
Your choice of base image establishes the foundation for everything that follows, affecting not just the initial image size but also security posture, available tooling, and compatibility. The spectrum ranges from full-featured distributions like Ubuntu (approximately 77MB compressed) to minimal images like Alpine Linux (around 5MB) and even distroless images that contain only your application and its runtime dependencies without a package manager or shell.
Alpine Linux has become extraordinarily popular for its minimal size, but it comes with important considerations. Alpine uses musl libc instead of glibc, which can cause compatibility issues with certain binaries and libraries compiled for glibc-based systems. Applications with native dependencies may require additional build tools and compilation steps that partially offset the size advantage. For many use cases, the Debian slim variants offer an excellent middle ground—significantly smaller than full Debian images while maintaining glibc compatibility and a more complete package ecosystem.
Multi-Stage Build Patterns
Multi-stage builds represent one of the most transformative features Docker has introduced for creating efficient images. This technique allows you to use multiple FROM statements in a single Dockerfile, with each FROM instruction starting a new build stage. You can selectively copy artifacts from one stage to another, leaving behind build tools, intermediate files, and dependencies that were necessary for compilation but aren't needed in the final runtime image.
The classic use case involves a build stage with a full development environment—compilers, build tools, headers, and development libraries—followed by a minimal runtime stage that contains only the compiled application and its runtime dependencies. This pattern is particularly powerful for compiled languages like Go, Rust, or C++, where the build environment can be hundreds of megabytes larger than the runtime requirements. A Go application, for instance, might require a 300MB build image but can run in a 10MB runtime image containing just the statically compiled binary.
FROM golang:1.21 AS builder
WORKDIR /app
COPY go.mod go.sum ./
RUN go mod download
COPY . .
RUN CGO_ENABLED=0 GOOS=linux go build -ldflags="-w -s" -o main .

FROM alpine:3.19
RUN apk --no-cache add ca-certificates
WORKDIR /root/
COPY --from=builder /app/main .
EXPOSE 8080
CMD ["./main"]
Beyond simple two-stage builds, complex applications benefit from multiple specialized stages. You might have separate stages for dependency installation, testing, building different components, and assembling the final image. Each stage can use the most appropriate base image for its purpose—a Node.js stage for frontend builds, a Python stage for backend processing, and a minimal Nginx stage for serving static assets. This modular approach not only reduces final image size but also improves build parallelization and makes the build process more maintainable.
Dependency Layer Optimization
One of the most impactful optimizations involves separating dependency installation from application code copying. Package managers like npm, pip, and Maven download dependencies based on manifest files (package.json, requirements.txt, pom.xml). By copying only these manifest files first, running the dependency installation, and then copying the application code, you create a caching boundary that remains valid as long as dependencies don't change—even when your source code changes constantly during development.
FROM node:20-alpine AS builder
WORKDIR /app
COPY package*.json ./
RUN npm ci --only=production
COPY . .
RUN npm run build

FROM node:20-alpine
WORKDIR /app
COPY --from=builder /app/dist ./dist
COPY --from=builder /app/node_modules ./node_modules
EXPOSE 3000
CMD ["node", "dist/server.js"]
"Separating dependency installation from code copying is the single most effective technique for reducing build times during iterative development cycles."
Image Size Reduction Techniques
Minimizing image size delivers multiple benefits beyond just saving storage space. Smaller images transfer faster across networks, reducing deployment times in distributed environments. They consume less memory in image registries and on host systems, allowing higher container density. Most importantly, smaller images have a reduced attack surface with fewer packages and binaries that could contain vulnerabilities or be exploited by attackers.
Package Manager Cleanup
Package managers like apt, yum, and apk create substantial temporary files and metadata during installation. These artifacts serve no purpose in the final image and should be removed within the same RUN instruction that installs packages. Splitting installation and cleanup across multiple RUN instructions doesn't reduce image size because each RUN creates a separate layer, and the files from the installation layer persist even after deletion in a subsequent layer.
RUN apt-get update && apt-get install -y \
    curl \
    vim \
    git \
 && apt-get clean \
 && rm -rf /var/lib/apt/lists/* /tmp/* /var/tmp/*
For Alpine-based images, the apk package manager provides particularly clean operation with the --no-cache flag, which prevents the creation of cache files altogether. This approach is cleaner than installing and then removing cache, as it ensures the cache never enters the layer in the first place. Additionally, Alpine's package repository is designed for container use, with packages split into smaller components that allow more granular installation of only what's truly needed.
Binary Stripping and Compression
Compiled binaries often contain debugging symbols, symbol tables, and other metadata useful for development but unnecessary for production execution. The strip utility removes this information, often reducing binary size by 30-50% without affecting functionality. For Go applications, compile-time flags like -ldflags="-w -s" achieve similar results, removing debug information and symbol tables during the build process rather than as a post-processing step.
UPX (Ultimate Packer for eXecutables) provides another layer of size reduction through executable compression. UPX can reduce binary size by 50-70%, though with trade-offs: slightly increased memory usage during execution and potential incompatibility with certain security scanning tools. For applications where startup time and image size are more critical than these considerations, UPX offers substantial benefits, particularly for languages that produce large binaries.
| Optimization Technique | Typical Size Reduction | Performance Impact | Best Use Cases |
|---|---|---|---|
| Alpine base image | 70-90% vs Ubuntu | Minimal; possible glibc compatibility issues | Microservices, simple applications |
| Multi-stage builds | 50-90% reduction | None; only affects build time | Compiled languages, complex builds |
| Binary stripping | 30-50% of binary size | None; removes debug symbols only | Production deployments |
| UPX compression | 50-70% of binary size | Slight memory increase; slower startup | Size-critical deployments |
| Distroless images | 80-95% vs full distro | None; debugging more difficult | Production microservices |
Eliminating Unnecessary Files
Source code repositories contain numerous files irrelevant to production containers: documentation, test files, development configurations, CI/CD definitions, and version control metadata. A well-crafted .dockerignore file prevents these files from being sent to the Docker daemon during build, reducing build context size and preventing accidental inclusion in the image. This file works similarly to .gitignore, specifying patterns for files and directories to exclude from the build context.
.git
.gitignore
.dockerignore
Dockerfile*
docker-compose*
README.md
LICENSE
.env*
*.md
tests/
docs/
*.test
*.spec.js
coverage/
node_modules/
__pycache__/
*.pyc
.pytest_cache/
"A comprehensive dockerignore file is security hygiene—it prevents sensitive files like environment variables, credentials, and private keys from accidentally being baked into images."
Build Performance Optimization
Build performance directly impacts developer productivity and deployment velocity. A build that takes 10 minutes versus 2 minutes doesn't just waste 8 minutes—it disrupts flow, encourages context switching, and creates friction in the development cycle. Optimizing build performance requires understanding both Docker's caching mechanisms and the specific characteristics of your application's build process.
BuildKit Enhancements
BuildKit, Docker's next-generation build engine, introduces significant performance improvements and new capabilities beyond the legacy builder. It provides parallel build stage execution, automatic garbage collection, improved caching mechanisms, and support for advanced features like cache mounts and secret handling. Enabling BuildKit is as simple as setting an environment variable: DOCKER_BUILDKIT=1, yet it can reduce build times by 50% or more for complex multi-stage builds.
BuildKit's cache mount feature allows mounting a persistent cache directory during build steps, particularly valuable for package manager caches. Instead of downloading dependencies fresh for each build or trying to preserve them across layers, cache mounts provide a persistent location that survives across builds but doesn't contribute to the final image size. This technique is especially powerful for languages with large dependency trees like Node.js, Python, or Java.
RUN --mount=type=cache,target=/root/.cache/pip \
    pip install -r requirements.txt

RUN --mount=type=cache,target=/root/.npm \
    npm ci --only=production
Parallel Build Stages
Multi-stage builds with independent stages can be parallelized by BuildKit automatically. If you have separate stages for frontend and backend builds that don't depend on each other, BuildKit executes them concurrently, utilizing available CPU cores more effectively. Structuring your Dockerfile to maximize independent stages can significantly reduce total build time, especially on multi-core build machines or CI/CD runners.
For maximum parallelization benefits, consider splitting large monolithic RUN commands into separate stages when those operations don't have sequential dependencies. Testing, linting, and building different components can often happen in parallel, with a final stage that combines the results. This approach not only speeds up builds but also provides clearer failure points—if tests fail, you know immediately without waiting for other build steps to complete.
Remote Caching Strategies
In team environments and CI/CD pipelines, build cache sharing becomes crucial for maintaining performance across different machines and build agents. Docker's registry cache feature allows pushing and pulling cache layers to a registry, enabling cache reuse across different build environments. This capability is particularly valuable in CI/CD systems where each build might run on a different ephemeral agent without local cache.
docker buildx build \
  --cache-from type=registry,ref=myregistry.com/myapp:buildcache \
  --cache-to type=registry,ref=myregistry.com/myapp:buildcache,mode=max \
  -t myregistry.com/myapp:latest \
  --push .
"Remote caching transforms CI/CD pipelines from repeatedly building from scratch to incremental builds that complete in seconds rather than minutes."
Security Considerations in Image Building
Security begins at the image level, long before containers are deployed to production. Vulnerabilities in base images, outdated packages, embedded secrets, and excessive privileges create risks that propagate throughout your infrastructure. Building secure images requires a defense-in-depth approach that addresses multiple threat vectors and follows the principle of least privilege at every layer.
Base Image Vulnerability Management
Base images serve as the foundation of your security posture. Using outdated base images exposes your applications to known vulnerabilities that attackers can exploit. Regularly updating base image tags and using specific version tags rather than latest ensures reproducibility while allowing controlled updates. Many organizations establish approved base image catalogs with regularly scanned and patched images that development teams must use.
Minimal base images like Alpine, distroless, or scratch images reduce attack surface by including fewer packages and binaries. A distroless image contains only your application and its runtime dependencies—no shell, no package manager, no utilities. This approach makes it significantly harder for attackers to operate even if they compromise your application, as they lack the tools typically used for reconnaissance, lateral movement, or establishing persistence.
Secret Management
Never include secrets, credentials, API keys, or sensitive configuration in Docker images. Even if you delete these files in a subsequent layer, they remain in the layer where they were added and can be extracted by anyone with access to the image. BuildKit's secret mount feature provides a secure way to make secrets available during build without including them in the final image or any intermediate layers.
RUN --mount=type=secret,id=npm_token \
    echo "//registry.npmjs.org/:_authToken=$(cat /run/secrets/npm_token)" > ~/.npmrc && \
    npm install && \
    rm ~/.npmrc
For runtime secrets, use environment variables passed at container startup, mounted volumes, or dedicated secret management systems like Docker Secrets, Kubernetes Secrets, or HashiCorp Vault. These approaches keep secrets outside the image entirely, allowing the same image to be used across different environments with different credentials and enabling secret rotation without rebuilding images.
Running as Non-Root
Containers run as root by default, which creates unnecessary security risks. If an attacker compromises your application, root access within the container provides elevated privileges that can be used to attempt container escape or access sensitive host resources. Creating a dedicated user with minimal privileges and using the USER instruction to switch to that user before starting your application significantly reduces this risk.
RUN addgroup -g 1001 -S appgroup && \
    adduser -u 1001 -S appuser -G appgroup

USER appuser

CMD ["./application"]
"Running containers as root is like leaving your house keys under the doormat—it might be convenient, but it's an unnecessary risk that's trivial to avoid."
Language-Specific Optimization Patterns
Different programming languages and frameworks have unique characteristics that influence optimal Docker image construction. Understanding these language-specific patterns allows you to apply the most effective optimization techniques for your particular technology stack.
Node.js Applications
Node.js applications benefit significantly from proper dependency management and multi-stage builds. Using npm ci instead of npm install ensures reproducible builds based on package-lock.json. Separating devDependencies from production dependencies and using --only=production reduces the number of installed packages. Node.js images can be particularly large due to native dependencies and build tools, making Alpine-based images or multi-stage builds especially valuable.
FROM node:20-alpine AS builder
WORKDIR /app
COPY package*.json ./
RUN npm ci
COPY . .
RUN npm run build && npm prune --production

FROM node:20-alpine
WORKDIR /app
COPY --from=builder /app/dist ./dist
COPY --from=builder /app/node_modules ./node_modules
COPY --from=builder /app/package.json ./
USER node
EXPOSE 3000
CMD ["node", "dist/index.js"]
Python Applications
Python applications require careful management of site-packages and consideration of whether to use virtual environments within containers. While virtual environments aren't strictly necessary in containers (since the container itself provides isolation), they can simplify dependency management and allow easier debugging. Using pip's --no-cache-dir flag prevents caching of downloaded packages, reducing layer size. For applications with compiled dependencies, multi-stage builds separate the build environment from the runtime environment.
Python wheels provide pre-compiled packages that install faster and don't require build tools at runtime. Creating wheels in a build stage and installing them in a runtime stage eliminates the need for gcc, python-dev, and other build dependencies in the final image. This pattern is particularly effective for data science and machine learning applications with large compiled dependencies like NumPy, SciPy, or TensorFlow.
Go Applications
Go's static compilation capability makes it ideal for minimal container images. A Go binary compiled with CGO_ENABLED=0 has no runtime dependencies and can run in a scratch image—a completely empty image with zero base layers. This produces images as small as 5-10MB for simple applications. The -ldflags="-w -s" flags strip debug information, further reducing binary size. Go's fast compilation also makes multi-stage builds extremely efficient.
FROM golang:1.21-alpine AS builder
WORKDIR /app
COPY go.* ./
RUN go mod download
COPY . .
RUN CGO_ENABLED=0 GOOS=linux go build -ldflags="-w -s" -o app .

FROM scratch
COPY --from=builder /etc/ssl/certs/ca-certificates.crt /etc/ssl/certs/
COPY --from=builder /app/app /app
EXPOSE 8080
ENTRYPOINT ["/app"]
Java Applications
Java applications historically produced large Docker images due to the JVM's size and application packaging in JAR or WAR files. Modern approaches use multi-stage builds to separate the build process (using Maven or Gradle) from the runtime environment. JLink, introduced in Java 9, creates custom JVM distributions containing only the modules your application uses, significantly reducing JVM size from 200MB+ to 30-50MB for typical applications.
Spring Boot applications benefit from layered JAR support, which separates dependencies, Spring Boot loader, snapshot dependencies, and application classes into different layers. Since dependencies change less frequently than application code, this separation improves cache utilization during rebuilds. The Spring Boot Maven and Gradle plugins provide built-in support for creating layered JARs optimized for Docker.
"Language-specific optimization isn't about memorizing recipes—it's about understanding your runtime's characteristics and applying Docker's layering and caching mechanisms appropriately."
Continuous Integration and Build Automation
Integrating efficient Docker image building into CI/CD pipelines ensures that optimization techniques are applied consistently across all builds and that images are built, tested, and deployed reliably. Automated builds eliminate manual steps, reduce human error, and enable rapid iteration while maintaining quality and security standards.
Build Reproducibility
Reproducible builds ensure that building the same source code multiple times produces identical images. This property is crucial for debugging, security auditing, and compliance. Using specific version tags for base images rather than latest, pinning dependency versions, and avoiding instructions that introduce non-determinism (like fetching latest packages without version constraints) contribute to build reproducibility.
Dockerfile linting tools like hadolint identify common mistakes and anti-patterns that could affect reproducibility or efficiency. These tools check for issues like using latest tags, not pinning package versions, inefficient layer ordering, and security concerns. Integrating linting into CI pipelines prevents problematic Dockerfiles from reaching production and educates developers about best practices through immediate feedback.
Image Scanning and Validation
Automated vulnerability scanning should be integrated into every build pipeline, failing builds that contain critical vulnerabilities. Tools like Trivy, Clair, or Anchore scan images for known vulnerabilities in packages and libraries, providing reports that can be integrated into CI/CD systems. Scanning should occur both during build (to catch issues early) and periodically on deployed images (to detect newly discovered vulnerabilities in previously built images).
Beyond vulnerability scanning, policy enforcement tools validate that images meet organizational standards: running as non-root, not containing secrets, using approved base images, and meeting size constraints. Open Policy Agent (OPA) or similar policy engines can enforce these requirements automatically, preventing non-compliant images from being deployed. This automated governance ensures security and efficiency standards are maintained without relying on manual review.
Registry Organization and Tagging Strategies
Effective tagging strategies balance the need for stable references with the ability to track versions and environments. Using semantic versioning (1.2.3) for releases, commit SHAs for traceability, and environment tags (staging, production) for deployment tracking provides flexibility while maintaining clarity. Avoid reusing tags for different images, as this breaks reproducibility and can cause deployment confusion.
- 🏷️ Semantic version tags (v1.2.3) for releases provide clear version communication and enable rollbacks to specific versions
- 🏷️ Git commit SHA tags (sha-a1b2c3d) enable precise traceability between deployed images and source code
- 🏷️ Branch tags (main, develop) provide convenient references to latest builds from specific branches
- 🏷️ Environment tags (production, staging) indicate currently deployed versions in each environment
- 🏷️ Date tags (2024-01-15) provide chronological organization and support time-based retention policies
Monitoring and Maintaining Image Efficiency
Image efficiency isn't a one-time achievement but an ongoing practice that requires monitoring, measurement, and continuous improvement. As applications evolve, dependencies change, and new packages are added, images can gradually bloat if not actively managed. Establishing metrics and regular reviews ensures that efficiency gains are maintained over time.
Image Size Tracking
Tracking image size over time reveals trends and identifies when significant size increases occur. Graphing image size by version or build number makes it immediately obvious when a change introduced bloat. Many CI/CD systems can automatically comment on pull requests with image size changes, making developers aware of the impact of their changes before merging. Setting size budgets and failing builds that exceed thresholds enforces discipline around image efficiency.
Tools like dive provide detailed analysis of image layers, showing exactly what each layer contributes to the total size and identifying wasted space. This visibility helps pinpoint specific Dockerfile instructions or dependencies that contribute disproportionately to image size. Regular dive analysis during development catches efficiency issues early when they're easier to address than after they've been deployed to production.
Build Time Metrics
Monitoring build times reveals cache effectiveness and identifies opportunities for optimization. Sudden increases in build time might indicate cache invalidation issues, changes in dependency installation, or infrastructure problems. Tracking build times by stage in multi-stage builds shows which stages consume the most time and would benefit most from optimization efforts. These metrics guide prioritization of optimization work toward areas with the highest impact.
In team environments, aggregate metrics across all developers and CI builds provide insight into overall efficiency. If developers are experiencing slow builds but CI builds are fast, it might indicate issues with local cache management or network connectivity. Conversely, slow CI builds might point to insufficient build agent resources or inefficient cache sharing strategies.
"What gets measured gets managed—tracking image size and build time metrics makes efficiency a visible, quantifiable goal rather than an abstract aspiration."
Advanced Techniques and Emerging Patterns
The Docker ecosystem continues evolving, with new techniques and tools emerging to address efficiency challenges. Staying current with these developments ensures your image building practices remain optimal as technology advances and new capabilities become available.
Buildpacks and Cloud Native Buildpacks
Cloud Native Buildpacks provide an alternative approach to Dockerfile-based builds, automatically detecting application type and building optimized images without requiring explicit Dockerfiles. Buildpacks handle many optimization concerns automatically: layer caching, dependency management, and security updates. While less flexible than custom Dockerfiles, buildpacks offer consistent, best-practice images with minimal configuration, particularly valuable for standard application frameworks.
Buildpacks separate the build process into detect, analyze, build, and export phases, with each phase potentially using different builders optimized for specific tasks. This separation enables sophisticated optimization strategies that would be complex to implement in traditional Dockerfiles. Buildpacks also support automatic base image updates, allowing security patches to be applied to existing images without rebuilding from source.
Content Addressable Storage
Modern container registries use content-addressable storage, where layers are identified by cryptographic hashes of their content rather than arbitrary identifiers. This approach enables automatic deduplication across different images—if two images contain identical layers, the registry stores that layer only once. Understanding this behavior influences optimization decisions: creating reusable layers that multiple images can share reduces storage requirements and improves pull performance across your image portfolio.
Building images with common base layers and shared dependency layers maximizes deduplication benefits. Organizations can create curated base images with common dependencies pre-installed, allowing application images to build on these foundations. This approach not only reduces storage but also accelerates deployments, as commonly used layers are more likely to already exist on target hosts.
Rootless and Unprivileged Builds
Running Docker daemon as root creates security concerns in shared environments. Rootless Docker allows running the daemon and building images without root privileges, reducing the attack surface and enabling Docker usage in restricted environments. While rootless mode has some limitations (networking complexity, performance overhead), it's increasingly viable for many use cases and represents the security-conscious direction of container technology.
Unprivileged builds using tools like Kaniko or Buildah enable building container images in environments where Docker daemon access isn't available or desirable, such as Kubernetes pods or restricted CI/CD environments. These tools don't require privileged access or Docker daemon connectivity, making them suitable for multi-tenant platforms and security-sensitive environments. Understanding when and how to use these alternatives expands your options for building images efficiently in diverse environments.
Common Pitfalls and How to Avoid Them
Even experienced developers fall into common traps that undermine image efficiency. Recognizing these pitfalls and understanding how to avoid them prevents wasted effort and ensures your images remain optimized.
Cache Invalidation Mistakes
Placing frequently changing instructions before stable ones invalidates cache unnecessarily. Copying all source code before installing dependencies means every code change requires reinstalling dependencies, even when they haven't changed. This mistake is particularly costly for languages with large dependency trees or slow package managers. Always structure Dockerfiles with stable instructions first and volatile instructions last, creating natural cache boundaries that maximize reuse.
Using COPY . . early in the Dockerfile is a common anti-pattern. Instead, copy only the files needed for each step: dependency manifests first, then source code after dependencies are installed. This granular copying creates more opportunities for cache hits and makes the build process more resilient to changes in parts of the codebase unrelated to what you're currently working on.
Layer Bloat from Temporary Files
Creating large temporary files or downloading packages in one RUN instruction and deleting them in another doesn't reduce image size—the files remain in the layer where they were created. All file operations that should be ephemeral must occur in a single RUN instruction, with cleanup happening before that instruction completes. Using && to chain commands ensures they execute in the same layer.
RUN wget https://example.com/large-file.tar.gz \
 && tar -xzf large-file.tar.gz \
 && mv extracted-files /destination \
 && rm large-file.tar.gz
Overusing VOLUME Instructions
VOLUME instructions in Dockerfiles create mount points but can cause confusion about data persistence and complicate image usage. Volumes declared in Dockerfiles can't be easily removed or modified by users of the image. In most cases, it's better to document expected mount points rather than declaring them with VOLUME, allowing users to mount volumes as needed for their specific use cases. Reserve VOLUME instructions for cases where the image truly requires specific volumes for correct operation.
Ignoring Build Context Size
The build context—all files sent to the Docker daemon when building—directly affects build performance. A large build context slows down the build process even if most files aren't used in the image. Placing Dockerfiles in subdirectories with only necessary files, using .dockerignore aggressively, or using BuildKit's enhanced context handling reduces build context size and improves build performance, especially in environments with slower network connections between build client and daemon.
What is the ideal Docker image size?
There is no universal ideal size—it depends on your application's requirements. A minimal Go microservice might be 5-10MB, while a Python data science application could legitimately be 500MB-1GB due to large libraries like TensorFlow. Focus on eliminating unnecessary components rather than hitting an arbitrary size target. Compare your image size to similar applications and ensure you're not including build tools, development dependencies, or unnecessary system packages in production images.
Should I use Alpine Linux for all images?
Alpine is excellent for many use cases but isn't universally optimal. Applications with compiled dependencies may face compatibility issues with musl libc, requiring additional build complexity. For applications where glibc compatibility matters or where the size difference isn't critical, Debian slim variants offer a good balance. Consider your specific requirements: if you need minimal size and your application is compatible, Alpine is great; if you need broad compatibility and the size difference doesn't significantly impact your deployment, Debian slim might be more practical.
How often should I update base images?
Update base images regularly to receive security patches, ideally monthly or whenever critical vulnerabilities are announced. Use automated scanning to detect vulnerable base images and trigger rebuilds. However, balance security with stability—test updated images in non-production environments before deploying to production. Use specific version tags (like alpine:3.19) rather than latest to control when updates occur, and maintain a process for evaluating and adopting new base image versions systematically.
Can multi-stage builds work with any programming language?
Multi-stage builds are universally applicable but provide the most dramatic benefits for compiled languages (Go, Rust, C++) where build and runtime requirements differ significantly. Interpreted languages (Python, Node.js, Ruby) also benefit by separating dependency installation from runtime, though the size reduction is typically less dramatic. Even for languages where the same base image is used for build and runtime, multi-stage builds improve organization and can separate testing, linting, and building into distinct stages that run in parallel.
What's the difference between CMD and ENTRYPOINT?
ENTRYPOINT defines the executable that runs when the container starts, while CMD provides default arguments to that executable. ENTRYPOINT is harder to override (requires --entrypoint flag), making it suitable for images that should always run a specific executable. CMD is easily overridden by arguments to docker run, making it suitable for default commands that users might want to change. Using both together provides flexibility: ENTRYPOINT sets the executable, CMD sets default arguments that can be overridden. For most applications, using ENTRYPOINT with an exec form (JSON array) provides the best behavior.
How do I handle different configurations for different environments?
Never bake environment-specific configuration into images—images should be environment-agnostic. Use environment variables passed at runtime, configuration files mounted as volumes, or configuration management systems like Consul or etcd. This approach allows the same image to run in development, staging, and production with different configurations. For sensitive configuration like credentials, use Docker secrets, Kubernetes secrets, or dedicated secret management systems rather than environment variables, which can be exposed through various means.