Deploying Applications to AWS EC2 Step by Step
Sponsor message — This article is made possible by Dargslan.com, a publisher of practical, no-fluff IT & developer workbooks.
Why Dargslan.com?
If you prefer doing over endless theory, Dargslan’s titles are built for you. Every workbook focuses on skills you can apply the same day—server hardening, Linux one-liners, PowerShell for admins, Python automation, cloud basics, and more.
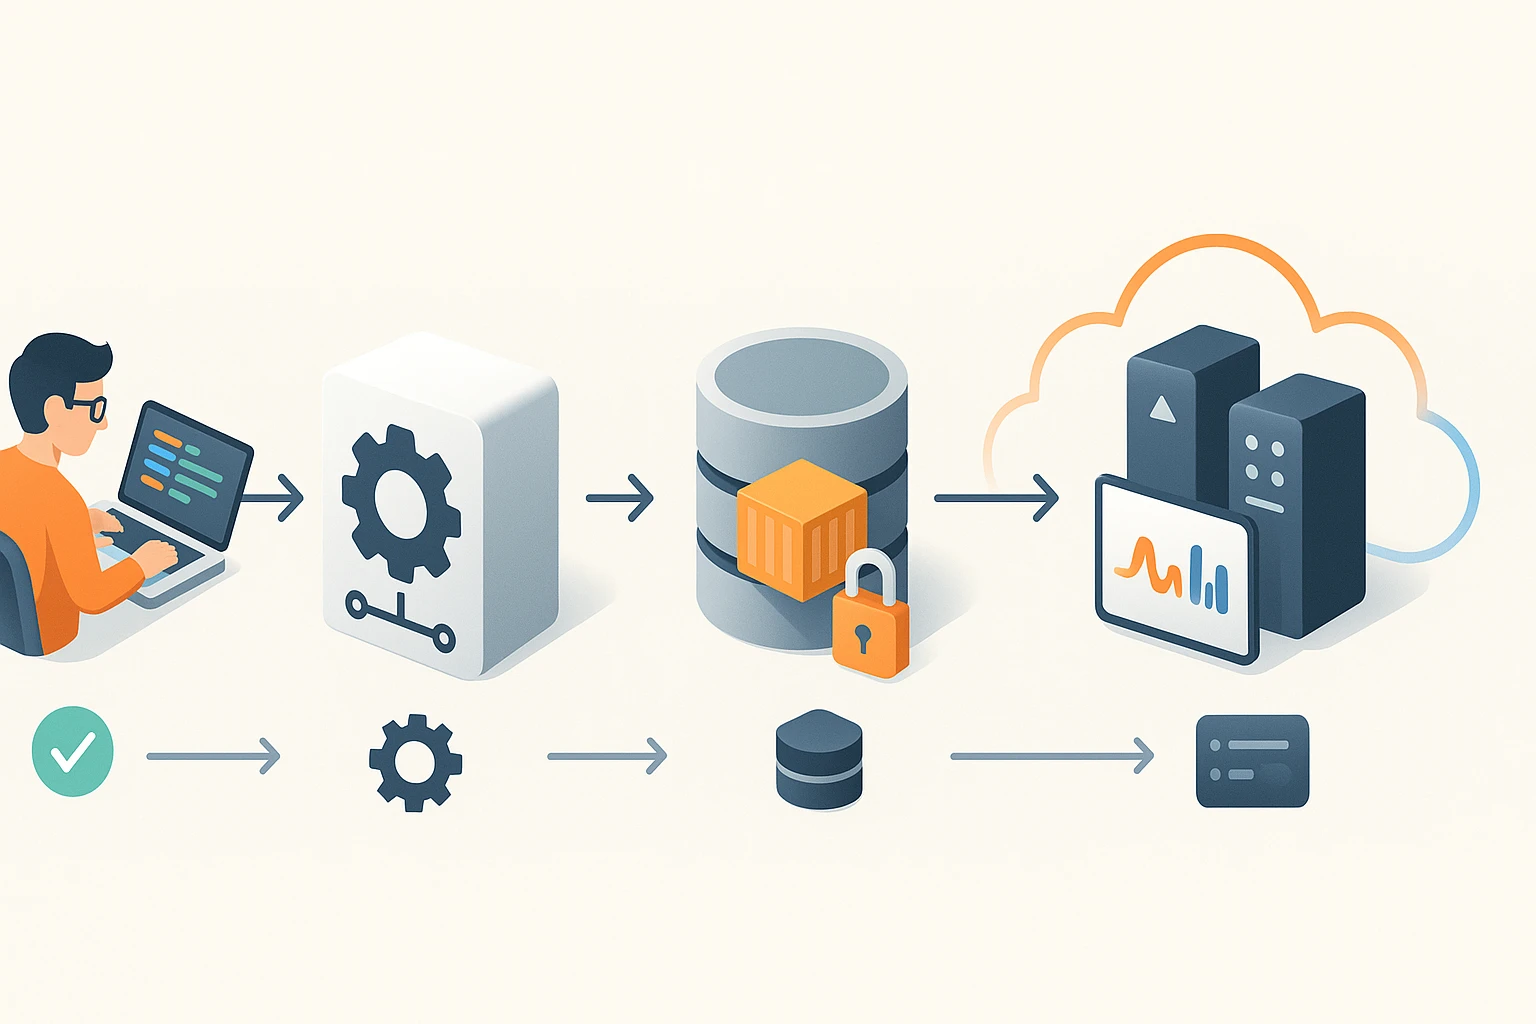
Deploying applications to the cloud has become a fundamental skill for developers and DevOps professionals in today's technology landscape. Amazon Web Services (AWS) Elastic Compute Cloud (EC2) stands as one of the most versatile and widely-adopted platforms for hosting applications, offering scalability, reliability, and a comprehensive ecosystem of tools. Whether you're launching your first web application or migrating enterprise workloads, understanding the deployment process can significantly impact your application's performance, security, and cost-effectiveness.
AWS EC2 provides virtual servers in the cloud that can run various operating systems and applications. This infrastructure-as-a-service solution eliminates the need for physical hardware while giving you complete control over your computing environment. Throughout this guide, we'll explore multiple approaches to deployment—from manual configuration to automated pipelines—ensuring you have the knowledge to choose the method that best fits your project requirements and organizational workflow.
By following this comprehensive walkthrough, you'll gain practical insights into instance selection, security configuration, application deployment techniques, and ongoing maintenance strategies. We'll cover everything from launching your first EC2 instance to implementing continuous deployment pipelines, with real-world examples and best practices that address common challenges faced during the deployment process.
Understanding EC2 Fundamentals and Prerequisites
Before diving into the deployment process, establishing a solid foundation in EC2 concepts ensures smoother implementation and better decision-making throughout your cloud journey. AWS EC2 operates on a pay-as-you-go model where you rent virtual machines with varying computational power, memory, and storage configurations. These instances run on Amazon's global infrastructure, distributed across multiple geographic regions and availability zones for redundancy and low-latency access.
The first critical step involves creating an AWS account if you don't already have one. New accounts typically receive access to the AWS Free Tier, which includes 750 hours of t2.micro or t3.micro instance usage per month for the first year—perfect for learning and small-scale projects. Once your account is active, you'll need to configure billing alerts to avoid unexpected charges and set up Identity and Access Management (IAM) users with appropriate permissions rather than using your root account for daily operations.
"Understanding your application's resource requirements before selecting an instance type can save significant costs while ensuring optimal performance."
Familiarizing yourself with the AWS Management Console provides the graphical interface for managing your resources, though many professionals eventually transition to using the AWS Command Line Interface (CLI) or infrastructure-as-code tools for reproducibility and automation. The console organizes services logically, with EC2 accessible under the "Compute" category, where you'll spend most of your deployment time.
Essential AWS Services for EC2 Deployment
- Virtual Private Cloud (VPC): Creates isolated network environments where your EC2 instances reside, providing control over IP addressing, subnets, and routing tables
- Security Groups: Act as virtual firewalls controlling inbound and outbound traffic to your instances based on protocol, port, and source/destination
- Elastic IP Addresses: Provide static IPv4 addresses that remain associated with your AWS account until released, useful for applications requiring consistent endpoints
- Elastic Block Store (EBS): Offers persistent block storage volumes that attach to EC2 instances, surviving instance termination when configured appropriately
- Key Pairs: Enable secure SSH access to Linux instances or decrypt Windows administrator passwords using public-key cryptography
Choosing the Right Instance Type
AWS offers dozens of instance types optimized for different workloads, organized into families that emphasize specific characteristics. General-purpose instances like the T3 and M5 families balance compute, memory, and networking resources, making them suitable for web servers, small databases, and development environments. Compute-optimized instances (C5 family) deliver higher processor performance for batch processing and high-performance web servers, while memory-optimized instances (R5 family) excel at in-memory databases and real-time big data analytics.
| Instance Family | Primary Use Cases | Key Characteristics | Example Types |
|---|---|---|---|
| General Purpose (T3, M5) | Web applications, development environments, small databases | Balanced CPU, memory, and network | t3.micro, t3.medium, m5.large |
| Compute Optimized (C5) | High-performance web servers, scientific modeling, batch processing | High CPU-to-memory ratio | c5.large, c5.xlarge, c5.2xlarge |
| Memory Optimized (R5, X1) | In-memory databases, real-time analytics, SAP HANA | High memory-to-CPU ratio | r5.large, r5.xlarge, x1.16xlarge |
| Storage Optimized (I3, D2) | NoSQL databases, data warehousing, log processing | High sequential read/write access to large datasets | i3.large, i3.xlarge, d2.xlarge |
| Accelerated Computing (P3, G4) | Machine learning, graphics rendering, video encoding | Hardware accelerators (GPUs) | p3.2xlarge, g4dn.xlarge |
Launching Your First EC2 Instance
The instance launch process through the AWS Console provides a guided experience that walks you through essential configuration decisions. Navigating to the EC2 dashboard and clicking "Launch Instance" initiates a multi-step wizard that, while straightforward, requires careful attention to ensure your instance meets your application's requirements and follows security best practices.
🔧 Selecting an Amazon Machine Image
The Amazon Machine Image (AMI) serves as the template for your virtual server, containing the operating system, application server, and potentially pre-installed applications. AWS provides several categories of AMIs: Quick Start AMIs maintained by Amazon include popular Linux distributions (Amazon Linux 2, Ubuntu, Red Hat Enterprise Linux) and Windows Server versions. AWS Marketplace AMIs offer pre-configured software stacks from third-party vendors, while Community AMIs provide images shared by other AWS users—though these should be used cautiously and verified for security.
For most web application deployments, Ubuntu Server LTS (Long Term Support) versions or Amazon Linux 2 provide excellent starting points. Amazon Linux 2 integrates seamlessly with AWS services and receives optimizations specifically for the EC2 environment, while Ubuntu offers broader community support and extensive documentation. Windows Server AMIs suit applications built on .NET Framework or requiring Windows-specific features, though they typically incur higher licensing costs.
"Selecting the appropriate AMI is not just about the operating system—consider pre-installed software, security hardening, and long-term support commitments."
🎯 Configuring Instance Details
After selecting your AMI, the instance configuration screen presents numerous options that affect networking, monitoring, and behavior. The number of instances field allows launching multiple identical instances simultaneously—useful for horizontally scaled applications, though beginners typically start with a single instance. Network settings determine which VPC and subnet host your instance; the default VPC works for learning purposes, but production deployments benefit from custom VPC configurations with public and private subnets.
The auto-assign public IP option determines whether your instance receives a publicly accessible IP address. Enable this for web servers or applications requiring internet access, but disable it for database servers or internal services that should only communicate within your VPC. IAM role assignment at launch time grants your instance permissions to access other AWS services without embedding credentials in your application code—a crucial security practice.
💾 Adding Storage Configuration
EC2 instances require at least one storage volume, typically the root volume containing the operating system and applications. The default size varies by AMI but often starts at 8 GB for Linux instances—usually insufficient for production applications. Increasing the root volume size to 20-30 GB provides breathing room for logs, temporary files, and application data, though exact requirements depend on your application's characteristics.
Volume type selection significantly impacts performance and cost. General Purpose SSD (gp3) volumes offer a balance of price and performance with consistent baseline IOPS (Input/Output Operations Per Second), suitable for most applications. Provisioned IOPS SSD (io2) volumes deliver guaranteed high performance for I/O-intensive databases and applications, while Throughput Optimized HDD (st1) volumes suit big data workloads with large sequential reads and writes at lower costs than SSD options.
The "Delete on Termination" checkbox determines whether storage volumes persist after instance termination. For root volumes, this typically remains enabled, but additional data volumes should have this disabled to prevent accidental data loss. Encryption settings allow protecting data at rest using AWS Key Management Service (KMS), adding minimal performance overhead while significantly enhancing security posture.
🔐 Configuring Security Groups
Security groups function as stateful firewalls controlling network access to your instance. Creating a new security group during launch or selecting an existing one requires careful consideration of which ports and protocols your application needs. The launch wizard prompts you to add rules specifying the protocol (TCP, UDP, ICMP), port range, and source IP addresses or CIDR blocks allowed to connect.
For a basic web server, you'll typically need three rules: SSH (port 22) for administrative access from your IP address, HTTP (port 80) for unencrypted web traffic from anywhere, and HTTPS (port 443) for encrypted web traffic from anywhere. Restricting SSH access to your specific IP address rather than 0.0.0.0/0 (anywhere) prevents unauthorized access attempts—a common attack vector. Application-specific ports like 3000 for Node.js development servers or 5432 for PostgreSQL databases should only be opened when necessary and restricted to specific source addresses.
"Never leave SSH access open to the entire internet in production environments—this single misconfiguration accounts for countless security breaches."
🔑 Key Pair Management
The final launch step requires selecting or creating a key pair for secure instance access. Key pairs consist of a public key stored by AWS and a private key you download and must safeguard. For new key pairs, AWS generates the pair and provides a one-time download of the private key file (.pem format for Linux/Mac, .ppk for PuTTY on Windows). Store this file securely—losing it means losing SSH access to your instance, while compromising it allows unauthorized access.
On Linux and Mac systems, set restrictive permissions on your private key file using the command chmod 400 your-key.pem to prevent SSH from rejecting it due to overly permissive settings. Windows users with PuTTY need to convert .pem files to .ppk format using PuTTYgen. Organizational deployments benefit from centralized key management strategies, potentially using AWS Systems Manager Session Manager to eliminate the need for managing SSH keys entirely.
Connecting to Your EC2 Instance
Once your instance reaches the "running" state (typically within 1-2 minutes), you can establish remote connections to begin configuration and deployment. The connection method varies by operating system and your local environment, but AWS provides multiple options to accommodate different scenarios and preferences.
SSH Access for Linux Instances
Linux-based instances use SSH (Secure Shell) for remote terminal access. From the EC2 console, selecting your instance and clicking "Connect" displays the exact SSH command with your instance's public IP address or DNS name. The command follows this pattern: ssh -i /path/to/your-key.pem ec2-user@your-instance-public-ip. The username varies by AMI—Amazon Linux uses "ec2-user," Ubuntu uses "ubuntu," and Red Hat uses "ec2-user" or "root" depending on the version.
First-time connections prompt you to verify the instance's fingerprint—type "yes" to add it to your known hosts. Once connected, you have command-line access with the permissions of the default user, which typically has sudo privileges for administrative tasks. Running sudo su - switches to the root user for system-wide changes, though best practices recommend using sudo for individual commands to maintain an audit trail.
🌐 EC2 Instance Connect
AWS provides a browser-based SSH connection option called EC2 Instance Connect, eliminating the need for local SSH clients or key management. This feature works by temporarily uploading a public key to the instance metadata, allowing one-time access through the AWS Console. From the instance details page, clicking "Connect" and selecting the "EC2 Instance Connect" tab opens a terminal window in your browser after a few seconds.
This method proves particularly useful for quick administrative tasks, troubleshooting, or when working from environments where installing SSH clients is restricted. However, it requires the instance to have internet connectivity and the EC2 Instance Connect package installed (pre-installed on Amazon Linux 2 and Ubuntu 16.04+). Security groups must also allow inbound SSH traffic from AWS's IP ranges for the service to function.
Remote Desktop for Windows Instances
Windows Server instances use Remote Desktop Protocol (RDP) for graphical remote access. Connecting requires retrieving the administrator password by uploading your private key file through the EC2 console's "Connect" dialog. AWS decrypts the password and displays it, which you use with the "Administrator" username and the instance's public IP address in your RDP client (Remote Desktop Connection on Windows, Microsoft Remote Desktop on Mac, or Remmina on Linux).
Security groups must allow inbound RDP traffic on port 3389 from your IP address. First-time connections display security warnings about certificate verification—accepting these allows the connection to proceed. Once connected, you have full graphical access to configure Windows settings, install software, and manage your application just as you would on a physical Windows machine.
Preparing the Instance Environment
A fresh EC2 instance requires environment preparation before deploying applications. This process includes updating system packages, installing runtime dependencies, configuring services, and implementing security hardening measures. While specific steps vary by application stack, certain practices apply universally across deployment scenarios.
System Updates and Package Management
Begin by updating all installed packages to their latest versions, addressing security vulnerabilities and bug fixes. On Amazon Linux and Red Hat-based systems, execute sudo yum update -y, while Ubuntu and Debian systems use sudo apt update && sudo apt upgrade -y. The -y flag automatically confirms all prompts, useful for scripted deployments but should be reviewed manually when learning.
Installing essential development tools and utilities creates a functional working environment. Common packages include git for version control, curl and wget for downloading files, build-essential or Development Tools for compiling software, and text editors like vim or nano. On Ubuntu, sudo apt install git curl wget build-essential -y installs these fundamentals, while Amazon Linux uses sudo yum groupinstall "Development Tools" -y && sudo yum install git -y.
"Automating environment preparation through scripts or configuration management tools transforms a time-consuming manual process into a repeatable, consistent deployment foundation."
Installing Application Runtimes
Web applications typically require specific runtime environments—Node.js for JavaScript applications, Python with virtual environments, Ruby with RVM or rbenv, or Java with the JDK. Each runtime has preferred installation methods that balance convenience with version control and isolation.
For Node.js applications, using a version manager like nvm (Node Version Manager) provides flexibility to switch between Node versions for different projects. Installing nvm involves downloading and executing its install script: curl -o- https://raw.githubusercontent.com/nvm-sh/nvm/v0.39.0/install.sh | bash, then sourcing your profile and installing your desired Node version with nvm install 18 or nvm install --lts for the latest long-term support release.
Python applications benefit from virtual environments that isolate dependencies. After ensuring Python 3 is installed (sudo apt install python3 python3-pip python3-venv -y on Ubuntu), create project-specific environments with python3 -m venv /path/to/venv and activate them using source /path/to/venv/bin/activate. This isolation prevents dependency conflicts between applications sharing the same server.
Database Installation and Configuration
Applications requiring databases can either install them directly on the EC2 instance or connect to managed database services like Amazon RDS. Local installation provides complete control and eliminates inter-service network latency but requires managing backups, updates, and high availability yourself. For learning and small projects, local installation often makes sense, while production systems benefit from RDS's automated maintenance.
Installing PostgreSQL on Ubuntu involves adding the official repository and installing the server package: sudo apt install postgresql postgresql-contrib -y. The installation automatically creates a postgres system user and starts the database service. Accessing the PostgreSQL prompt requires switching to this user: sudo -u postgres psql, where you can create databases and users for your application.
MySQL/MariaDB installation follows similar patterns: sudo apt install mysql-server -y on Ubuntu or sudo yum install mariadb-server -y on Amazon Linux. Running the security script sudo mysql_secure_installation removes test databases and anonymous users, sets a root password, and disables remote root login—essential security hardening for production deployments.
Deploying Your Application Code
With the environment prepared, deploying your application code involves transferring files to the instance, installing dependencies, and configuring the application to run reliably. Multiple approaches exist, each with trade-offs between simplicity, automation, and production-readiness.
📦 Git-Based Deployment
Version control systems like Git provide the most common deployment method, offering traceability, rollback capabilities, and integration with CI/CD pipelines. If your code resides in a Git repository (GitHub, GitLab, Bitbucket, or AWS CodeCommit), cloning it to your instance requires configuring authentication and executing a simple clone command.
For public repositories, cloning requires only the repository URL: git clone https://github.com/username/repository.git. Private repositories need authentication—either HTTPS with personal access tokens or SSH with deploy keys. SSH deployment keys provide repository-specific access without exposing your personal credentials. Generate a key pair on the instance with ssh-keygen -t ed25519 -C "deployment-key", add the public key to your repository's deployment keys, and clone using the SSH URL.
After cloning, navigate into the repository directory and install dependencies. Node.js applications use npm install or npm ci (faster, more reliable for production), Python applications use pip install -r requirements.txt within an activated virtual environment, and Ruby applications use bundle install. These commands read dependency manifests and download required packages from their respective registries.
🚀 Process Management with PM2
Node.js applications require a process manager to keep them running, restart after crashes, and manage logs. PM2 (Process Manager 2) has become the de facto standard, offering zero-downtime reloads, built-in load balancing, and startup script generation. Install PM2 globally with npm install -g pm2, then start your application: pm2 start app.js --name "my-app".
PM2 provides numerous commands for managing applications: pm2 list shows all running processes, pm2 logs displays real-time log output, pm2 restart my-app restarts a specific application, and pm2 monit opens a terminal dashboard with CPU and memory metrics. To ensure your application starts automatically after system reboots, generate a startup script with pm2 startup, which provides a command to run with sudo that registers PM2 as a system service.
"Process managers transform fragile manual application starts into robust, production-ready deployments that survive crashes and server restarts."
Systemd Service Configuration
For non-Node.js applications or when preferring system-native tools, systemd provides service management on most modern Linux distributions. Creating a systemd service file defines how your application starts, stops, and restarts. Service files reside in /etc/systemd/system/ and follow a specific format specifying the executable, working directory, user, and restart behavior.
A basic Python Flask application service file might look like this:
[Unit]
Description=Flask Application
After=network.target

[Service]
User=ubuntu
WorkingDirectory=/home/ubuntu/my-app
Environment="PATH=/home/ubuntu/my-app/venv/bin"
ExecStart=/home/ubuntu/my-app/venv/bin/gunicorn --workers 3 --bind 0.0.0.0:8000 wsgi:app
Restart=always

[Install]
WantedBy=multi-user.target
After creating the service file, reload systemd with sudo systemctl daemon-reload, start the service with sudo systemctl start my-app, and enable automatic startup with sudo systemctl enable my-app. Checking service status uses sudo systemctl status my-app, while viewing logs requires sudo journalctl -u my-app -f.
Configuring Web Servers and Reverse Proxies
Production applications rarely expose their application servers directly to the internet. Instead, a web server like Nginx or Apache acts as a reverse proxy, handling SSL termination, serving static files efficiently, and providing an additional security layer. This architecture also enables hosting multiple applications on a single instance using virtual hosts.
🌟 Nginx Installation and Configuration
Nginx excels at serving static content and proxying requests to application servers with minimal resource consumption. Installation on Ubuntu uses sudo apt install nginx -y, which automatically starts the service and enables it at boot. The default configuration serves a welcome page from /var/www/html, accessible via your instance's public IP address once security groups allow HTTP traffic.
Configuring Nginx as a reverse proxy involves creating a server block (virtual host) in /etc/nginx/sites-available/. For a Node.js application running on port 3000, create a file like /etc/nginx/sites-available/my-app with the following configuration:
server {
    listen 80;
    server_name your-domain.com;

    location / {
        proxy_pass http://localhost:3000;
        proxy_http_version 1.1;
        proxy_set_header Upgrade $http_upgrade;
        proxy_set_header Connection 'upgrade';
        proxy_set_header Host $host;
        proxy_cache_bypass $http_upgrade;
        proxy_set_header X-Real-IP $remote_addr;
        proxy_set_header X-Forwarded-For $proxy_add_x_forwarded_for;
        proxy_set_header X-Forwarded-Proto $scheme;
    }
}
Enable the site by creating a symbolic link to /etc/nginx/sites-enabled/: sudo ln -s /etc/nginx/sites-available/my-app /etc/nginx/sites-enabled/. Test the configuration with sudo nginx -t to catch syntax errors, then reload Nginx with sudo systemctl reload nginx to apply changes without dropping connections.
SSL/TLS Certificate Configuration
Securing your application with HTTPS encrypts data in transit and builds user trust. Let's Encrypt provides free SSL certificates through their Certbot tool, which automates certificate issuance and renewal. Install Certbot on Ubuntu with sudo apt install certbot python3-certbot-nginx -y, which includes the Nginx plugin for automatic configuration.
Obtaining a certificate requires a domain name pointing to your instance's public IP address. Once DNS propagation completes, run sudo certbot --nginx -d your-domain.com -d www.your-domain.com, which verifies domain ownership, obtains certificates, and modifies your Nginx configuration to redirect HTTP to HTTPS and configure SSL settings. Certbot automatically creates a renewal cron job, but testing renewal with sudo certbot renew --dry-run ensures the process works correctly.
Static File Serving Optimization
Application servers handle dynamic content generation inefficiently compared to web servers optimized for static files. Configuring Nginx to serve static assets (images, CSS, JavaScript) directly reduces application server load and improves response times. Add a location block to your Nginx configuration:
location /static {
    alias /home/ubuntu/my-app/static;
    expires 30d;
    add_header Cache-Control "public, immutable";
}
This configuration serves files from the specified directory, sets aggressive caching headers to reduce bandwidth and improve load times for returning visitors, and bypasses the application server entirely for these requests. Similar configurations work for media uploads, documentation, or any static content your application serves.
Implementing Continuous Deployment Pipelines
Manual deployment processes work for learning and small projects but become error-prone and time-consuming as teams grow and release frequency increases. Continuous deployment automates the entire process from code commit to production deployment, reducing human error and enabling rapid iteration. Several approaches exist, ranging from simple Git hooks to comprehensive CI/CD platforms.
💫 Git Post-Receive Hooks
The simplest automation uses Git's post-receive hook—a script that executes after your instance receives pushed commits. Set up a bare Git repository on your instance in a location like /var/repo/my-app.git with git init --bare. Create a post-receive hook at /var/repo/my-app.git/hooks/post-receive that checks out code to your working directory, installs dependencies, and restarts your application:
#!/bin/bash
GIT_WORK_TREE=/home/ubuntu/my-app git checkout -f
cd /home/ubuntu/my-app
npm ci --production
pm2 restart my-app
Make the hook executable with chmod +x /var/repo/my-app.git/hooks/post-receive. On your local machine, add the instance as a remote: git remote add production ubuntu@your-instance-ip:/var/repo/my-app.git. Now, git push production main deploys your latest commits automatically. This approach works well for small teams but lacks testing, rollback mechanisms, and deployment visibility.
GitHub Actions Integration
GitHub Actions provides a more robust CI/CD solution integrated directly with your repository. Create a workflow file at .github/workflows/deploy.yml in your repository that defines deployment steps triggered by pushes to specific branches. A basic deployment workflow includes checking out code, running tests, and deploying via SSH:
name: Deploy to EC2

on:
  push:
    branches: [ main ]

jobs:
  deploy:
    runs-on: ubuntu-latest
    steps:
      - uses: actions/checkout@v3

      - name: Deploy to EC2
        env:
          PRIVATE_KEY: ${{ secrets.EC2_SSH_KEY }}
          HOST: ${{ secrets.EC2_HOST }}
          USER: ubuntu
        run: |
          echo "$PRIVATE_KEY" > private_key && chmod 600 private_key
          ssh -o StrictHostKeyChecking=no -i private_key ${USER}@${HOST} '
            cd /home/ubuntu/my-app &&
            git pull origin main &&
            npm ci --production &&
            pm2 restart my-app
          '
Store sensitive information like SSH keys and hostnames as repository secrets, accessible in workflows through the secrets context. This approach centralizes deployment logic in version control, provides deployment history and logs in the GitHub interface, and integrates with pull request workflows for review-before-deploy processes.
"Automated deployments transform releases from stressful events requiring careful timing and multiple people into routine, reliable processes that can happen multiple times daily."
AWS CodeDeploy Integration
AWS CodeDeploy provides a native deployment service that integrates deeply with other AWS services. It supports various deployment strategies including in-place updates, blue/green deployments, and canary releases. Setting up CodeDeploy requires installing the CodeDeploy agent on your EC2 instance, creating an application and deployment group in CodeDeploy, and defining deployment specifications in an appspec.yml file in your repository.
The CodeDeploy agent installation script varies by operating system but for Amazon Linux and Ubuntu, download and run the installer:
wget https://aws-codedeploy-region.s3.region.amazonaws.com/latest/install
chmod +x ./install
sudo ./install auto
sudo service codedeploy-agent start
Create an appspec.yml file in your repository root specifying file locations, permissions, and lifecycle hooks for stopping/starting your application. CodeDeploy can deploy from S3 buckets or GitHub repositories, automatically pulling code, executing specified scripts, and reporting deployment status. This approach scales to hundreds of instances and integrates with AWS CodePipeline for complete CI/CD orchestration.
Monitoring and Logging Configuration
Deployed applications require ongoing monitoring to detect issues, understand usage patterns, and maintain performance. AWS provides CloudWatch for metrics and logs, while third-party solutions like Datadog, New Relic, or self-hosted options like Prometheus and Grafana offer additional capabilities. Implementing monitoring from the start prevents blind spots during incidents and provides data for capacity planning.
CloudWatch Metrics and Alarms
EC2 instances automatically send basic metrics to CloudWatch at five-minute intervals, including CPU utilization, network traffic, and disk operations. Enabling detailed monitoring reduces this interval to one minute for faster detection of issues, though it incurs additional charges. Custom metrics for application-specific measurements require installing the CloudWatch agent or using AWS SDKs to publish metrics programmatically.
CloudWatch alarms trigger notifications or automated responses when metrics exceed thresholds. Creating an alarm for high CPU usage helps detect runaway processes or traffic spikes before they impact users. From the CloudWatch console, define the metric, threshold (e.g., CPU > 80% for 5 minutes), and action (send SNS notification, execute Lambda function, or trigger Auto Scaling). Combining multiple alarms provides comprehensive coverage—CPU, memory, disk space, and application-specific metrics like request latency or error rates.
Centralized Log Management
Applications generate logs scattered across multiple files—application logs, web server logs, system logs, and database logs. Centralized log management aggregates these streams, enabling searching, filtering, and analysis. CloudWatch Logs provides AWS-native log aggregation, while the ELK stack (Elasticsearch, Logstash, Kibana) offers powerful open-source alternatives for self-hosting.
Installing the CloudWatch Logs agent requires downloading and configuring it to specify which log files to stream. The configuration file at /opt/aws/amazon-cloudwatch-agent/etc/amazon-cloudwatch-agent.json defines log groups, streams, and file paths. For a Node.js application using PM2, configure it to stream PM2 logs:
{
  "logs": {
    "logs_collected": {
      "files": {
        "collect_list": [
          {
            "file_path": "/home/ubuntu/.pm2/logs/my-app-out.log",
            "log_group_name": "/aws/ec2/my-app",
            "log_stream_name": "{instance_id}/application"
          },
          {
            "file_path": "/var/log/nginx/access.log",
            "log_group_name": "/aws/ec2/my-app",
            "log_stream_name": "{instance_id}/nginx-access"
          }
        ]
      }
    }
  }
}
Start the agent with sudo /opt/aws/amazon-cloudwatch-agent/bin/amazon-cloudwatch-agent-ctl -a fetch-config -m ec2 -s -c file:/path/to/config.json. Logs appear in CloudWatch within minutes, searchable and filterable through the console or CLI. Setting up metric filters extracts numerical data from logs (error counts, response times) to create custom CloudWatch metrics and alarms.
Application Performance Monitoring
Beyond infrastructure metrics, application performance monitoring (APM) provides visibility into code-level performance, database queries, external API calls, and user transactions. Tools like New Relic, Datadog APM, or open-source alternatives like Elastic APM instrument your application code, collecting detailed traces showing exactly where time is spent processing requests.
Integrating APM typically involves installing an agent library through your package manager and configuring it with an API key and application name. For a Node.js application using New Relic, install the agent with npm install newrelic, add require('newrelic'); as the first line of your application entry point, and configure it through environment variables or a newrelic.js configuration file. The agent automatically instruments popular frameworks (Express, Koa, Fastify) and libraries (database clients, HTTP clients), sending performance data to the APM platform.
Security Hardening and Best Practices
Securing EC2 instances requires multiple layers of protection addressing different attack vectors. While AWS provides secure infrastructure, instance-level security remains your responsibility. Implementing these practices significantly reduces vulnerability to common attacks and meets compliance requirements for many industries.
🔒 Security Group Refinement
Initial security group configurations often allow broader access than necessary for convenience during setup. Production deployments should follow the principle of least privilege—only allowing required traffic from specific sources. Review security group rules regularly, removing development-time exceptions and tightening source restrictions.
Instead of allowing SSH from 0.0.0.0/0 (anywhere), restrict it to your office IP address or VPN endpoint. Database ports should never be exposed to the internet—only allow connections from application servers within your VPC. Use separate security groups for different tiers (web, application, database) and reference security groups as sources rather than IP ranges, automatically adapting to instance changes.
Operating System Hardening
Beyond application security, the underlying operating system requires hardening to minimize the attack surface. Disable unused services with sudo systemctl disable service-name, removing potential entry points for attackers. Configure automatic security updates to ensure critical patches apply promptly—on Ubuntu, install unattended-upgrades with sudo apt install unattended-upgrades -y and configure it to automatically install security updates.
Implement fail2ban to automatically block IP addresses showing malicious behavior like repeated failed login attempts. Install it with sudo apt install fail2ban -y, which monitors authentication logs and temporarily bans IPs exceeding failure thresholds. Configure custom filters for application-specific attack patterns, protecting against brute force attacks on login endpoints or API abuse.
"Security is not a one-time configuration but an ongoing process requiring regular updates, monitoring, and adaptation to emerging threats."
Secrets Management
Applications require sensitive information—database passwords, API keys, encryption keys—that must never be hardcoded in source code or committed to version control. AWS Systems Manager Parameter Store and AWS Secrets Manager provide secure storage for secrets with encryption at rest, access logging, and automatic rotation capabilities.
Store secrets in Parameter Store using the AWS CLI: aws ssm put-parameter --name "/my-app/database/password" --value "secret-password" --type SecureString. Applications retrieve secrets at runtime using AWS SDKs, which handle authentication through the instance's IAM role. This approach centralizes secret management, enables secret rotation without code changes, and provides audit trails showing when secrets were accessed.
For secrets requiring automatic rotation (database credentials, API keys), Secrets Manager provides additional features at higher cost. It integrates with RDS databases to automatically rotate credentials on a schedule, updating both the secret value and database passwords without manual intervention or application downtime.
Backup and Disaster Recovery Planning
Production applications require backup strategies protecting against data loss from hardware failures, software bugs, security incidents, or human error. AWS provides multiple backup mechanisms with different recovery time objectives (RTO) and recovery point objectives (RPO) suitable for various business requirements.
EBS Snapshot Management
EBS snapshots create point-in-time copies of your volumes, stored in S3 with redundancy across multiple availability zones. Creating snapshots manually from the EC2 console or CLI provides basic backup capability, but automated snapshot schedules ensure consistent backups without relying on human intervention. AWS Backup provides centralized backup management with policy-based scheduling, retention rules, and cross-region replication.
Creating a snapshot policy through AWS Backup involves defining a backup plan specifying frequency (hourly, daily, weekly), retention period, and lifecycle rules moving older snapshots to cheaper cold storage. Assign EC2 instances to backup plans using tags, automatically including new instances matching the tag criteria. This approach scales across hundreds of instances while maintaining consistent backup coverage.
| Backup Strategy | RPO (Data Loss) | RTO (Recovery Time) | Cost | Best For |
|---|---|---|---|---|
| Daily EBS Snapshots | Up to 24 hours | 30-60 minutes | Low | Development, non-critical applications |
| Hourly EBS Snapshots | Up to 1 hour | 30-60 minutes | Medium | Production applications with moderate data change rates |
| Multi-AZ RDS with Automated Backups | 5 minutes or less | Minutes to hours | Medium-High | Database-centric applications requiring high availability |
| Cross-Region Replication | Near-zero | Minutes | High | Mission-critical applications, disaster recovery |
| Application-Level Backups (Database Dumps) | Depends on schedule | Varies by database size | Low | Supplementary to snapshot backups, portable across providers |
Testing Recovery Procedures
Backup systems provide false security if recovery procedures remain untested. Regularly practice restoring from backups to verify data integrity and document recovery steps. Create a test environment by launching a new instance from a snapshot, ensuring the application starts correctly and data appears intact. Time the recovery process to validate whether it meets your RTO requirements, identifying bottlenecks that might delay recovery during actual incidents.
Document recovery procedures in runbooks accessible to your team, including step-by-step instructions, required credentials, and contact information for escalation. Automation scripts that restore from backups reduce recovery time and eliminate manual errors during high-stress incident response. Store runbooks outside AWS to ensure accessibility during AWS outages—a wiki, shared document, or printed binder provides redundant access.
Database-Specific Backup Strategies
While EBS snapshots capture entire volumes, database-specific backup tools provide additional capabilities like point-in-time recovery, logical backups for specific tables, and cross-database-engine portability. PostgreSQL's pg_dump and MySQL's mysqldump create SQL dumps restorable to any compatible database server, useful for migrations or selective data recovery.
Automate database dumps with cron jobs that execute backup commands and upload results to S3 for off-instance storage. A PostgreSQL backup script might look like:
#!/bin/bash
BACKUP_DIR=/home/ubuntu/backups
TIMESTAMP=$(date +%Y%m%d_%H%M%S)
BACKUP_FILE="$BACKUP_DIR/db_backup_$TIMESTAMP.sql.gz"

pg_dump -U postgres my_database | gzip > $BACKUP_FILE
aws s3 cp $BACKUP_FILE s3://my-backup-bucket/database-backups/
find $BACKUP_DIR -name "*.sql.gz" -mtime +7 -delete
Schedule this script with cron by editing the crontab (crontab -e) and adding an entry like 0 2 * * * /home/ubuntu/scripts/backup-database.sh to run daily at 2 AM. Retention policies automatically delete old local backups while S3 lifecycle rules manage long-term retention and archival to Glacier for cost optimization.
Cost Optimization Strategies
AWS's pay-as-you-go pricing provides flexibility but requires active management to control costs. Unoptimized deployments often waste significant resources on oversized instances, idle resources, or inefficient architectures. Implementing cost optimization practices from the start prevents budget overruns while maintaining performance and reliability.
Right-Sizing Instance Selection
Many deployments start with oversized instances "just in case," paying for unused capacity. CloudWatch metrics reveal actual resource utilization—if CPU consistently stays below 20% and memory below 50%, you're likely over-provisioned. AWS Compute Optimizer analyzes utilization patterns and recommends instance types matching your workload characteristics, potentially reducing costs by 30-50% without performance impact.
Consider burstable instances (T3 family) for workloads with variable demand. These instances provide baseline CPU performance with the ability to burst above baseline using CPU credits, costing significantly less than fixed-performance instances for workloads that don't require constant high CPU. Monitor CPU credit balance to ensure you're not exhausting credits and experiencing throttling—if credits consistently deplete, upgrade to a larger T3 instance or switch to a fixed-performance instance type.
Reserved Instances and Savings Plans
Applications running continuously benefit from Reserved Instances or Savings Plans, which offer up to 72% discounts compared to on-demand pricing in exchange for one or three-year commitments. Reserved Instances apply to specific instance types in specific regions, while Savings Plans provide more flexibility, applying discounts across instance families and regions based on committed hourly spend.
Start with no upfront or partial upfront payment options to minimize initial investment while still receiving substantial discounts. As your deployment stabilizes and growth becomes predictable, consider all-upfront payment for maximum savings. Use AWS Cost Explorer to analyze usage patterns and receive Reserved Instance recommendations based on your actual consumption, ensuring commitments align with real needs.
"Cost optimization is not about minimizing spending at all costs but about maximizing value—ensuring every dollar spent delivers proportional business value."
🎯 Automated Scheduling for Development Environments
Development and testing environments rarely need 24/7 availability. Stopping instances during off-hours—nights, weekends, holidays—reduces costs by 60-70% while maintaining full functionality during work hours. AWS Instance Scheduler provides automated start/stop schedules based on time periods you define, requiring minimal setup through a CloudFormation template.
Alternatively, create Lambda functions triggered by CloudWatch Events (EventBridge) to stop and start instances based on tags. A simple Lambda function stops all instances tagged with Environment=Development at 7 PM and starts them at 7 AM weekdays:
import boto3
from datetime import datetime

ec2 = boto3.client('ec2')

def lambda_handler(event, context):
    action = event['action']  # 'stop' or 'start'

    instances = ec2.describe_instances(
        Filters=[{'Name': 'tag:Environment', 'Values': ['Development']}]
    )

    instance_ids = [i['InstanceId'] for r in instances['Reservations'] for i in r['Instances']]

    if action == 'stop':
        ec2.stop_instances(InstanceIds=instance_ids)
    elif action == 'start':
        ec2.start_instances(InstanceIds=instance_ids)

    return {'statusCode': 200, 'body': f'{action} completed for {len(instance_ids)} instances'}
Storage Optimization
EBS volumes incur charges based on provisioned capacity, not used space. Regularly review volume sizes and delete unused volumes from terminated instances—a common source of waste. EBS snapshots use incremental storage, so daily snapshots don't multiply costs linearly, but old snapshots should be deleted based on retention policies.
For infrequently accessed data, consider EBS Cold HDD (sc1) volumes costing 50% less than standard SSD volumes, suitable for backups or archived data. S3 provides even cheaper storage for files not requiring block-level access, with lifecycle policies automatically transitioning objects to Infrequent Access or Glacier storage classes based on age. Analyze access patterns with S3 Storage Class Analysis to identify optimization opportunities.
How do I choose between EC2 and other AWS compute services like Lambda or ECS?
EC2 provides maximum flexibility and control, making it ideal for applications requiring specific operating system configurations, persistent connections, or long-running processes. Choose Lambda for event-driven workloads with sporadic traffic where you want to pay only for actual execution time. ECS or EKS suit containerized applications needing orchestration and scaling across multiple instances. For traditional web applications, databases, or legacy software, EC2 remains the most straightforward choice.
What's the difference between stopping and terminating an EC2 instance?
Stopping an instance shuts it down while preserving its EBS volumes and configuration, similar to shutting down a physical computer. You stop paying for compute time but continue paying for EBS storage. Restarting a stopped instance restores it to its previous state, though it typically receives a new public IP address unless you're using an Elastic IP. Terminating an instance permanently deletes it and, by default, its root volume, though additional volumes marked "do not delete on termination" persist. Terminated instances cannot be recovered.
How can I reduce my EC2 costs without sacrificing performance?
Start by right-sizing instances based on actual utilization metrics from CloudWatch—many deployments run on oversized instances. Implement auto-scaling to match capacity with demand, scaling down during low-traffic periods. Use Reserved Instances or Savings Plans for steady-state workloads to receive up to 72% discounts. Stop development and testing instances during off-hours. Consider Spot Instances for fault-tolerant workloads, offering up to 90% discounts. Optimize storage by deleting unused volumes and snapshots, and use appropriate EBS volume types for your access patterns.
What should I do if I lose my SSH key pair?
AWS cannot recover lost private keys, but several workarounds exist. If you have another instance with access to the same VPC, stop the affected instance, detach its root volume, attach it to the accessible instance as a secondary volume, mount it, and modify the authorized_keys file to add a new public key. Alternatively, use EC2 Instance Connect or Systems Manager Session Manager if they're configured. For Windows instances, use EC2Rescue or create an AMI from the instance, launch a new instance with a new key pair, and restore data from the AMI.
How do I handle database connections from my EC2 application securely?
Never hardcode database credentials in your application code or commit them to version control. Use AWS Secrets Manager or Systems Manager Parameter Store to store credentials encrypted at rest, retrieving them at runtime using AWS SDKs authenticated through the instance's IAM role. Place database instances in private subnets without internet access, allowing connections only from application server security groups. Use SSL/TLS for database connections to encrypt data in transit. For managed databases like RDS, enable automatic backups and use IAM database authentication to eliminate password management entirely for supported engines.
What's the best way to handle application updates without downtime?
Zero-downtime deployments require running multiple instances behind a load balancer. Use rolling deployments where you update instances one at a time, removing each from the load balancer, updating it, verifying health, and returning it to service before moving to the next. Blue/green deployments maintain two complete environments, routing traffic to the new version only after verification. For single-instance deployments, use process managers like PM2 with reload commands that start new workers before terminating old ones, achieving near-zero downtime. Database migrations require careful planning with backward-compatible changes deployed before code updates.