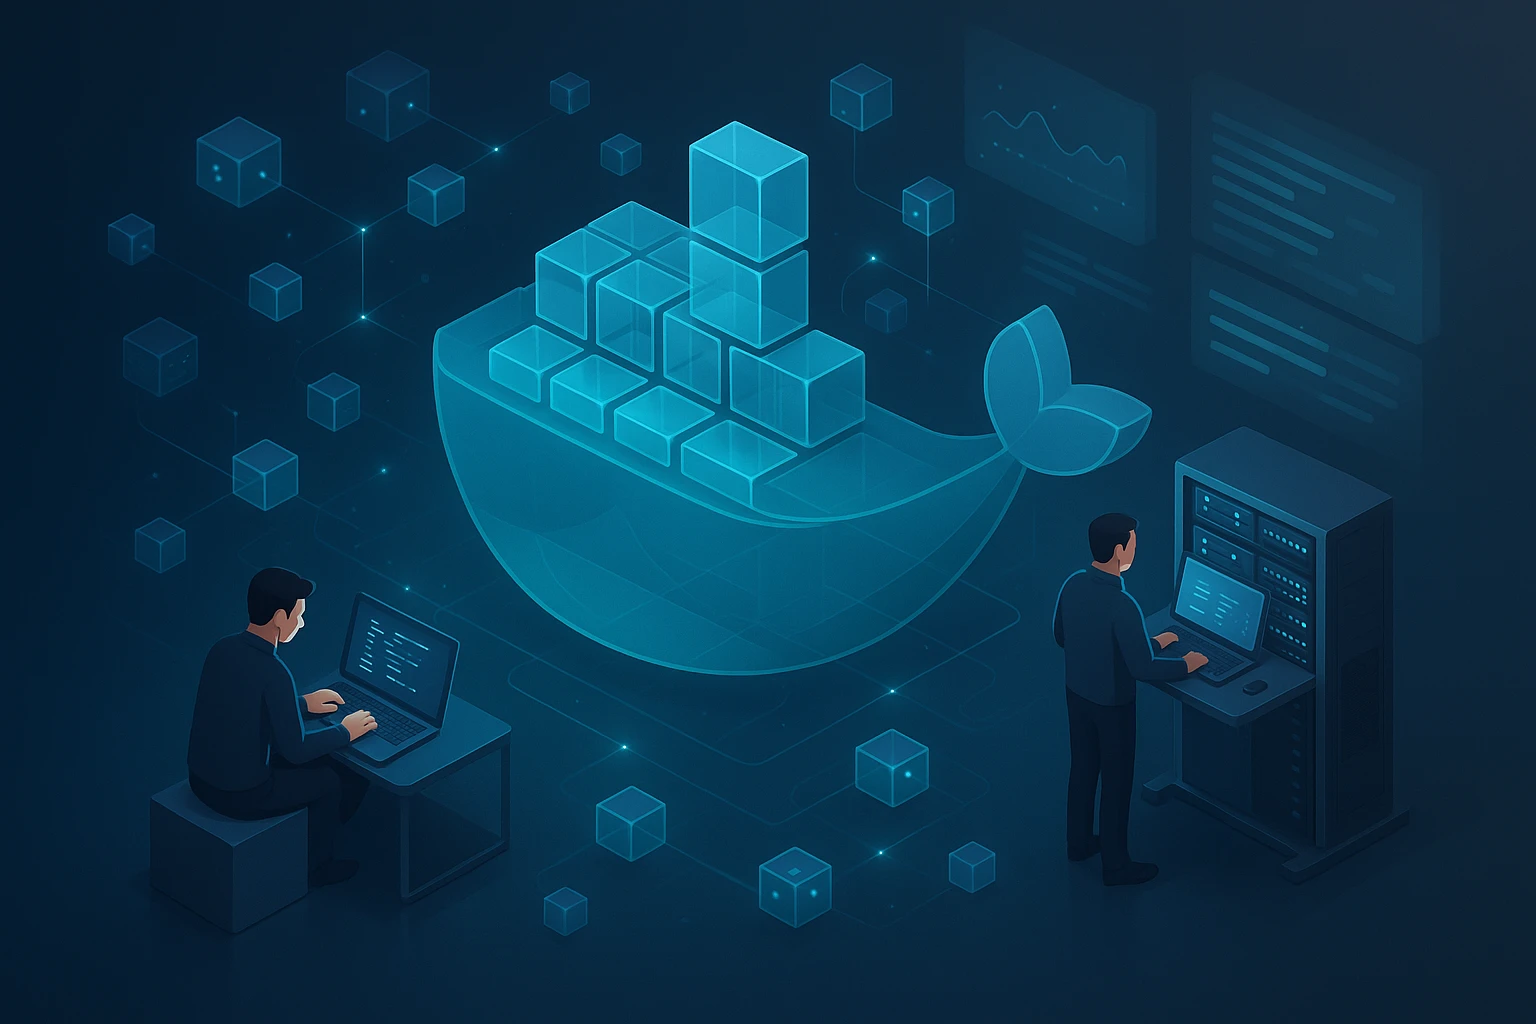
Docker Basics for Developers and SysAdmins
Sponsor message — This article is made possible by Dargslan.com, a publisher of practical, no-fluff IT & developer workbooks.
Why Dargslan.com?
If you prefer doing over endless theory, Dargslan’s titles are built for you. Every workbook focuses on skills you can apply the same day—server hardening, Linux one-liners, PowerShell for admins, Python automation, cloud basics, and more.
In today's rapidly evolving technological landscape, containerization has become the backbone of modern application development and deployment. Whether you're a developer struggling with "it works on my machine" syndrome or a system administrator managing complex infrastructure, understanding containerization is no longer optional—it's essential. The shift toward microservices architecture and cloud-native applications has made Docker the de facto standard for packaging, distributing, and running applications consistently across different environments.
Docker is a platform that enables developers and system administrators to build, ship, and run applications inside lightweight, portable containers. These containers package an application with all its dependencies, libraries, and configuration files, ensuring consistent behavior regardless of where they run. This comprehensive guide explores Docker from multiple angles—technical fundamentals, practical implementation, operational considerations, and real-world applications—providing you with the knowledge needed to leverage containerization effectively in your workflow.
Throughout this exploration, you'll gain hands-on understanding of Docker's core concepts, learn how to create and manage containers, discover best practices for both development and production environments, and understand how Docker fits into the broader ecosystem of DevOps and cloud computing. From basic commands to advanced orchestration concepts, this resource will equip you with the practical knowledge to transform how you build, test, and deploy applications.
Understanding Containerization and Docker Architecture
Containerization represents a fundamental shift in how we think about application deployment. Unlike traditional virtual machines that require a full operating system for each instance, containers share the host system's kernel while maintaining isolated user spaces. This architectural difference makes containers incredibly lightweight, fast to start, and efficient in resource utilization. A typical container might be tens of megabytes in size and start in seconds, compared to gigabytes and minutes for virtual machines.
The Docker architecture consists of several key components working together seamlessly. The Docker Engine serves as the runtime that creates and manages containers on your host system. It operates as a client-server application with three major components: a server daemon process (dockerd), a REST API that programs use to communicate with the daemon, and a command-line interface (CLI) client. This modular design allows for flexible interaction with containers through various interfaces while maintaining a consistent underlying system.
"Containers provide a standardized way to package your application's code, configurations, and dependencies into a single object that can run reliably in any computing environment."
Docker images form the foundation of containerization. An image is essentially a read-only template containing instructions for creating a container. These images are built from a Dockerfile, which specifies the base operating system, application code, dependencies, and configuration needed to run your application. Images are composed of layers, where each instruction in a Dockerfile creates a new layer. This layered approach enables efficient storage and transfer, as layers can be shared between different images and cached for faster builds.
Core Components and Their Interactions
The Docker ecosystem includes several interconnected elements that work together to provide a complete containerization solution. Docker registries serve as repositories for storing and distributing Docker images. Docker Hub is the default public registry, hosting millions of images ranging from official operating system bases to complex application stacks. Organizations often run private registries to maintain control over their proprietary images and ensure security compliance.
- Docker Daemon: The persistent background process that manages containers, images, networks, and storage volumes on a host system
- Docker Client: The primary interface for users to interact with Docker, sending commands to the daemon via API calls
- Docker Images: Immutable templates that define what goes into a container, including the application and all its dependencies
- Docker Containers: Runnable instances of images that execute applications in isolated environments
- Docker Registry: A storage and distribution system for Docker images, enabling sharing and version control
- Docker Volumes: Persistent data storage mechanisms that survive container lifecycle events
- Docker Networks: Virtual networks that enable communication between containers and external systems
| Component | Purpose | Key Characteristics | Common Use Cases |
|---|---|---|---|
| Container | Runtime instance of an image | Isolated, ephemeral, lightweight | Running applications, microservices, testing environments |
| Image | Blueprint for containers | Read-only, layered, versioned | Application packaging, distribution, version control |
| Volume | Persistent storage | Managed by Docker, survives container deletion | Database storage, configuration files, shared data |
| Network | Container connectivity | Isolated, configurable, multiple driver types | Multi-container applications, service discovery, load balancing |
| Registry | Image repository | Centralized, versioned, access-controlled | Image distribution, CI/CD pipelines, team collaboration |
Getting Started with Docker Commands
Mastering Docker begins with understanding its command-line interface. The Docker CLI provides an extensive set of commands for managing every aspect of containerization. These commands follow a consistent pattern, making them intuitive once you understand the basic structure. Most Docker commands begin with "docker" followed by a management category (like "container", "image", or "network") and then the specific action you want to perform.
Installing Docker varies slightly depending on your operating system, but the process has been streamlined across platforms. For Linux systems, Docker Engine can be installed directly from package repositories. Windows and macOS users typically install Docker Desktop, which includes Docker Engine, Docker CLI, Docker Compose, and a graphical user interface. After installation, verifying your setup with a simple command ensures everything is configured correctly and ready for use.
Essential Commands for Daily Operations
Working with containers requires familiarity with a core set of commands that handle the most common tasks. The "docker run" command creates and starts a new container from an image, accepting numerous options to configure networking, volumes, environment variables, and resource limits. Understanding these options allows you to precisely control how your containers behave and interact with their environment.
🔧 Container Management Commands
# Pull an image from Docker Hub
docker pull ubuntu:latest

# Run a container interactively
docker run -it ubuntu:latest /bin/bash

# Run a container in detached mode with port mapping
docker run -d -p 8080:80 --name webserver nginx

# List running containers
docker ps

# List all containers (including stopped)
docker ps -a

# Stop a running container
docker stop webserver

# Start a stopped container
docker start webserver

# Remove a container
docker rm webserver

# View container logs
docker logs webserver

# Execute a command in a running container
docker exec -it webserver /bin/bash

# Inspect container details
docker inspect webserver
"The power of Docker lies not in running a single container, but in orchestrating multiple containers that work together as a cohesive application architecture."
Image Management and Creation
Images serve as the foundation for all containers, making image management a critical skill. Beyond pulling pre-built images from registries, creating custom images tailored to your specific needs represents a fundamental Docker capability. The Dockerfile provides a declarative way to define your image, specifying each step needed to build your application environment.
📦 Image Operations
# List local images
docker images

# Build an image from a Dockerfile
docker build -t myapp:1.0 .

# Tag an image
docker tag myapp:1.0 myregistry.com/myapp:1.0

# Push an image to a registry
docker push myregistry.com/myapp:1.0

# Remove an image
docker rmi myapp:1.0

# Remove unused images
docker image prune

# Save an image to a tar archive
docker save -o myapp.tar myapp:1.0

# Load an image from a tar archive
docker load -i myapp.tar

# View image history and layers
docker history myapp:1.0
Creating Effective Dockerfiles
A Dockerfile is a text document containing sequential instructions for building a Docker image. Each instruction creates a new layer in the image, and understanding how these layers work is crucial for creating efficient, maintainable images. The order of instructions matters significantly because Docker caches layers, and changing one instruction invalidates the cache for all subsequent layers.
Writing optimal Dockerfiles requires balancing several considerations: image size, build time, security, and maintainability. Starting with an appropriate base image sets the foundation for your application. Official images from Docker Hub provide well-maintained starting points for common platforms and languages. Alpine Linux-based images offer particularly small footprints, though they may require additional configuration for some applications.
Dockerfile Instructions and Best Practices
The FROM instruction specifies the base image and must be the first instruction in your Dockerfile. The RUN instruction executes commands during the build process, typically used for installing packages and configuring the environment. The COPY and ADD instructions transfer files from your build context into the image, with COPY being preferred for simple file copying. The CMD instruction specifies the default command to run when a container starts, while ENTRYPOINT defines the executable that always runs.
🏗️ Sample Dockerfile for a Node.js Application
# Use an official Node.js runtime as the base image
FROM node:18-alpine

# Set the working directory in the container
WORKDIR /usr/src/app

# Copy package files first (for better layer caching)
COPY package*.json ./

# Install dependencies
RUN npm ci --only=production

# Copy application source code
COPY . .

# Create a non-root user for security
RUN addgroup -g 1001 -S nodejs && \
    adduser -S nodejs -u 1001 && \
    chown -R nodejs:nodejs /usr/src/app

# Switch to non-root user
USER nodejs

# Expose the application port
EXPOSE 3000

# Define environment variable
ENV NODE_ENV=production

# Health check to monitor container status
HEALTHCHECK --interval=30s --timeout=3s --start-period=5s --retries=3 \
    CMD node healthcheck.js

# Start the application
CMD ["node", "server.js"]
Optimizing Dockerfiles involves several key strategies. Minimize the number of layers by combining related RUN commands with logical AND operators. Place frequently changing instructions toward the end of the Dockerfile to maximize cache utilization. Use multi-stage builds to separate build dependencies from runtime requirements, significantly reducing final image size. Always clean up temporary files and package manager caches within the same layer where they're created to prevent bloating your image.
"A well-crafted Dockerfile is self-documenting code that clearly communicates how your application environment is constructed and configured."
Multi-Stage Builds for Optimization
Multi-stage builds revolutionized Docker image creation by allowing you to use multiple FROM statements in a single Dockerfile. This technique enables you to use one stage for building your application with all necessary build tools, then copy only the compiled artifacts into a minimal runtime image. The result is dramatically smaller final images that contain only what's needed to run your application, improving security and reducing deployment times.
⚡ Multi-Stage Build Example
# Build stage
FROM golang:1.21-alpine AS builder

WORKDIR /build

# Copy go mod files
COPY go.mod go.sum ./
RUN go mod download

# Copy source code
COPY . .

# Build the application
RUN CGO_ENABLED=0 GOOS=linux go build -a -installsuffix cgo -o main .

# Runtime stage
FROM alpine:latest

RUN apk --no-cache add ca-certificates

WORKDIR /root/

# Copy only the binary from builder stage
COPY --from=builder /build/main .

# Expose port
EXPOSE 8080

# Run the application
CMD ["./main"]| Dockerfile Instruction | Purpose | Best Practice | Example |
|---|---|---|---|
| FROM | Specifies base image | Use official images, prefer Alpine for smaller size | FROM node:18-alpine |
| WORKDIR | Sets working directory | Use absolute paths, create if doesn't exist | WORKDIR /app |
| COPY | Copies files into image | Copy dependencies first for better caching | COPY package.json ./ |
| RUN | Executes commands during build | Chain commands, clean up in same layer | RUN apt-get update && apt-get install -y curl |
| EXPOSE | Documents port usage | Document all ports your app listens on | EXPOSE 8080 |
| ENV | Sets environment variables | Use for configuration, avoid secrets | ENV NODE_ENV=production |
| CMD | Default container command | Use exec form, one per Dockerfile | CMD ["npm", "start"] |
Container Networking and Communication
Networking in Docker enables containers to communicate with each other and with external systems. Docker provides several network drivers, each designed for specific use cases. The bridge network is the default, creating a private internal network on the host where containers can communicate. The host network removes network isolation, allowing containers to use the host's network directly. The overlay network enables communication between containers running on different Docker hosts, essential for swarm mode and distributed applications.
When you create a container without specifying a network, Docker automatically connects it to the default bridge network. While functional, this default network has limitations—containers can only communicate using IP addresses, not container names. Creating custom bridge networks provides DNS resolution, allowing containers to discover each other by name, which is far more maintainable than hardcoding IP addresses.
Network Management Operations
Creating and managing networks gives you precise control over how containers communicate. Custom networks provide isolation between different application stacks running on the same host. You can connect a container to multiple networks, enabling complex architectures where containers need to communicate with different groups of services.
🌐 Network Commands
# Create a custom bridge network
docker network create --driver bridge myapp-network

# Create a network with custom subnet
docker network create --driver bridge --subnet=172.18.0.0/16 custom-network

# List all networks
docker network ls

# Inspect network details
docker network inspect myapp-network

# Connect a running container to a network
docker network connect myapp-network webserver

# Disconnect a container from a network
docker network disconnect myapp-network webserver

# Run a container on a specific network
docker run -d --name database --network myapp-network postgres:15

# Remove a network
docker network rm myapp-network

# Remove all unused networks
docker network prune
"Proper network design in Docker isn't just about connectivity—it's about creating secure, maintainable architectures that scale with your application needs."
Port Mapping and Exposure
Containers run in isolated network namespaces, meaning ports inside a container aren't automatically accessible from the host or external networks. Port mapping bridges this gap by forwarding traffic from a host port to a container port. The -p flag when running containers specifies this mapping, allowing external access to containerized services.
Understanding the difference between EXPOSE in Dockerfiles and -p in docker run commands is important. EXPOSE documents which ports the container listens on but doesn't actually publish them. It serves as documentation and enables automatic port mapping when using certain Docker features. The -p flag actually creates the port forwarding rule, making the service accessible from outside the container.
Data Persistence with Volumes
Containers are ephemeral by design—when you remove a container, all data written to its filesystem disappears. Volumes solve this problem by providing persistent storage that exists independently of container lifecycles. Docker manages volumes in a special area of the host filesystem, and they offer better performance and portability compared to bind mounts.
Three primary methods exist for persisting data in Docker: volumes, bind mounts, and tmpfs mounts. Volumes are the preferred mechanism, managed entirely by Docker and stored in a specific location on the host. Bind mounts map any host directory into a container, offering flexibility but requiring absolute paths and making containers less portable. Tmpfs mounts store data in host memory, useful for sensitive information that shouldn't persist to disk.
Volume Operations and Management
Creating and managing volumes follows similar patterns to other Docker resources. Named volumes provide a way to reference persistent data across container restarts and recreations. Anonymous volumes are created automatically but are harder to manage and reference. Volume drivers extend Docker's storage capabilities, enabling integration with network storage, cloud storage, and specialized storage systems.
💾 Volume Commands
# Create a named volume
docker volume create myapp-data

# List all volumes
docker volume ls

# Inspect volume details
docker volume inspect myapp-data

# Run a container with a volume mount
docker run -d --name database -v myapp-data:/var/lib/postgresql/data postgres:15

# Run a container with a bind mount
docker run -d --name webserver -v /host/path:/container/path nginx

# Run a container with a read-only volume
docker run -d --name app -v myapp-data:/data:ro alpine

# Copy data from a container to a volume
docker cp mycontainer:/data/. /var/lib/docker/volumes/myapp-data/_data/

# Remove a volume
docker volume rm myapp-data

# Remove all unused volumes
docker volume prune

# Create a volume with specific options
docker volume create --driver local --opt type=nfs --opt o=addr=192.168.1.1,rw --opt device=:/path/to/dir myapp-nfs
Backup and Restore Strategies
Backing up container data requires careful consideration of what needs to be preserved and how to minimize downtime. For volumes, you can create temporary containers that mount the volume and archive its contents. Database containers often require specific backup procedures to ensure data consistency, such as using database-specific dump commands before archiving files.
"Data persistence strategy should be planned before deploying containers to production—retrofitting backup solutions to running systems is significantly more complex than designing them from the start."
Docker Compose for Multi-Container Applications
Docker Compose transforms how you manage multi-container applications by defining your entire application stack in a single YAML file. Instead of running multiple docker commands with various options, Compose lets you declare all services, networks, and volumes in one place, then start everything with a single command. This approach makes complex applications reproducible and easy to share with team members.
The docker-compose.yml file uses a declarative syntax to describe your application architecture. Each service definition includes the image or build context, environment variables, port mappings, volume mounts, and dependencies on other services. Compose handles the orchestration details—creating networks, starting containers in the correct order, and managing the lifecycle of all components together.
Compose File Structure and Syntax
A well-structured Compose file organizes your application into logical services, each representing a container in your stack. The version field at the top specifies the Compose file format version, determining which features are available. Services are defined under the services key, with each service having its own configuration block. Networks and volumes can be defined at the top level and referenced by services that need them.
📋 Sample Docker Compose File
version: '3.8'

services:
  # Frontend service
  web:
    build:
      context: ./web
      dockerfile: Dockerfile
    ports:
      - "80:80"
    environment:
      - API_URL=http://api:3000
    depends_on:
      - api
    networks:
      - frontend
      - backend
    restart: unless-stopped

  # Backend API service
  api:
    build:
      context: ./api
      dockerfile: Dockerfile
    ports:
      - "3000:3000"
    environment:
      - DATABASE_URL=postgresql://postgres:password@db:5432/myapp
      - REDIS_URL=redis://cache:6379
    depends_on:
      - db
      - cache
    networks:
      - backend
    volumes:
      - ./api/logs:/app/logs
    restart: unless-stopped

  # Database service
  db:
    image: postgres:15-alpine
    environment:
      - POSTGRES_DB=myapp
      - POSTGRES_USER=postgres
      - POSTGRES_PASSWORD=password
    volumes:
      - postgres-data:/var/lib/postgresql/data
      - ./init-scripts:/docker-entrypoint-initdb.d
    networks:
      - backend
    restart: unless-stopped

  # Redis cache service
  cache:
    image: redis:7-alpine
    networks:
      - backend
    restart: unless-stopped

  # Background worker service
  worker:
    build:
      context: ./worker
      dockerfile: Dockerfile
    environment:
      - DATABASE_URL=postgresql://postgres:password@db:5432/myapp
      - REDIS_URL=redis://cache:6379
    depends_on:
      - db
      - cache
    networks:
      - backend
    restart: unless-stopped

networks:
  frontend:
    driver: bridge
  backend:
    driver: bridge

volumes:
  postgres-data:
    driver: local
Compose Commands and Workflow
Working with Docker Compose involves a set of commands that manage your entire application stack. The up command builds, creates, and starts all services defined in your compose file. The down command stops and removes containers, networks, and optionally volumes. These commands make it trivial to spin up development environments or tear them down completely.
🚀 Docker Compose Commands
# Start all services in detached mode
docker-compose up -d

# Start services and rebuild images
docker-compose up -d --build

# View logs from all services
docker-compose logs

# Follow logs from a specific service
docker-compose logs -f api

# List running services
docker-compose ps

# Stop all services
docker-compose stop

# Stop and remove containers, networks
docker-compose down

# Stop and remove everything including volumes
docker-compose down -v

# Scale a service to multiple instances
docker-compose up -d --scale worker=3

# Execute a command in a running service
docker-compose exec api npm test

# Validate compose file syntax
docker-compose config

# Pull latest images for all services
docker-compose pull

# Restart a specific service
docker-compose restart api
Security Best Practices for Containers
Container security requires a multi-layered approach addressing image security, runtime security, and host security. Containers share the host kernel, making kernel vulnerabilities particularly critical. Unlike virtual machines, containers don't provide strong isolation boundaries by default, so implementing security best practices is essential for production deployments.
Starting with secure base images forms the foundation of container security. Use official images from trusted sources, and prefer minimal base images like Alpine Linux that have smaller attack surfaces. Regularly scan images for vulnerabilities using tools like Docker Scan, Trivy, or Clair. Keep base images and dependencies updated to patch known security issues. Never include secrets, credentials, or sensitive data directly in images—use environment variables, secrets management systems, or mounted configuration files instead.
Runtime Security Measures
Running containers with appropriate security constraints limits potential damage from compromised containers. Never run containers as root unless absolutely necessary. Create dedicated users within your Dockerfile and use the USER instruction to switch to that user. Drop unnecessary Linux capabilities and add only those your application requires. Use read-only filesystems where possible to prevent malicious modification of container contents.
- Run as Non-Root User: Create and use dedicated users with minimal privileges to limit the impact of container compromises
- Use Read-Only Filesystems: Mount container filesystems as read-only except for specific writable directories needed by your application
- Limit Resources: Set CPU, memory, and other resource limits to prevent containers from consuming excessive host resources
- Drop Capabilities: Remove all Linux capabilities and add back only those specifically required by your application
- Use Security Scanning: Regularly scan images for vulnerabilities and update dependencies to patch security issues
- Implement Network Policies: Restrict network access between containers to only what's necessary for application functionality
- Enable Content Trust: Use Docker Content Trust to verify image authenticity and integrity before pulling and running
- Audit and Monitor: Log container activities and monitor for suspicious behavior using security tools and logging systems
"Security in containerized environments isn't a feature you add at the end—it's a fundamental principle that must be woven into every layer of your container strategy."
Image Security and Vulnerability Management
Maintaining secure images requires ongoing vigilance and automated processes. Implement automated scanning in your CI/CD pipeline to catch vulnerabilities before images reach production. Establish policies for handling discovered vulnerabilities, including severity thresholds that block deployments. Maintain an inventory of all images in use and their security status to ensure nothing slips through the cracks.
🔒 Security-Hardened Dockerfile Example
FROM node:18-alpine AS builder

# Install security updates
RUN apk upgrade --no-cache

WORKDIR /build
COPY package*.json ./
RUN npm ci --only=production

COPY . .

# Runtime stage with minimal footprint
FROM node:18-alpine

# Install security updates
RUN apk upgrade --no-cache && \
    apk add --no-cache dumb-init

# Create non-root user
RUN addgroup -g 1001 -S nodejs && \
    adduser -S nodejs -u 1001

WORKDIR /app

# Copy application with correct ownership
COPY --from=builder --chown=nodejs:nodejs /build .

# Switch to non-root user
USER nodejs

# Use dumb-init to handle signals properly
ENTRYPOINT ["dumb-init", "--"]

# Run application
CMD ["node", "server.js"]
Container Orchestration and Scaling
While Docker Compose excels at managing multi-container applications on a single host, production environments typically require orchestration across multiple hosts with automated scaling, health checking, and self-healing capabilities. Container orchestration platforms like Kubernetes, Docker Swarm, and others provide these capabilities, transforming how applications are deployed and managed at scale.
Docker Swarm, Docker's native orchestration solution, offers a simpler alternative to Kubernetes while still providing essential orchestration features. Swarm mode turns a group of Docker hosts into a single virtual host, enabling you to deploy services across the cluster with automatic load balancing, rolling updates, and service discovery. While Kubernetes has become the dominant orchestration platform, Swarm remains relevant for teams seeking simpler orchestration without Kubernetes' complexity.
Scaling Strategies and Considerations
Horizontal scaling—adding more container instances—provides the primary scaling mechanism in containerized environments. Orchestration platforms automatically distribute containers across available hosts, monitor their health, and restart failed containers. Load balancers distribute incoming traffic across container instances, ensuring no single container becomes overwhelmed. Stateless application design enables effective horizontal scaling, as any container instance can handle any request.
Vertical scaling—increasing resources allocated to containers—offers another scaling dimension. Resource limits and reservations in container configurations ensure containers receive adequate CPU and memory while preventing any single container from monopolizing host resources. Monitoring resource utilization helps identify when vertical scaling is needed and when horizontal scaling would be more effective.
"The true power of containerization emerges not from running a single container, but from orchestrating hundreds or thousands of containers working together as a cohesive, scalable system."
Monitoring and Logging Containers
Effective monitoring and logging are crucial for maintaining healthy containerized applications. Containers' ephemeral nature makes traditional monitoring approaches insufficient—containers can be created, destroyed, and moved between hosts dynamically. Modern container monitoring requires tools that understand this dynamic environment and can track containers across their lifecycle.
Docker provides built-in logging drivers that capture container output and forward it to various destinations. The default json-file driver stores logs on the host filesystem, while other drivers can send logs to centralized logging systems like Syslog, Fluentd, or cloud-based services. Structured logging in JSON format makes logs easier to parse and analyze, especially when aggregating logs from multiple containers.
Monitoring Tools and Metrics
Container metrics provide insights into resource utilization, performance, and health. Docker stats command shows real-time resource usage for running containers, including CPU percentage, memory usage, network I/O, and block I/O. For production environments, dedicated monitoring solutions like Prometheus, Grafana, and Datadog provide comprehensive monitoring with alerting, historical data, and sophisticated visualization.
📊 Monitoring Commands
# View resource usage for all running containers
docker stats

# View resource usage for specific containers
docker stats webserver database

# View resource usage once (no streaming)
docker stats --no-stream

# View container logs
docker logs webserver

# Follow container logs in real-time
docker logs -f webserver

# View last 100 log lines
docker logs --tail 100 webserver

# View logs with timestamps
docker logs -t webserver

# View logs since a specific time
docker logs --since 2024-01-01T00:00:00 webserver

# Inspect container processes
docker top webserver

# View container events
docker events

# Export container filesystem as tar archive
docker export webserver > webserver.tar

# View changes to container filesystem
docker diff webserver
Health Checks and Self-Healing
Health checks enable Docker to monitor container health beyond simply checking if the process is running. A container might be running but unable to serve requests due to application errors or resource exhaustion. Health checks define commands that Docker runs periodically to verify the container is functioning correctly. Failed health checks trigger automatic container restarts or replacement, enabling self-healing applications.
Implementing effective health checks requires understanding your application's health indicators. Simple health checks might verify a web server responds to HTTP requests. More sophisticated checks might verify database connectivity, check queue depths, or validate that critical background processes are running. Balance health check frequency and complexity—too frequent or expensive checks can impact performance, while infrequent checks delay detection of problems.
Development Workflows with Docker
Docker transforms development workflows by ensuring consistency between development, testing, and production environments. The "works on my machine" problem largely disappears when developers run applications in containers identical to production. This consistency accelerates onboarding new team members, who can start contributing quickly without spending days configuring development environments.
Development containers typically include additional tools and configurations not present in production images. Volume mounts enable live code reloading, where changes to source files on the host immediately affect the running container without rebuilding images. This workflow combines the consistency of containers with the rapid iteration developers need. Many projects maintain separate Dockerfiles or docker-compose configurations for development and production to accommodate these different requirements.
Local Development Best Practices
Optimizing Docker for local development involves balancing convenience with production similarity. Use volume mounts to map your source code into containers, enabling your IDE and development tools to work with local files while the application runs in a container. Configure containers to automatically restart when files change, providing a smooth development experience. Consider using development-specific base images that include debugging tools and development dependencies.
- 🔄 Use Volume Mounts for Source Code: Mount source directories into containers for live reloading without rebuilding images
- ⚡ Leverage Build Caching: Structure Dockerfiles to maximize layer caching and minimize rebuild times during development
- 🔧 Separate Development and Production Configs: Maintain separate compose files or use compose overrides for development-specific settings
- 🐛 Include Debugging Tools: Add debugging and profiling tools in development images that aren't present in production
- 📝 Document Setup Steps: Create clear documentation so team members can quickly set up their development environment
Continuous Integration and Deployment
Docker integrates seamlessly into CI/CD pipelines, providing consistent build and test environments. Build Docker images as part of your CI process, run automated tests inside containers, and push successful builds to registries. This approach ensures every code change is tested in an environment identical to production, catching environment-specific issues early.
Container registries play a central role in CI/CD workflows, serving as the distribution mechanism for application images. Tag images with version numbers, git commit hashes, or build numbers to track exactly which code is deployed where. Implement automated deployment pipelines that pull images from registries and deploy them to staging or production environments, reducing manual deployment steps and potential errors.
Performance Optimization Techniques
Container performance depends on multiple factors including image size, resource allocation, and configuration. Smaller images download faster, start quicker, and have smaller attack surfaces. Multi-stage builds, minimal base images, and removing unnecessary files all contribute to smaller images. A Node.js application image might shrink from several gigabytes to under 100 megabytes through careful optimization.
Resource limits prevent containers from consuming excessive CPU or memory, which could impact other containers or the host system. Setting appropriate limits requires understanding your application's resource requirements under normal and peak load. Too restrictive limits cause performance degradation or crashes, while overly generous limits waste resources and reduce container density on hosts.
Image Size Optimization
Reducing image size improves performance throughout the container lifecycle. Smaller images transfer faster between registries and hosts, reducing deployment times. They consume less disk space, allowing more images to be cached locally. Layer caching becomes more effective with smaller layers, speeding up builds. Use .dockerignore files to exclude unnecessary files from build contexts, preventing them from being copied into images.
⚙️ Optimization Techniques
# Use multi-stage builds to separate build and runtime
FROM golang:1.21 AS builder
WORKDIR /build
COPY . .
RUN go build -o app

FROM alpine:latest
COPY --from=builder /build/app .
CMD ["./app"]

# Combine RUN commands to reduce layers
RUN apt-get update && \
    apt-get install -y package1 package2 && \
    apt-get clean && \
    rm -rf /var/lib/apt/lists/*

# Use specific image tags, not 'latest'
FROM node:18.17.0-alpine

# Remove package manager cache in the same layer
RUN npm install && npm cache clean --force

# Use .dockerignore to exclude unnecessary files
# .dockerignore content:
# node_modules
# .git
# .env
# *.md
# tests
Runtime Performance Considerations
Container runtime performance depends on proper resource allocation and configuration. Use resource constraints to guarantee minimum resources while preventing excessive consumption. The --cpus flag limits CPU usage, while --memory limits RAM. For I/O-intensive applications, consider block I/O limits. Monitor actual resource usage to right-size these limits based on real-world behavior rather than guesses.
Storage driver selection impacts performance, especially for write-heavy workloads. The overlay2 driver provides the best performance for most use cases. For databases and other applications with significant write activity, consider using volumes instead of container writable layers, as volumes bypass the storage driver and provide native filesystem performance.
Troubleshooting Common Issues
Troubleshooting containerized applications requires understanding both Docker internals and your application's behavior. Common issues include networking problems, permission errors, resource constraints, and configuration mistakes. Systematic troubleshooting approaches help identify and resolve issues quickly, minimizing downtime and frustration.
When containers fail to start or behave unexpectedly, examining logs provides the first clue to the problem. The docker logs command shows container output, including error messages and stack traces. For containers that exit immediately, logs often reveal configuration errors or missing dependencies. Inspecting container configuration with docker inspect shows detailed information about networking, volumes, environment variables, and resource limits.
Common Problems and Solutions
Network connectivity issues frequently arise when containers can't communicate with each other or external services. Verify containers are on the correct networks and that port mappings are configured properly. Use docker exec to run networking tools like ping, curl, or telnet inside containers to diagnose connectivity. Check firewall rules on the host that might block container traffic.
- Container Exits Immediately: Check logs for errors, verify the command or entrypoint is correct, ensure all dependencies are available
- Cannot Connect to Container: Verify port mappings with docker ps, check firewall rules, ensure the service is listening on the correct interface
- Permission Denied Errors: Check file ownership and permissions, verify the user running the process has necessary access
- Out of Disk Space: Remove unused images, containers, and volumes with prune commands, increase disk space allocation
- Performance Issues: Check resource constraints, monitor host resource usage, optimize image size and application code
- DNS Resolution Failures: Verify network configuration, check DNS settings, use container names instead of IPs on custom networks
- Volume Mount Issues: Verify paths exist, check permissions, ensure correct syntax for volume definitions
Debugging Techniques
Interactive debugging allows you to explore container environments and test fixes. Use docker exec to run shells inside running containers, examining filesystem contents, testing network connectivity, and inspecting running processes. For containers that won't start, docker run with an overridden entrypoint can launch a shell instead of the failing application, allowing you to investigate the environment manually.
🔍 Debugging Commands
# Access shell in running container
docker exec -it webserver /bin/sh

# Override entrypoint to access shell in failing container
docker run -it --entrypoint /bin/sh myimage

# Copy files from container to host for inspection
docker cp webserver:/app/config.json ./config.json

# View detailed container configuration
docker inspect webserver

# Check container resource usage
docker stats webserver

# View container processes
docker top webserver

# View recent container events
docker events --since 1h

# Test network connectivity from inside container
docker exec webserver ping database

# Check port bindings
docker port webserver

# View container filesystem changes
docker diff webserver
"Effective troubleshooting in containerized environments requires understanding not just your application, but also how Docker manages networking, storage, and process isolation."
Migration Strategies to Containers
Migrating existing applications to containers requires careful planning and execution. Start by containerizing applications with minimal dependencies and clear boundaries, gaining experience before tackling complex, tightly-coupled systems. Document dependencies, configuration requirements, and operational procedures before beginning migration. This preparation helps identify potential issues and ensures nothing is overlooked during the transition.
The strangler pattern offers a gradual migration approach where new features are built as containers while legacy components continue running. Over time, containerized services replace legacy components until the entire application runs in containers. This incremental approach reduces risk compared to big-bang migrations and allows teams to learn and adapt their containerization strategy based on real-world experience.
Assessment and Planning
Successful migration begins with thorough assessment of your current environment. Inventory all applications, their dependencies, and integration points. Identify stateful components that require special consideration for data persistence. Evaluate networking requirements and how services communicate. This assessment reveals the scope of migration and helps prioritize which applications to containerize first.
Consider application architecture when planning containerization. Monolithic applications might need refactoring into smaller services to fully benefit from containers. Stateful applications require careful volume management and backup strategies. Applications with complex networking or security requirements need detailed planning to ensure containerized versions maintain necessary functionality and compliance.
Advanced Docker Features
Beyond basic container operations, Docker provides advanced features for specialized use cases and complex scenarios. BuildKit, Docker's next-generation build system, offers improved performance, better caching, and advanced features like build secrets and SSH forwarding. Content trust ensures image integrity through cryptographic signing. Plugins extend Docker's capabilities for storage, networking, and authorization.
Docker contexts enable managing multiple Docker environments from a single client. Switch between local Docker, remote Docker hosts, and Kubernetes clusters using context commands. This capability simplifies workflows for developers and operators who work with multiple environments, eliminating the need to reconfigure connection settings constantly.
BuildKit and Advanced Building
BuildKit revolutionizes Docker image building with parallel execution, advanced caching, and new Dockerfile syntax. Enable BuildKit by setting the DOCKER_BUILDKIT=1 environment variable. BuildKit's improved caching considers more factors when determining if layers can be reused, reducing build times significantly. Build secrets allow passing sensitive information during builds without including them in the final image or build history.
🚀 BuildKit Features
# Enable BuildKit for a build
DOCKER_BUILDKIT=1 docker build -t myapp .

# Use build secrets (requires BuildKit)
docker build --secret id=mysecret,src=./secret.txt -t myapp .

# In Dockerfile:
# syntax=docker/dockerfile:1
# RUN --mount=type=secret,id=mysecret cat /run/secrets/mysecret

# Use SSH forwarding during build
docker build --ssh default -t myapp .

# Cache mount for package managers
# RUN --mount=type=cache,target=/root/.npm npm install

# Bind mount for accessing files without copying
# RUN --mount=type=bind,source=.,target=/src make build
Integration with Cloud Platforms
Container adoption has been driven largely by cloud platforms offering managed container services. Amazon ECS, Azure Container Instances, and Google Cloud Run provide serverless container execution without managing underlying infrastructure. These services handle scaling, load balancing, and infrastructure management, allowing teams to focus on applications rather than operations.
Container registries from cloud providers integrate seamlessly with their container services, providing secure image storage with fine-grained access control. AWS ECR, Azure Container Registry, and Google Container Registry offer vulnerability scanning, image signing, and lifecycle policies. Integration with CI/CD services enables automated workflows from code commit to production deployment.
Kubernetes and Cloud-Native Ecosystem
Kubernetes has become the standard for container orchestration in cloud environments. All major cloud providers offer managed Kubernetes services—EKS, AKS, and GKE—that handle cluster management while you focus on deploying applications. Understanding Docker fundamentals provides the foundation for working with Kubernetes, as pods in Kubernetes are essentially groups of containers with shared networking and storage.
The cloud-native ecosystem extends beyond container orchestration to include service meshes, monitoring solutions, and continuous deployment tools. Istio and Linkerd provide advanced networking capabilities like traffic management and observability. Prometheus and Grafana offer comprehensive monitoring. Helm simplifies application deployment on Kubernetes. These tools build on container fundamentals to provide enterprise-grade capabilities.
How do containers differ from virtual machines?
Containers share the host operating system kernel and isolate applications at the process level, making them much lighter and faster to start than virtual machines. VMs include a full operating system copy and require a hypervisor, consuming more resources. Containers typically measure megabytes and start in seconds, while VMs measure gigabytes and take minutes. However, VMs provide stronger isolation since each runs its own kernel.
Should I use Docker Compose or Kubernetes for my application?
Docker Compose excels for development environments and simple production deployments on single hosts or small clusters. It's easier to learn and configure than Kubernetes. Choose Kubernetes when you need advanced orchestration features like automatic scaling, self-healing, rolling updates across large clusters, or when deploying to cloud platforms. Many teams start with Compose and migrate to Kubernetes as their needs grow.
How do I handle persistent data in containers?
Use Docker volumes for persistent data that needs to survive container restarts and removals. Volumes are managed by Docker and provide better performance than bind mounts. For databases, always use volumes to store data directories. Back up volumes regularly using docker export or by mounting them in temporary containers that copy data to backup locations. Consider using managed database services for production workloads to simplify backup and high availability.
What's the best way to secure Docker containers in production?
Implement multiple security layers: use minimal base images, run containers as non-root users, scan images for vulnerabilities, limit container capabilities, use read-only filesystems where possible, implement network segmentation, keep Docker and host systems updated, and never include secrets in images. Use secrets management systems like Docker Secrets or cloud provider solutions. Regular security audits and monitoring help identify and address vulnerabilities.
How can I optimize Docker image build times?
Structure Dockerfiles to maximize layer caching by placing frequently changing instructions last. Use .dockerignore to exclude unnecessary files from build context. Leverage multi-stage builds to separate build dependencies from runtime requirements. Enable BuildKit for improved caching and parallel execution. Combine related RUN commands to reduce layers. Use specific base image tags instead of latest to ensure consistent caching. Consider using a build cache or registry with caching capabilities.
What resource limits should I set for containers?
Resource limits depend on your application's requirements and available host resources. Start by monitoring actual usage without limits to understand baseline requirements. Set memory limits to prevent OOM kills but allow headroom for peaks. CPU limits should allow burst capacity while preventing monopolization. For production, set both limits and reservations to guarantee minimum resources. Use health checks to detect when containers are resource-constrained and need adjustment.