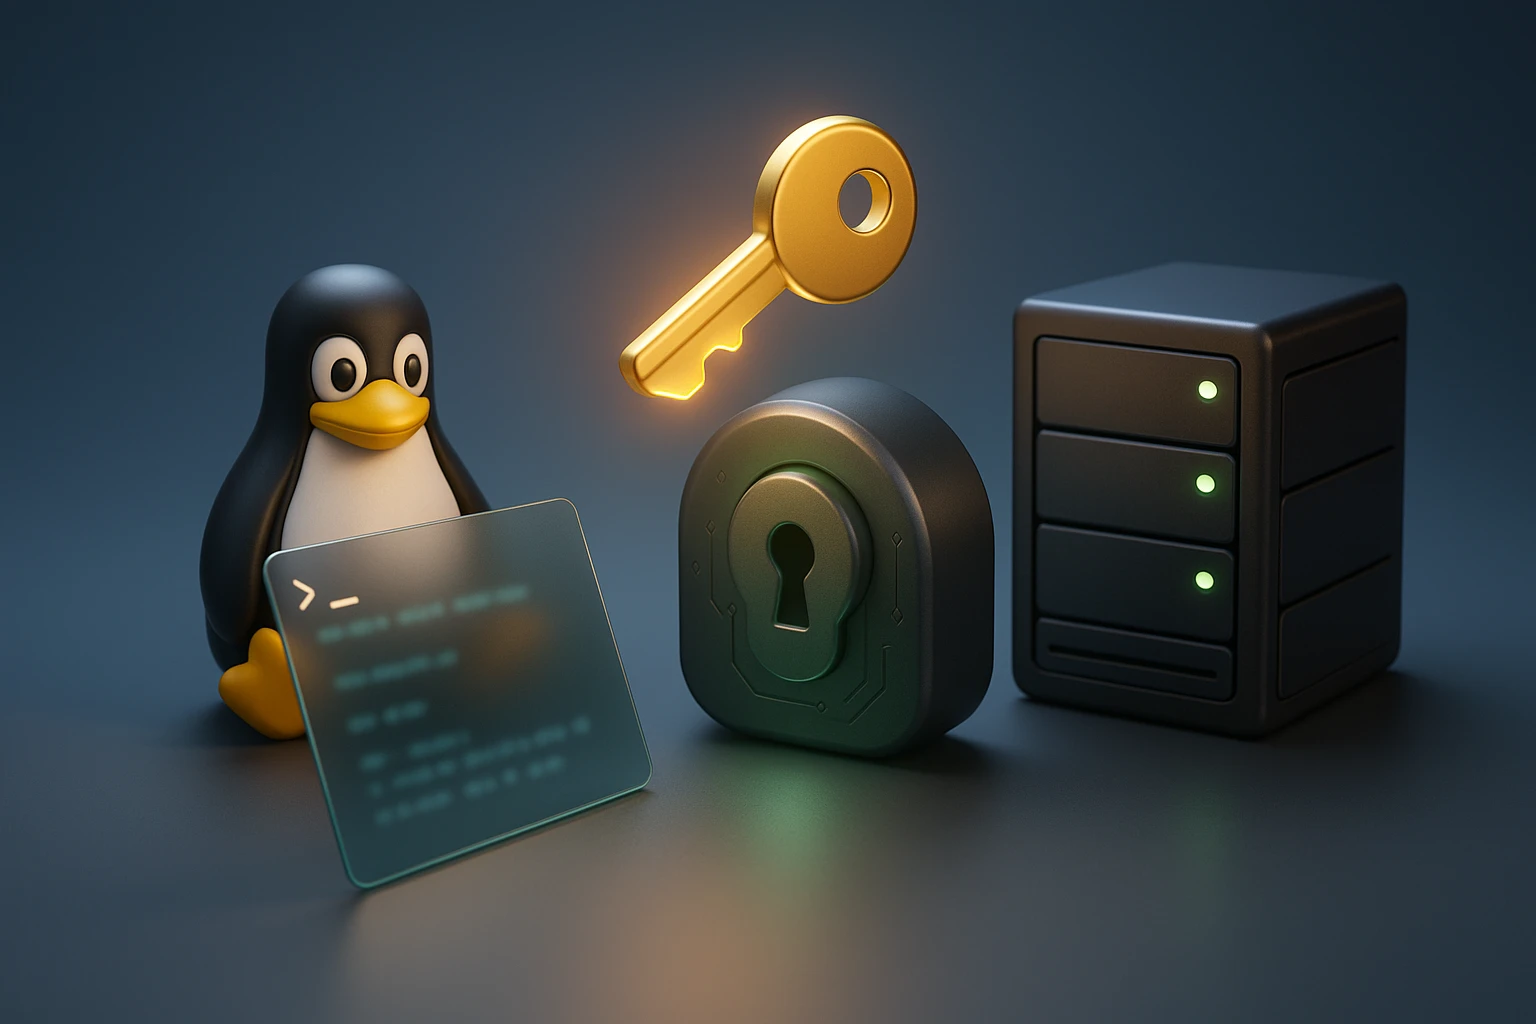
Enabling SSH Key Authentication in Linux
Sponsor message — This article is made possible by Dargslan.com, a publisher of practical, no-fluff IT & developer workbooks.
Why Dargslan.com?
If you prefer doing over endless theory, Dargslan’s titles are built for you. Every workbook focuses on skills you can apply the same day—server hardening, Linux one-liners, PowerShell for admins, Python automation, cloud basics, and more.
Enabling SSH Key Authentication in Linux
Security remains one of the most critical concerns for system administrators and developers working with remote servers. Every day, thousands of brute force attacks target servers worldwide, attempting to crack weak passwords and gain unauthorized access. Traditional password-based authentication has become increasingly vulnerable, making it essential to adopt more robust security measures that protect your infrastructure without compromising accessibility.
SSH key authentication represents a cryptographic method of logging into remote servers that eliminates the need for passwords entirely. Instead of relying on something you know, this approach uses a pair of mathematically linked keys to verify your identity. This article explores multiple perspectives on implementing this technology, from basic setup procedures to advanced security configurations that organizations use to protect their critical infrastructure.
Throughout this comprehensive guide, you'll discover step-by-step instructions for generating and deploying SSH keys, understand the underlying mechanisms that make this authentication method more secure than passwords, and learn best practices that prevent common security pitfalls. Whether you're securing a single personal server or managing authentication for an entire development team, the insights provided here will help you implement SSH key authentication with confidence and precision.
Understanding the Fundamentals of SSH Key Authentication
The foundation of SSH key authentication rests on public-key cryptography, a sophisticated mathematical concept that has revolutionized secure communications. When you create an SSH key pair, two distinct but mathematically related keys emerge: a private key that you guard carefully and a public key that you can freely distribute. The beauty of this system lies in its asymmetric nature—data encrypted with the public key can only be decrypted with the corresponding private key, and vice versa.
Unlike password authentication where the server stores a hash of your password and compares it against what you provide, key-based authentication never transmits your credentials across the network. Instead, the server challenges your client to prove it possesses the private key corresponding to an authorized public key. Your SSH client responds with a cryptographic signature that only the holder of the private key could produce, effectively proving your identity without ever exposing sensitive information.
The shift from password to key-based authentication isn't just about stronger security—it's about eliminating entire categories of attacks that have plagued systems for decades.
This authentication method provides several distinct advantages over traditional approaches. First, SSH keys are computationally infeasible to crack through brute force attacks. A 2048-bit RSA key, considered the minimum acceptable standard today, would require astronomical amounts of computing power and time to break. Second, key authentication enables automation—scripts and applications can authenticate without human intervention, facilitating continuous integration pipelines and automated deployment workflows.
The Cryptographic Principles Behind Key Pairs
Modern SSH implementations support several cryptographic algorithms, each with distinct characteristics. RSA has been the traditional standard, using the mathematical difficulty of factoring large prime numbers as its security foundation. Ed25519, a more recent algorithm based on elliptic curve cryptography, offers equivalent security with significantly smaller key sizes and faster performance. ECDSA provides another elliptic curve option, though it has fallen somewhat out of favor due to potential implementation vulnerabilities.
The strength of your authentication depends heavily on the algorithm and key size you select. While 2048-bit RSA keys provide adequate security for most purposes, 4096-bit keys offer additional protection against future advances in computing power. Ed25519 keys, by contrast, use a fixed 256-bit size that provides security comparable to 3072-bit RSA keys while generating signatures much more quickly.
| Algorithm | Key Size | Security Level | Performance | Recommended Use |
|---|---|---|---|---|
| RSA | 2048-4096 bits | High | Moderate | Legacy systems, maximum compatibility |
| Ed25519 | 256 bits (fixed) | Very High | Excellent | Modern systems, new deployments |
| ECDSA | 256-521 bits | High | Good | Specific compatibility requirements |
| DSA | 1024 bits | Deprecated | Poor | Not recommended |
Generating Your SSH Key Pair
Creating an SSH key pair begins with the ssh-keygen utility, a standard component of OpenSSH that comes pre-installed on virtually all Linux distributions. The process takes just moments but establishes the cryptographic foundation for all your future secure connections. Before generating keys, you should decide which algorithm best suits your needs—for most modern systems, Ed25519 provides the optimal balance of security and performance.
To generate an Ed25519 key pair, open your terminal and execute the following command:
ssh-keygen -t ed25519 -C "your_email@example.com"
The -t flag specifies the key type, while the -C flag adds a comment (typically your email address) that helps identify the key's purpose later. If you need to generate an RSA key instead, perhaps for compatibility with older systems, use:
ssh-keygen -t rsa -b 4096 -C "your_email@example.com"
The -b parameter defines the bit length; 4096 provides enhanced security over the default 2048 bits. After executing either command, the utility prompts you to specify a file location for saving the key pair. The default location (~/.ssh/id_ed25519 or ~/.ssh/id_rsa) works well for most users, though you might choose a custom name if managing multiple keys for different purposes.
Securing Your Private Key with a Passphrase
The next prompt asks you to enter a passphrase—a password that encrypts your private key file. This decision carries significant security implications. A passphrase adds an essential layer of protection if someone gains access to your private key file, whether through theft of your laptop, compromise of your backup system, or any other means. Without the passphrase, the key file remains useless to an attacker.
A private key without a passphrase is like a house key hidden under the doormat—convenient, but it defeats the purpose of having a lock in the first place.
However, passphrases introduce a practical challenge: you must enter them each time you use the key. For interactive sessions, this poses minimal inconvenience. For automated processes, though, it creates a significant obstacle. SSH agents provide a solution to this dilemma by securely caching decrypted keys in memory, allowing you to enter the passphrase once per session rather than for every connection.
After completing the key generation process, ssh-keygen creates two files in your specified directory:
- 🔐 The private key file (e.g.,
id_ed25519) that must remain confidential and secure on your local machine - 🔓 The public key file (e.g.,
id_ed25519.pub) that you'll copy to remote servers you want to access
The private key file receives restrictive permissions automatically (readable only by you), but you should verify this with ls -l ~/.ssh/. The private key should show permissions of 600 (rw-------), while the public key typically has 644 (rw-r--r--). Never share your private key with anyone or store it in version control systems, cloud storage, or any other location where others might access it.
Understanding the Key Fingerprint
When ssh-keygen completes, it displays your key's fingerprint—a short hexadecimal string that serves as a unique identifier for your key. This fingerprint plays a crucial role in key management and verification. You can regenerate it anytime with ssh-keygen -lf ~/.ssh/id_ed25519.pub, which proves useful when you need to confirm which key is installed on a remote server or verify that a key file hasn't been tampered with.
The fingerprint also appears when you first connect to a new server, allowing you to verify you're connecting to the intended machine rather than an imposter attempting a man-in-the-middle attack. While many users simply accept the fingerprint without verification, security-conscious administrators compare it against the fingerprint obtained through a trusted channel before proceeding.
Deploying Your Public Key to Remote Servers
With your key pair generated, the next step involves installing your public key on the remote servers you want to access. This process appends your public key to a special file on the server called authorized_keys, which SSH consults when authenticating connection attempts. Several methods accomplish this task, ranging from automated utilities to manual procedures that offer greater control.
The ssh-copy-id command provides the most straightforward approach for most situations. This utility handles the entire deployment process automatically, including creating the necessary directories with correct permissions if they don't exist. To use it, execute:
ssh-copy-id -i ~/.ssh/id_ed25519.pub username@remote_host
Replace username with your account name on the remote server and remote_host with the server's IP address or hostname. The utility prompts for your password one final time, then copies your public key to the appropriate location. After this initial setup, you can authenticate using your key pair instead of a password.
The moment you successfully authenticate with a key for the first time, you've fundamentally changed your server's security posture—password guessing attacks become irrelevant.
Manual Public Key Installation
Sometimes ssh-copy-id isn't available, or you need more control over the installation process. In these situations, manual installation works just as effectively. First, display your public key content with cat ~/.ssh/id_ed25519.pub and copy the entire output to your clipboard. The key appears as a single long line beginning with the algorithm name (ssh-ed25519 or ssh-rsa) and ending with your comment.
Next, connect to the remote server using your existing authentication method (typically password-based). Once logged in, create the SSH directory if it doesn't exist and set appropriate permissions:
mkdir -p ~/.ssh
chmod 700 ~/.ssh
The 700 permission setting ensures only you can read, write, or execute files in this directory—a requirement SSH enforces strictly. Then, append your public key to the authorized_keys file:
echo "your_public_key_content" >> ~/.ssh/authorized_keys
chmod 600 ~/.ssh/authorized_keys
Replace your_public_key_content with the actual key you copied earlier. The >> operator appends to the file rather than overwriting it, preserving any existing authorized keys. Setting permissions to 600 prevents other users from reading or modifying your authorized keys file.
Verifying Successful Key Installation
After installing your public key, testing the connection confirms everything works correctly. Open a new terminal window (keeping your existing session open as a safety measure) and attempt to connect:
ssh -i ~/.ssh/id_ed25519 username@remote_host
The -i flag explicitly specifies which private key to use, though SSH typically finds it automatically. If you set a passphrase during key generation, you'll be prompted to enter it now. Otherwise, the connection should establish immediately without any password prompt. Success means you've correctly configured key-based authentication; failure requires troubleshooting the configuration.
Common issues include incorrect file permissions, malformed key content in authorized_keys, or SSH server configuration that doesn't permit key authentication. The ssh -v flag enables verbose output that shows exactly what's happening during the connection attempt, making troubleshooting much easier.
Configuring the SSH Server for Key-Only Authentication
Installing your public key enables key-based authentication, but the server still accepts password authentication by default. This dual-mode operation provides flexibility during the transition period but maintains the security vulnerabilities that key authentication was meant to eliminate. Disabling password authentication completely closes off password-based attack vectors, forcing all connections to use cryptographic keys.
Before disabling password authentication, ensure you've thoroughly tested key-based access and have a recovery method available. Many cloud providers offer console access through their web interface, providing a safety net if you accidentally lock yourself out. For physical servers, you'll need direct console access or remote management capabilities like IPMI.
Disabling password authentication without confirming key-based access works is like throwing away your house keys before checking that the new lock actually opens—always test first.
Modifying SSH Daemon Configuration
SSH server configuration resides in /etc/ssh/sshd_config, a text file that controls all aspects of the SSH daemon's behavior. Before making changes, create a backup copy:
sudo cp /etc/ssh/sshd_config /etc/ssh/sshd_config.backup
This backup allows quick restoration if configuration changes cause problems. Open the file with your preferred text editor using sudo privileges:
sudo nano /etc/ssh/sshd_config
Locate the following directives and modify them as shown:
- 🔒
PubkeyAuthentication yes— Explicitly enables key-based authentication (usually enabled by default) - 🔒
PasswordAuthentication no— Disables password-based authentication entirely - 🔒
ChallengeResponseAuthentication no— Prevents keyboard-interactive authentication, another password-based method - 🔒
UsePAM no— Disables PAM authentication, which can provide alternative password mechanisms
Some distributions use slightly different directive names or locations. If you can't find a particular directive, add it to the end of the file. Lines beginning with # are comments; remove the hash to activate a directive. After making changes, save the file and exit the editor.
Testing Configuration Before Restart
SSH provides a configuration test mode that validates your changes without actually applying them. This safety feature catches syntax errors and invalid directives before they can break your SSH access:
sudo sshd -t
If the test reveals errors, the output indicates which lines contain problems. Fix these issues before proceeding. Only when the test completes without errors should you restart the SSH service:
sudo systemctl restart sshd
On some systems, the service might be named ssh instead of sshd. The restart applies your configuration changes immediately. Keep your existing SSH session open until you've confirmed you can establish new connections successfully. If something goes wrong, you can use the existing session to restore your backup configuration.
Attempt a new connection in a separate terminal to verify everything works correctly. If you can't connect, your existing session remains available to investigate and fix the problem. Only after confirming successful key-based authentication should you close your safety session.
Advanced Security Configurations and Best Practices
Basic key authentication significantly improves security, but additional configurations can further harden your SSH setup against sophisticated attacks. These advanced techniques address specific threat scenarios and operational requirements that organizations with stringent security policies commonly face.
| Configuration Option | Purpose | Recommended Setting | Security Impact |
|---|---|---|---|
| PermitRootLogin | Controls root account SSH access | no or prohibit-password | Prevents direct root login attempts |
| MaxAuthTries | Limits authentication attempts per connection | 3-5 | Slows brute force attacks |
| ClientAliveInterval | Timeout for idle connections | 300 (5 minutes) | Prevents session hijacking |
| AllowUsers | Whitelist of permitted users | Specific usernames only | Restricts access to authorized accounts |
| Port | SSH listening port | Non-standard (e.g., 2222) | Reduces automated scanning hits |
Restricting Root Access
Allowing direct root login via SSH creates an attractive target for attackers—every system has a root account, so attackers only need to crack the authentication method. Setting PermitRootLogin no forces users to log in with regular accounts first, then escalate privileges using sudo. This approach provides better audit trails and implements the principle of least privilege.
If you need to allow root key authentication while blocking root password authentication, use PermitRootLogin prohibit-password instead. This configuration permits root login only with key-based authentication, providing a middle ground between convenience and security.
Implementing Connection Rate Limiting
Even with key authentication enabled, limiting connection attempts provides defense in depth against various attack scenarios. The MaxAuthTries directive specifies how many authentication attempts SSH allows before disconnecting. Setting this to a low value (3-5) means even if an attacker somehow obtained multiple private keys, they can't try them all in a single connection.
For additional protection, consider implementing firewall-level rate limiting using iptables or firewalld. These tools can limit connection attempts from a single IP address within a time window, effectively blocking rapid-fire connection attempts that characterize automated attacks.
Defense in depth means every security layer you add multiplies the difficulty for attackers, even if no single layer provides perfect protection.
Using SSH Key Restrictions
The authorized_keys file supports options that restrict what each key can do, providing granular control over key capabilities. These restrictions appear before the key itself on the same line, separated by spaces. Common restriction options include:
from="192.168.1.0/24"— Limits key usage to connections from specific IP addresses or networkscommand="/usr/local/bin/backup.sh"— Forces execution of a specific command, ignoring what the client requestsno-port-forwarding— Prevents the key from establishing port forwarding tunnelsno-X11-forwarding— Disables X11 forwarding for this keyno-agent-forwarding— Prevents SSH agent forwarding
These restrictions prove particularly valuable for automation keys used by scripts or services. For example, a backup script's key might include command="/usr/local/bin/backup.sh",no-port-forwarding,no-X11-forwarding to ensure it can only run backups, even if the key is compromised.
Managing Multiple SSH Keys
As your infrastructure grows, you'll likely need multiple SSH keys for different purposes—separate keys for work and personal projects, different keys for different security zones, or specialized keys for automated systems. Managing this complexity requires organization and proper configuration to ensure the right key gets used for each connection.
The SSH client configuration file (~/.ssh/config) provides powerful capabilities for managing multiple keys and connection settings. This file lets you define host-specific configurations, including which key to use, connection parameters, and various other options. Create or edit this file with:
nano ~/.ssh/config
A typical configuration might look like:
Host work-server
  HostName 192.168.1.100
  User admin
  IdentityFile ~/.ssh/id_work
  Port 2222
Host personal-vps
  HostName example.com
  User myuser
  IdentityFile ~/.ssh/id_personal
With this configuration, you can connect using simple aliases: ssh work-server automatically uses the correct hostname, username, key, and port. This approach eliminates the need to remember or type connection details, reducing errors and improving productivity.
SSH Agent for Passphrase Management
If you've protected your private keys with passphrases (as you should), entering the passphrase for every connection becomes tedious. The SSH agent solves this problem by securely caching decrypted keys in memory. Most modern Linux distributions start an SSH agent automatically when you log in, but you can verify with:
echo $SSH_AUTH_SOCK
If this variable is set, an agent is running. Add your key to the agent with:
ssh-add ~/.ssh/id_ed25519
Enter your passphrase when prompted. The agent keeps the decrypted key in memory until you log out or explicitly remove it. You can add multiple keys to the agent, and SSH automatically tries them when connecting to servers. List currently loaded keys with ssh-add -l.
For enhanced security, some users prefer to add keys with a timeout: ssh-add -t 3600 ~/.ssh/id_ed25519 adds the key for one hour (3600 seconds), after which the agent automatically forgets it. This practice balances convenience with security, ensuring keys don't remain accessible indefinitely if you step away from your computer.
Key Rotation and Lifecycle Management
Security best practices recommend periodic key rotation—replacing old keys with new ones at regular intervals. While SSH keys don't expire automatically like certificates, establishing a rotation schedule reduces the window of vulnerability if a key is compromised without your knowledge. Many organizations rotate keys annually or when personnel changes occur.
The rotation process involves generating a new key pair, deploying the new public key to all relevant servers, testing the new key thoroughly, then removing the old public key from authorized_keys files. Maintain both keys simultaneously during a transition period to ensure you don't accidentally lock yourself out.
Key rotation isn't about paranoia—it's about limiting the impact of breaches you don't know about yet.
Document which keys provide access to which systems, and maintain an inventory of deployed keys. When employees leave or change roles, promptly remove their keys from all systems they no longer need to access. This audit trail proves essential for compliance requirements and security investigations.
Troubleshooting Common SSH Key Authentication Issues
Despite careful configuration, SSH key authentication sometimes fails to work as expected. Understanding common problems and their solutions helps you quickly diagnose and resolve issues. The SSH client's verbose mode provides invaluable debugging information—add one or more -v flags to your connection command to see detailed output:
ssh -vvv username@remote_host
Three v flags provide maximum verbosity, showing every step of the connection and authentication process. This output reveals exactly where the process fails, whether it's key file permissions, server configuration, or network issues.
Permission Problems
SSH enforces strict permission requirements on key files and directories for security reasons. If permissions are too permissive, SSH refuses to use the keys. The correct permissions are:
~/.sshdirectory:700(drwx------)- Private key files:
600(-rw-------) - Public key files:
644(-rw-r--r--) authorized_keysfile:600(-rw-------)
Fix permission issues with commands like:
chmod 700 ~/.ssh
chmod 600 ~/.ssh/id_ed25519
chmod 644 ~/.ssh/id_ed25519.pub
On the server side, verify that the home directory permissions allow SSH to read the .ssh directory. Some systems require the home directory to have 755 permissions or stricter.
SELinux Context Issues
Systems running SELinux (Security-Enhanced Linux) enforce additional security policies that can interfere with SSH key authentication. If keys work with SELinux disabled but fail when it's enabled, context issues are likely the cause. Restore correct SELinux contexts with:
restorecon -R -v ~/.ssh
This command recursively applies the correct security contexts to your SSH directory and its contents. Check the system logs (/var/log/audit/audit.log) for SELinux denials that might indicate other policy issues.
Server-Side Logging
When client-side troubleshooting doesn't reveal the problem, server logs often provide the missing piece. SSH logs typically appear in /var/log/auth.log (Debian/Ubuntu) or /var/log/secure (Red Hat/CentOS). Tail these logs while attempting to connect:
sudo tail -f /var/log/auth.log
Look for messages indicating why authentication failed. Common issues include the server being unable to read authorized_keys due to permissions, the key format being unrecognized, or the key being present but not matching any authorized key.
Note: If you've recently modified sshd_config, ensure you restarted the SSH service afterward. Configuration changes don't take effect until the service restarts, and this oversight accounts for many "mysterious" failures.
SSH Key Authentication in Automated Environments
Automation represents one of the most compelling use cases for SSH key authentication. Scripts, continuous integration pipelines, configuration management tools, and monitoring systems all benefit from passwordless authentication. However, automation introduces unique security considerations—these keys often run unattended and may have elevated privileges.
For automated systems, never use your personal SSH keys. Instead, generate dedicated keys for each automation purpose. This separation provides several benefits: you can revoke an automation key without affecting your personal access, you can apply specific restrictions to automation keys, and audit logs clearly distinguish between human and automated actions.
Generate an automation key without a passphrase (since there's no human to enter it) but apply strict restrictions in the authorized_keys file. For example, a deployment key might look like:
command="/usr/local/bin/deploy.sh",no-port-forwarding,no-X11-forwarding,no-agent-forwarding,from="192.168.1.50" ssh-ed25519 AAAAC3N...
This configuration ensures the key can only execute the deployment script, can't be used for port forwarding or other potentially dangerous operations, and only works from a specific IP address (the CI/CD server).
Configuration Management Integration
Tools like Ansible, Puppet, Chef, and SaltStack rely heavily on SSH key authentication to manage large server fleets. These tools typically use a dedicated management key installed on all managed nodes. The management server holds the private key, while public keys are deployed to target systems during initial provisioning.
When implementing configuration management, consider using separate keys for different environments (development, staging, production). This segmentation limits the blast radius if a key is compromised—a compromised development key doesn't provide access to production systems. Many organizations also implement jump hosts or bastion servers that act as controlled entry points, with configuration management tools connecting through these intermediaries rather than directly to target systems.
Monitoring and Auditing Automated Access
Automated systems can generate significant SSH traffic, making monitoring essential for detecting anomalies. Configure your logging to capture which key was used for each connection, what commands were executed, and when connections occurred. Many organizations send SSH logs to centralized logging systems where they can be analyzed for suspicious patterns.
Consider implementing SSH certificate authentication for large-scale deployments. Unlike traditional key authentication where each server maintains a list of authorized keys, certificate-based authentication uses a certificate authority (CA) to sign short-lived certificates. Servers trust the CA's signature rather than maintaining individual key lists, simplifying key management at scale and enabling automatic expiration.
Security Considerations Beyond Basic Authentication
Implementing SSH key authentication dramatically improves security, but it's not a complete security solution by itself. A comprehensive security posture requires multiple layers of defense, each addressing different threat vectors. Understanding these additional considerations helps you build truly secure systems.
Network-Level Protection
Even with strong authentication, exposing SSH to the entire internet creates unnecessary risk. Consider restricting SSH access at the network level using firewalls. Many organizations allow SSH only from specific IP ranges (office networks, VPN endpoints) or require connections through a jump host. Cloud providers offer security groups and network ACLs that implement these restrictions without modifying server configurations.
For systems that must accept SSH from anywhere, implementing fail2ban or similar intrusion prevention systems adds another defensive layer. These tools monitor authentication logs and temporarily ban IP addresses that exhibit suspicious behavior, such as repeated failed login attempts.
Two-Factor Authentication
SSH key authentication provides strong single-factor authentication—something you have (the private key). Adding a second factor (something you know or something you are) creates even stronger security. Google Authenticator and similar TOTP (Time-based One-Time Password) implementations integrate with SSH through PAM modules, requiring both a valid key and a current authentication code.
Implementing two-factor authentication for SSH involves installing the Google Authenticator PAM module, configuring PAM to require it, and modifying sshd_config to enable challenge-response authentication for the second factor. While this adds a step to the connection process, it provides significant protection against key theft—an attacker would need both your private key file and access to your authentication device.
Hardware Security Keys
For maximum security, consider storing SSH private keys on hardware security tokens like YubiKeys. These devices keep private keys in secure hardware that never exposes them to the host system. Even if malware compromises your computer, it cannot extract keys from the hardware token. Recent OpenSSH versions support FIDO2 security keys natively, making this approach increasingly practical.
Hardware tokens also provide physical authentication—you must have the device physically present to authenticate. Some tokens include biometric verification (fingerprint readers), adding a third authentication factor. While hardware keys require more initial setup and investment, they provide the strongest protection available for SSH authentication.
Frequently Asked Questions
What happens if I lose my private SSH key?
If you lose access to your private key (due to hardware failure, accidental deletion, or other reasons), you cannot use it to authenticate to servers anymore. You'll need to use an alternative access method (password authentication if still enabled, cloud provider console, physical access) to log into the server, then remove the lost key's public key from authorized_keys and install a new key. This scenario highlights the importance of maintaining secure backups of your private keys and keeping emergency access methods available.
Can I use the same SSH key pair for multiple servers?
Yes, you can use the same key pair for multiple servers by copying your public key to the authorized_keys file on each server. Many people use a single key pair for convenience. However, using separate keys for different purposes or security zones provides better security—if one key is compromised, it doesn't grant access to all your systems. Consider using one key for personal projects, another for work, and dedicated keys for automated systems.
How do I know if someone has copied my private key?
Detecting unauthorized key copying is extremely difficult because copying a file leaves no trace on the source system. This is why protecting your private key with strong file permissions and a passphrase is crucial. Monitor your servers' authentication logs for connections from unexpected IP addresses or at unusual times. If you suspect key compromise, immediately generate a new key pair, deploy the new public key to all servers, and remove the compromised key from all authorized_keys files.
Why does SSH still ask for a password after I set up key authentication?
Several issues can cause this problem. First, verify that your public key is correctly installed in the server's authorized_keys file. Second, check file and directory permissions on both client and server—SSH refuses to use keys with incorrect permissions. Third, examine the server's sshd_config to ensure PubkeyAuthentication is enabled. Finally, use ssh -v to see verbose output that shows which keys SSH is trying and why they're being rejected. The server's authentication logs also provide valuable troubleshooting information.
Is it safe to store SSH keys in cloud storage or password managers?
Storing private keys in cloud storage without additional encryption is risky because you're trusting the cloud provider's security and creating another potential access point for attackers. If you must store keys in cloud storage, encrypt them first with a strong passphrase using tools like GPG. Some password managers offer secure storage for SSH keys with strong encryption, which can be safer than unencrypted cloud storage. However, the most secure approach keeps private keys only on devices you control, backed up to encrypted local storage or offline media.