How to Build Discord Music Bot
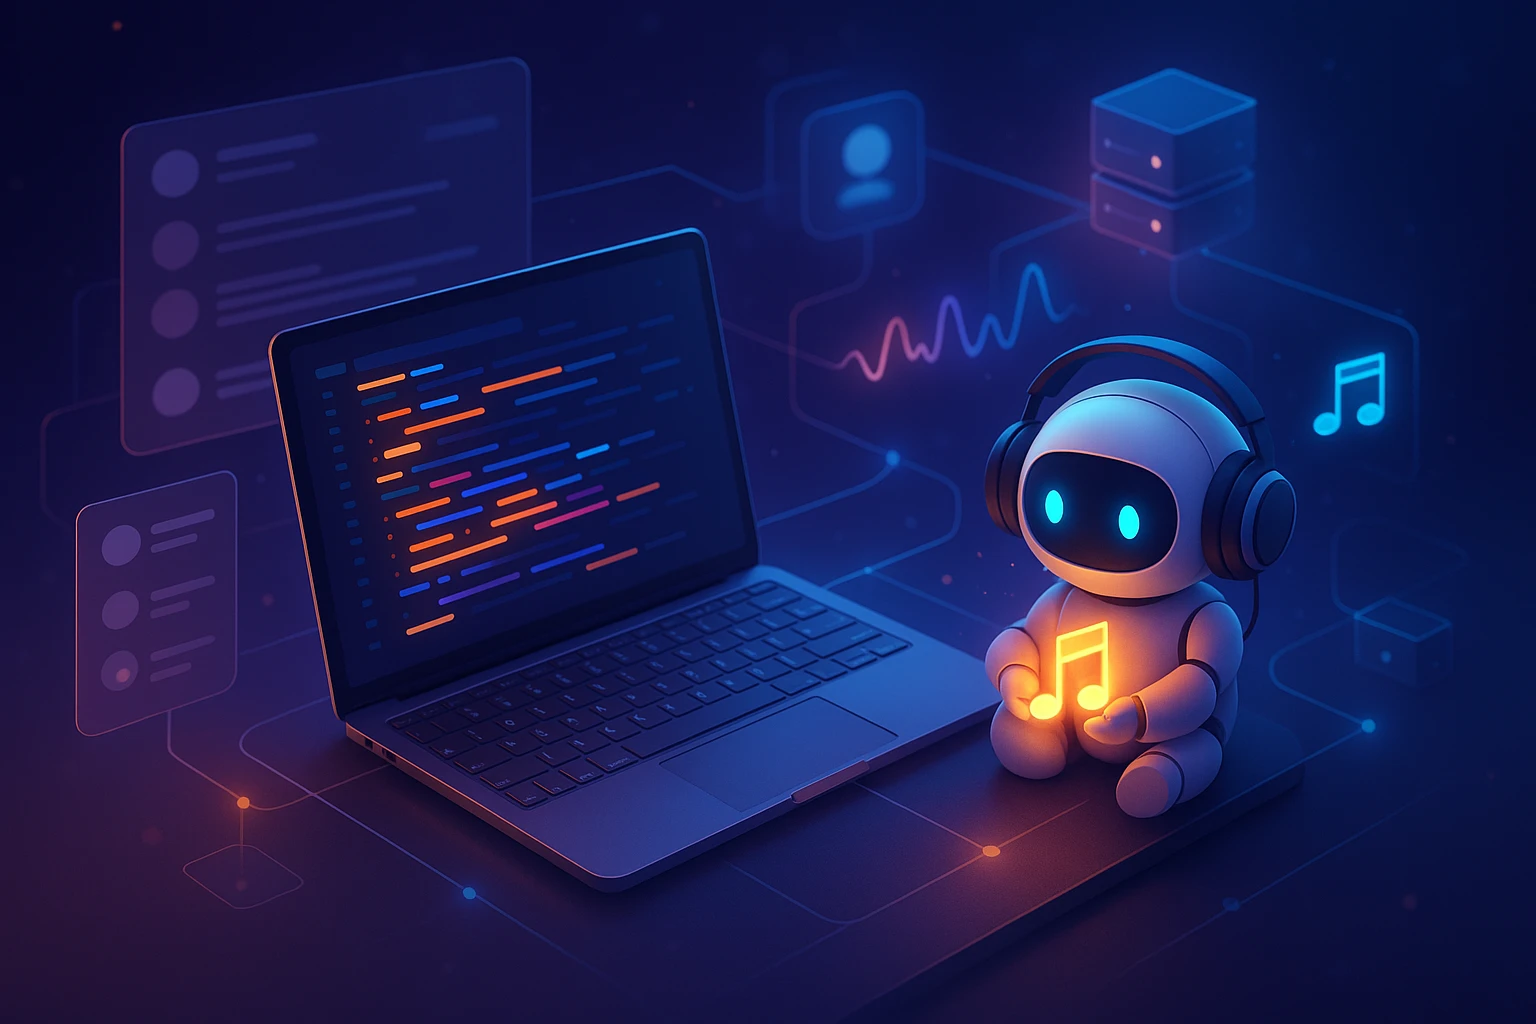
How to Build Discord Music Bot
Music brings communities together, and in the world of Discord servers, a custom music bot can transform your community's experience from ordinary to extraordinary. Whether you're managing a gaming guild, a study group, or a social hangout, having a personalized music bot gives you complete control over features, commands, and the overall listening experience. Unlike public bots that may go offline or have limitations, your own bot operates exactly how you want it to, whenever you need it.
A Discord music bot is essentially an automated program that connects to your Discord server and plays audio in voice channels based on user commands. These bots can stream music from various sources like YouTube, Spotify, or SoundCloud, manage playlists, control playback, and respond to user requests in real-time. Building one yourself means understanding the fundamentals of bot development, audio streaming, and Discord's API, but the journey offers valuable programming experience and a genuinely useful tool for your community.
Throughout this comprehensive guide, you'll discover the technical requirements needed to get started, step-by-step instructions for setting up your development environment, detailed code explanations for core functionality, troubleshooting strategies for common issues, and advanced features that will make your bot stand out. By the end, you'll have a fully functional music bot tailored to your server's specific needs, along with the knowledge to maintain and expand it as your community grows.
Essential Requirements Before Starting
Before diving into the actual development process, you need to ensure your system and accounts are properly configured. The foundation of any successful bot project starts with having the right tools and permissions in place. Missing even one component can lead to frustrating errors that are difficult to diagnose later in the development process.
Software and Platform Requirements
Your development environment needs several key components working together. First and foremost, you'll need Node.js installed on your computer, preferably version 16.9.0 or higher, as this provides the JavaScript runtime environment where your bot will execute. You can download Node.js from the official website, and the installation process automatically includes npm (Node Package Manager), which you'll use extensively for installing libraries and dependencies.
A reliable code editor makes development significantly easier. Visual Studio Code stands out as the most popular choice among Discord bot developers because of its excellent JavaScript support, integrated terminal, debugging capabilities, and extensive extension marketplace. Alternatives like Sublime Text or Atom work perfectly fine, but VS Code's IntelliSense feature helps catch errors before you even run your code.
"The difference between a bot that works and a bot that works well comes down to understanding your tools before you write a single line of code."
You'll also need a Discord account with appropriate permissions. Specifically, you must have administrator privileges on the server where you plan to test your bot, or at minimum, permissions to manage server settings and invite bots. Creating a separate test server specifically for bot development is highly recommended, as this prevents disrupting your main community during the testing phase.
Technical Knowledge Foundation
While you don't need to be an expert programmer, certain baseline knowledge makes the development process much smoother. Basic JavaScript proficiency is essential, including understanding variables, functions, promises, and async/await syntax. If you're completely new to JavaScript, spending a week or two with beginner tutorials before attempting bot development will save considerable frustration.
Familiarity with command-line interfaces helps tremendously, as you'll frequently use terminal commands to install packages, run your bot, and troubleshoot issues. Understanding how to navigate directories, execute commands, and read error messages in the terminal accelerates your development workflow significantly.
- JavaScript fundamentals: Variables, functions, objects, arrays, and control structures
- Asynchronous programming: Promises, async/await, and callback functions
- Command line basics: Navigation, running scripts, and package management
- JSON format: Understanding configuration files and data structures
- API concepts: Basic knowledge of how applications communicate with external services
Setting Up Your Development Environment
The setup phase establishes the foundation for your entire project. Taking time to configure everything correctly prevents countless headaches during development. This process involves creating a Discord application, configuring your project structure, and installing necessary dependencies that handle the complex work of connecting to Discord and streaming audio.
Creating Your Discord Application
Every Discord bot begins as an application registered through Discord's Developer Portal. Navigate to discord.com/developers/applications and log in with your Discord credentials. Click the "New Application" button in the top-right corner, give your application a meaningful name (this becomes your bot's initial username), and accept Discord's terms of service.
Once created, you'll see your application's dashboard with various configuration options. The "General Information" tab displays your Application ID and allows you to add descriptions and icons. For now, focus on the "Bot" section in the left sidebar. Click "Add Bot" and confirm the action. This converts your application into an actual bot user that can connect to Discord servers.
"Your bot token is like a password—never share it publicly, commit it to GitHub, or include it in screenshots. Anyone with your token can control your bot completely."
In the Bot settings, you'll find your bot token under the username. Click "Reset Token" if needed, then "Copy" to save it temporarily. You'll need this token shortly to authenticate your bot. Additionally, scroll down and enable the Presence Intent, Server Members Intent, and Message Content Intent under the "Privileged Gateway Intents" section. These permissions allow your bot to read messages and interact with server members properly.
Inviting Your Bot to Your Server
With your bot created, you need to generate an invitation link. Navigate to the "OAuth2" section, then "URL Generator" in the left sidebar. Under "Scopes," select bot and applications.commands. This combination allows your bot to join servers and use slash commands.
A new "Bot Permissions" section appears below the scopes. For a music bot, you need specific permissions to function properly. Select the following permissions:
- ✨ Read Messages/View Channels: See channels and read message content
- ✨ Send Messages: Respond to commands and send notifications
- ✨ Connect: Join voice channels where users request music
- ✨ Speak: Play audio in voice channels
- ✨ Use Voice Activity: Transmit audio without push-to-talk
Copy the generated URL at the bottom of the page and paste it into your browser. Select the server where you want to install your bot (you must have administrator permissions on that server), complete the CAPTCHA verification, and authorize the bot. Your bot now appears in your server's member list, though it shows as offline until you run the code.
Project Structure and Initialization
Create a new folder on your computer for your bot project. Open this folder in your code editor and launch the integrated terminal. Run the command npm init -y to initialize a new Node.js project. This creates a package.json file that tracks your project's dependencies and configuration.
Next, install the essential libraries your bot needs. Execute the following command in your terminal:
npm install discord.js @discordjs/voice @discordjs/opus ytdl-core ffmpeg-static
These packages serve specific purposes: discord.js handles all Discord API interactions, @discordjs/voice manages voice connections and audio streaming, @discordjs/opus provides audio encoding capabilities, ytdl-core downloads audio from YouTube, and ffmpeg-static processes audio files into streamable formats.
| Package Name | Purpose | Critical Function |
|---|---|---|
| discord.js | Discord API wrapper | Handles all bot interactions with Discord servers |
| @discordjs/voice | Voice connection management | Connects to voice channels and streams audio |
| @discordjs/opus | Audio encoding | Converts audio to Discord-compatible format |
| ytdl-core | YouTube audio extraction | Downloads audio streams from YouTube videos |
| ffmpeg-static | Audio processing | Transcodes and prepares audio for streaming |
Create a new file named config.json in your project folder. This file stores your bot token and other configuration settings. Structure it like this:
{ "token": "YOUR_BOT_TOKEN_HERE", "prefix": "!" }
Replace "YOUR_BOT_TOKEN_HERE" with the actual token you copied from the Discord Developer Portal. The prefix determines what character triggers your bot's commands. Users will type commands like !play or !skip to control the music.
Building the Core Bot Functionality
With your environment configured, you can now write the actual code that brings your bot to life. The core functionality involves establishing a connection to Discord, listening for user commands, joining voice channels, and streaming audio. Breaking this down into manageable components makes the development process less overwhelming and easier to debug.
Basic Bot Structure and Connection
Create a new file named index.js in your project folder. This serves as your bot's main entry point. Start by importing the necessary libraries and configuration:
const { Client, GatewayIntentBits } = require('discord.js');
const { joinVoiceChannel, createAudioPlayer, createAudioResource, AudioPlayerStatus } = require('@discordjs/voice');
const ytdl = require('ytdl-core');
const config = require('./config.json');
These imports give you access to Discord's client for connecting to the API, voice channel utilities for audio streaming, YouTube downloading capabilities, and your configuration file containing the bot token. The next step creates a new client instance with specific intents that define what events your bot can receive:
const client = new Client({
  intents: [
    GatewayIntentBits.Guilds,
    GatewayIntentBits.GuildMessages,
    GatewayIntentBits.MessageContent,
    GatewayIntentBits.GuildVoiceStates
  ]
});
Intents act as permissions that specify what data your bot can access. The Guilds intent provides basic server information, GuildMessages allows your bot to see when messages are sent, MessageContent lets it read the actual content of those messages, and GuildVoiceStates enables tracking when users join or leave voice channels.
"The most common mistake beginners make is forgetting to enable the Message Content Intent in both the code and the Developer Portal, causing their bot to receive empty message objects."
Implementing the Play Command
The play command represents the most complex but essential feature of your music bot. It needs to validate user input, check if the user is in a voice channel, join that channel, download audio from YouTube, and start streaming. Here's how to structure this functionality:
client.on('messageCreate', async (message) => {
  if (!message.content.startsWith(config.prefix) || message.author.bot) return;

  const args = message.content.slice(config.prefix.length).trim().split(/ +/);
  const command = args.shift().toLowerCase();

  if (command === 'play') {
    if (!args.length) {
      return message.reply('Please provide a YouTube URL!');
    }

    const voiceChannel = message.member.voice.channel;
    if (!voiceChannel) {
      return message.reply('You need to be in a voice channel to play music!');
    }

    const permissions = voiceChannel.permissionsFor(message.client.user);
    if (!permissions.has('Connect') || !permissions.has('Speak')) {
      return message.reply('I need permissions to join and speak in your voice channel!');
    }

    try {
      const connection = joinVoiceChannel({
        channelId: voiceChannel.id,
        guildId: message.guild.id,
        adapterCreator: message.guild.voiceAdapterCreator,
      });

      const stream = ytdl(args[0], { filter: 'audioonly', quality: 'highestaudio' });
      const resource = createAudioResource(stream);
      const player = createAudioPlayer();

      player.play(resource);
      connection.subscribe(player);

      message.reply('Now playing your requested song!');
    } catch (error) {
      console.error(error);
      message.reply('An error occurred while trying to play the song.');
    }
  }
});
This code performs several critical validation steps before attempting to play music. First, it checks whether the message starts with your configured prefix and ignores messages from other bots to prevent infinite loops. Then it parses the command and arguments, verifies that the user provided a YouTube URL, confirms the user is in a voice channel, and checks that your bot has the necessary permissions to join and speak in that channel.
The actual audio streaming process involves creating a voice connection to the channel, using ytdl-core to download the audio stream from YouTube with audio-only filtering for better performance, converting that stream into an audio resource that Discord can process, creating an audio player to manage playback, and finally subscribing the connection to the player so audio flows to the voice channel.
Adding Essential Control Commands
Beyond playing music, users need commands to control playback. Implementing stop, pause, resume, and skip functionality rounds out your bot's core features. Add these command handlers within the same messageCreate event:
if (command === 'stop') {
  const voiceChannel = message.member.voice.channel;
  if (!voiceChannel) return message.reply('You need to be in a voice channel!');

  const connection = getVoiceConnection(message.guild.id);
  if (connection) {
    connection.destroy();
    message.reply('Stopped playing and left the voice channel.');
  } else {
    message.reply('I am not currently playing anything!');
  }
}
The stop command retrieves the current voice connection for the server and destroys it, which immediately disconnects the bot from the voice channel and stops all audio playback. This represents the simplest control command since it doesn't require managing player state or audio resources.
"Users expect music bots to respond instantly to control commands. Any delay longer than a second feels broken, so optimize your command handling for speed."
For more advanced control, you need to maintain references to your audio players. Create a Map at the top of your file to store players by guild ID:
const players = new Map();
Modify your play command to store the player in this Map after creating it, then implement pause and resume commands that reference this stored player:
if (command === 'pause') {
  const player = players.get(message.guild.id);
  if (player) {
    player.pause();
    message.reply('Paused the music.');
  } else {
    message.reply('Nothing is currently playing!');
  }
}

if (command === 'resume') {
  const player = players.get(message.guild.id);
  if (player) {
    player.unpause();
    message.reply('Resumed the music.');
  } else {
    message.reply('Nothing is currently paused!');
  }
}
These commands provide users with precise control over playback without disconnecting the bot from the voice channel. The pause command temporarily stops audio transmission while maintaining the connection and current position, while resume continues from exactly where playback was paused.
Implementing a Queue System
Single-song playback works for basic use cases, but most communities expect their music bot to handle multiple song requests sequentially. A queue system stores requested songs in order and automatically plays the next song when the current one finishes. This functionality significantly enhances user experience and represents the difference between a basic bot and a professional-grade music bot.
Queue Data Structure
The queue needs to track multiple pieces of information for each server: the list of songs waiting to be played, the currently playing song, the voice connection, the audio player, and the text channel where the bot should send updates. Create a Map to store queue objects by guild ID:
const queues = new Map();
Each queue object should follow a consistent structure that makes it easy to add songs, remove completed songs, and manage playback state. A typical queue object looks like this:
{
  textChannel: message.channel,
  voiceChannel: voiceChannel,
  connection: null,
  songs: [],
  player: null,
  playing: false
}
When a user requests a song, your bot should check if a queue already exists for that server. If not, create a new queue object, add the song to the songs array, and start playback. If a queue exists, simply add the song to the existing array and notify the user of their queue position.
Modified Play Command with Queue Support
Refactor your play command to work with the queue system. The logic becomes more sophisticated but provides much better functionality:
if (command === 'play') {
  if (!args.length) {
    return message.reply('Please provide a YouTube URL!');
  }

  const voiceChannel = message.member.voice.channel;
  if (!voiceChannel) {
    return message.reply('You need to be in a voice channel!');
  }

  const songInfo = await ytdl.getInfo(args[0]);
  const song = {
    title: songInfo.videoDetails.title,
    url: args[0],
    duration: songInfo.videoDetails.lengthSeconds
  };

  let serverQueue = queues.get(message.guild.id);

  if (!serverQueue) {
    const queueConstruct = {
      textChannel: message.channel,
      voiceChannel: voiceChannel,
      connection: null,
      songs: [],
      player: null,
      playing: true
    };

    queues.set(message.guild.id, queueConstruct);
    queueConstruct.songs.push(song);

    try {
      const connection = joinVoiceChannel({
        channelId: voiceChannel.id,
        guildId: message.guild.id,
        adapterCreator: message.guild.voiceAdapterCreator,
      });
      queueConstruct.connection = connection;
      playSong(message.guild, queueConstruct.songs[0]);
    } catch (error) {
      console.error(error);
      queues.delete(message.guild.id);
      return message.reply('There was an error connecting to the voice channel!');
    }
  } else {
    serverQueue.songs.push(song);
    return message.reply(`${song.title} has been added to the queue!`);
  }
}
This enhanced version fetches video information from YouTube to display the song title and duration, creates a song object with relevant metadata, checks for an existing queue, and either creates a new queue and starts playback or adds the song to an existing queue. The separation of concerns makes the code more maintainable and easier to debug.
Play Song Function
Extract the actual playback logic into a separate function that handles streaming, player events, and automatic queue progression. This function becomes the heart of your queue system:
async function playSong(guild, song) {
  const serverQueue = queues.get(guild.id);

  if (!song) {
    serverQueue.connection.destroy();
    queues.delete(guild.id);
    return;
  }

  const stream = ytdl(song.url, { filter: 'audioonly', quality: 'highestaudio' });
  const resource = createAudioResource(stream);
  const player = createAudioPlayer();

  serverQueue.player = player;

  player.play(resource);
  serverQueue.connection.subscribe(player);

  player.on(AudioPlayerStatus.Idle, () => {
    serverQueue.songs.shift();
    playSong(guild, serverQueue.songs[0]);
  });

  player.on('error', error => {
    console.error(error);
    serverQueue.textChannel.send('An error occurred while playing the song!');
    serverQueue.songs.shift();
    playSong(guild, serverQueue.songs[0]);
  });

  serverQueue.textChannel.send(`Now playing: **${song.title}**`);
}
The key to automatic queue progression lies in the AudioPlayerStatus.Idle event listener. When a song finishes playing, the player enters an idle state, triggering this event. The function removes the completed song from the queue array using shift(), then recursively calls itself with the next song. If no songs remain, the function disconnects the bot and cleans up the queue.
"Error handling in the play function is crucial—if a song fails to play and you don't handle it properly, your entire queue system stops working until someone manually restarts it."
Skip Command Implementation
With a queue system in place, implementing a skip command becomes straightforward. Simply stop the current player, which triggers the idle event and automatically starts the next song:
if (command === 'skip') {
  const serverQueue = queues.get(message.guild.id);
  if (!serverQueue) {
    return message.reply('There is nothing playing to skip!');
  }
  if (!message.member.voice.channel) {
    return message.reply('You need to be in the voice channel to skip songs!');
  }
  serverQueue.player.stop();
  message.reply('Skipped to the next song!');
}
This elegant solution leverages the event-driven architecture you've already built. Stopping the player naturally progresses the queue without requiring duplicate code or complex state management.
Advanced Features and Enhancements
Once your basic queue system works reliably, you can add features that make your bot more user-friendly and powerful. These enhancements differentiate a functional bot from an exceptional one that users genuinely enjoy interacting with. Consider which features align with your community's needs and implement them incrementally to maintain code quality.
Queue Display Command
Users frequently want to see what songs are queued up next. A queue command displays the current and upcoming songs in a formatted message:
if (command === 'queue') {
  const serverQueue = queues.get(message.guild.id);
  if (!serverQueue || serverQueue.songs.length === 0) {
    return message.reply('The queue is currently empty!');
  }

  let queueMessage = '**Current Queue:**\n\n';
  queueMessage += `Now Playing: **${serverQueue.songs[0].title}**\n\n`;

  if (serverQueue.songs.length > 1) {
    queueMessage += 'Up Next:\n';
    serverQueue.songs.slice(1, 11).forEach((song, index) => {
      queueMessage += `${index + 1}. ${song.title}\n`;
    });
    if (serverQueue.songs.length > 11) {
      queueMessage += `\n...and ${serverQueue.songs.length - 11} more songs`;
    }
  }

  message.reply(queueMessage);
}
This command displays the currently playing song prominently, lists the next ten songs in the queue with numbered positions, and indicates if additional songs exist beyond the displayed limit. Limiting the display prevents excessively long messages that could be truncated or difficult to read.
Volume Control
Allowing users to adjust playback volume adds significant value. The @discordjs/voice library supports volume adjustment through audio resources. Modify your playSong function to accept a volume parameter:
const resource = createAudioResource(stream, { inlineVolume: true });
resource.volume.setVolume(serverQueue.volume / 100);
Add a volume property to your queue construct with a default value of 50, then implement a volume command:
if (command === 'volume') {
  const serverQueue = queues.get(message.guild.id);
  if (!serverQueue) {
    return message.reply('Nothing is currently playing!');
  }

  if (!args[0]) {
    return message.reply(`Current volume: ${serverQueue.volume}%`);
  }

  const newVolume = parseInt(args[0]);
  if (isNaN(newVolume) || newVolume < 0 || newVolume > 100) {
    return message.reply('Please provide a volume between 0 and 100!');
  }

  serverQueue.volume = newVolume;
  if (serverQueue.player && serverQueue.player.state.resource) {
    serverQueue.player.state.resource.volume.setVolume(newVolume / 100);
  }
  message.reply(`Volume set to ${newVolume}%`);
}
Volume control requires careful validation to prevent errors. The command checks for valid numeric input, ensures the value falls within acceptable bounds, updates both the queue's stored volume and the currently playing resource, and provides clear feedback about the new volume level.
Search Functionality
Requiring users to provide full YouTube URLs creates friction. Implementing search functionality allows users to request songs by name. Install the ytsr package for YouTube searching:
npm install ytsr
Then modify your play command to detect whether the input is a URL or search query:
const ytsr = require('ytsr');

if (command === 'play') {
  if (!args.length) {
    return message.reply('Please provide a song name or YouTube URL!');
  }

  let url = args[0];

  if (!ytdl.validateURL(url)) {
    const searchQuery = args.join(' ');
    const searchResults = await ytsr(searchQuery, { limit: 1 });
    if (searchResults.items.length === 0) {
      return message.reply('No results found for your search!');
    }
    url = searchResults.items[0].url;
  }

  // Continue with existing play logic using url
}
This enhancement dramatically improves user experience by automatically searching YouTube when the input isn't a valid URL. Users can simply type !play never gonna give you up instead of copying and pasting links, making the bot feel more intuitive and responsive.
"The best Discord bots anticipate user needs before users even realize they have them. Search functionality is one of those features that seems optional until you have it, then becomes indispensable."
Loop and Shuffle Commands
Many users want to repeat their favorite songs or randomize playback order. Add loop and shuffle flags to your queue construct:
const queueConstruct = {
  textChannel: message.channel,
  voiceChannel: voiceChannel,
  connection: null,
  songs: [],
  player: null,
  playing: true,
  volume: 50,
  loop: false,
  shuffle: false
};
Modify your playSong function to respect the loop flag:
player.on(AudioPlayerStatus.Idle, () => {
  if (!serverQueue.loop) {
    serverQueue.songs.shift();
  }
  playSong(guild, serverQueue.songs[0]);
});
Implement toggle commands for these features:
if (command === 'loop') {
  const serverQueue = queues.get(message.guild.id);
  if (!serverQueue) {
    return message.reply('Nothing is currently playing!');
  }
  serverQueue.loop = !serverQueue.loop;
  message.reply(`Loop is now ${serverQueue.loop ? 'enabled' : 'disabled'}!`);
}

if (command === 'shuffle') {
  const serverQueue = queues.get(message.guild.id);
  if (!serverQueue || serverQueue.songs.length < 2) {
    return message.reply('Not enough songs in the queue to shuffle!');
  }
  const currentSong = serverQueue.songs.shift();
  serverQueue.songs = serverQueue.songs.sort(() => Math.random() - 0.5);
  serverQueue.songs.unshift(currentSong);
  message.reply('Queue has been shuffled!');
}
The shuffle implementation preserves the currently playing song while randomizing the remaining queue order, ensuring playback isn't interrupted. These features give users more control over their listening experience without requiring complex commands or syntax.
| Feature | User Benefit | Implementation Complexity |
|---|---|---|
| Queue Display | See upcoming songs and queue length | Low - simple string formatting |
| Volume Control | Adjust audio level without leaving Discord | Medium - requires audio resource manipulation |
| Search Functionality | Play songs without finding URLs manually | Medium - requires additional library and validation |
| Loop Mode | Repeat favorite songs automatically | Low - simple boolean flag |
| Shuffle Mode | Randomize playback order | Low - array manipulation |
Common Issues and Solutions
Even with careful implementation, you'll encounter errors and unexpected behavior during development and deployment. Understanding common issues and their solutions saves hours of frustration and helps you build a more robust bot. Most problems fall into predictable categories with well-established fixes.
Connection and Permission Errors
Voice connection issues represent the most frequent category of problems. If your bot joins the voice channel but doesn't play audio, verify that FFmpeg is properly installed and accessible. The ffmpeg-static package should handle this automatically, but sometimes system configurations interfere. Test FFmpeg installation by running ffmpeg -version in your terminal.
Permission errors typically manifest as "Missing Permissions" or "Cannot connect to voice channel" messages. Double-check that your bot has the Connect and Speak permissions in both the server's role settings and the specific voice channel. Discord's permission system operates hierarchically, so channel-specific permissions can override server-wide settings.
- 🔧 Bot joins but no audio plays: Check FFmpeg installation and audio resource creation
- 🔧 Cannot join voice channel: Verify Connect permission in both server and channel settings
- 🔧 Audio cuts out randomly: Increase Node.js memory limit or optimize audio quality settings
- 🔧 Bot crashes on play command: Validate YouTube URL before attempting to download
- 🔧 Commands not responding: Confirm Message Content Intent is enabled in Developer Portal
Audio Quality and Performance Issues
If audio quality sounds poor or stutters frequently, the issue usually stems from network conditions or resource constraints. Lowering the audio quality in ytdl options can significantly improve stability on servers with limited bandwidth. Change quality: 'highestaudio' to quality: 'lowestaudio' in your ytdl configuration to test if this resolves stuttering.
Memory leaks occur when your bot runs for extended periods without proper cleanup. Ensure you're removing queue entries when servers become empty and destroying voice connections completely when playback ends. Implement a periodic cleanup function that runs every few hours:
setInterval(() => {
  queues.forEach((queue, guildId) => {
    if (!queue.connection || queue.connection.state.status === 'destroyed') {
      queues.delete(guildId);
    }
  });
}, 3600000); // Run every hour
YouTube and API Limitations
YouTube periodically changes their internal API, which can break ytdl-core functionality. If your bot suddenly stops working with "Video unavailable" errors despite valid URLs, update ytdl-core to the latest version: npm update ytdl-core. The maintainers actively monitor for YouTube changes and release patches quickly.
"Rate limiting is YouTube's way of saying your bot is too popular. Implement caching for frequently played songs and consider using multiple YouTube API keys if you're serving large communities."
Some videos are restricted due to age gates, region locks, or copyright claims. Implement error handling that catches these specific cases and provides helpful feedback:
try {
  const songInfo = await ytdl.getInfo(url);
} catch (error) {
  if (error.message.includes('private video')) {
    return message.reply('This video is private and cannot be played!');
  } else if (error.message.includes('age-restricted')) {
    return message.reply('This video is age-restricted and cannot be played!');
  } else {
    return message.reply('Failed to retrieve video information. Please try a different video.');
  }
}
Deployment and Hosting Issues
When moving your bot from local development to a hosting service, new challenges emerge. Many free hosting platforms impose time limits or automatically shut down inactive applications. Services like Heroku require a Procfile that specifies how to start your bot:
worker: node index.js
Environment variables become crucial for security when hosting publicly. Never commit your config.json file to GitHub or other public repositories. Instead, use environment variables to store sensitive information:
const token = process.env.DISCORD_TOKEN || config.token;
Configure your hosting platform's environment variables section to include your bot token, keeping it secure while allowing your code to access it. This approach prevents accidental token exposure while maintaining functionality across different environments.
Performance Optimization and Best Practices
As your bot grows in popularity and serves more servers simultaneously, optimization becomes increasingly important. A bot that works perfectly for one server might struggle with ten or crash with a hundred. Implementing performance best practices from the beginning prevents painful refactoring later when your community has grown to depend on your bot.
Memory Management
Memory leaks represent the silent killer of long-running bots. JavaScript's garbage collector handles most memory management automatically, but certain patterns prevent proper cleanup. Always destroy voice connections explicitly when they're no longer needed, clear queue data when servers become inactive, remove event listeners when components are destroyed, and periodically audit your Maps and arrays for stale data.
Implement a maximum queue size to prevent users from adding hundreds of songs that consume excessive memory. Add a check in your play command:
if (serverQueue && serverQueue.songs.length >= 50) {
  return message.reply('Queue is full! Please wait for some songs to finish.');
}
This limit protects your bot's resources while still providing generous functionality. Adjust the number based on your hosting environment's capabilities and your community's typical usage patterns.
Caching Strategies
Repeatedly downloading the same popular songs wastes bandwidth and processing time. Implement a simple cache system that stores audio streams temporarily:
const audioCache = new Map();
const CACHE_DURATION = 3600000; // 1 hour

async function getCachedAudio(url) {
  if (audioCache.has(url)) {
    const cached = audioCache.get(url);
    if (Date.now() - cached.timestamp < CACHE_DURATION) {
      return cached.stream;
    }
    audioCache.delete(url);
  }
  const stream = ytdl(url, { filter: 'audioonly', quality: 'highestaudio' });
  audioCache.set(url, { stream, timestamp: Date.now() });
  return stream;
}
This caching approach reduces redundant downloads for frequently requested songs while automatically clearing old entries to prevent unlimited memory growth. The one-hour duration balances performance benefits against memory usage, but adjust it based on your specific needs.
"Optimization is about identifying bottlenecks, not prematurely optimizing everything. Profile your bot under realistic load conditions before deciding what to optimize."
Error Recovery and Resilience
Robust error handling transforms a fragile bot into a reliable one. Wrap all async operations in try-catch blocks, implement retry logic for transient failures, log errors comprehensively for debugging, and gracefully degrade functionality when external services fail.
Create a centralized error handler that manages different error types consistently:
function handleError(error, message, context) {
  console.error(`Error in ${context}:`, error);
  if (error.message.includes('ECONNREFUSED')) {
    message.reply('Network error occurred. Please try again in a moment.');
  } else if (error.message.includes('Video unavailable')) {
    message.reply('This video is not available for playback.');
  } else {
    message.reply('An unexpected error occurred. The issue has been logged.');
  }
}
This pattern provides consistent user feedback while logging detailed error information for debugging. Users receive helpful messages instead of silence or cryptic technical errors, improving their overall experience.
Code Organization and Maintainability
As your bot grows, maintaining all code in a single file becomes unwieldy. Structure your project into logical modules that separate concerns and improve readability. Create a commands folder with individual files for each command category, a utils folder for helper functions, and a handlers folder for event processing.
A typical mature bot structure looks like this:
- 📁 commands/ - Individual command files organized by category
- 📁 events/ - Event handlers for messageCreate, voiceStateUpdate, etc.
- 📁 utils/ - Helper functions for queue management, audio processing, validation
- 📁 models/ - Data structures and classes for queues, songs, playlists
- 📄 index.js - Main entry point that initializes the bot and loads modules
This organization makes it easy to locate specific functionality, enables multiple developers to work on different features simultaneously, simplifies testing individual components, and allows gradual refactoring without breaking existing functionality.
Security Considerations and Token Protection
Security often gets overlooked in hobby projects, but protecting your bot and users should be a priority from day one. A compromised bot can spam servers, steal data, or get your entire Discord account banned. Understanding and implementing basic security practices prevents these scenarios and builds trust with your user community.
Token Security
Your bot token grants complete control over your bot's actions. If someone obtains your token, they can make your bot do anything within its permissions. Never hardcode tokens directly in your source code, especially if you plan to share your code or use version control. Always use environment variables or separate configuration files that are explicitly excluded from version control.
Create a .gitignore file in your project root to prevent accidentally committing sensitive files:
node_modules/
config.json
.env
*.log
If you accidentally commit your token to a public repository, immediately regenerate it in the Discord Developer Portal. The old token becomes invalid, and you'll need to update your bot's configuration with the new one. GitHub and other platforms actively scan for Discord tokens and may automatically alert Discord when they detect exposed credentials.
Input Validation and Sanitization
Always validate user input before processing it. Malicious users might try to inject commands, overflow buffers, or exploit parsing vulnerabilities. Implement strict validation for all command arguments:
function validateYouTubeURL(url) {
  const pattern = /^(https?:\/\/)?(www\.)?(youtube\.com|youtu\.be)\/.+$/;
  return pattern.test(url);
}

function sanitizeSearchQuery(query) {
  return query.replace(/[<>]/g, '').trim().slice(0, 100);
}
These validation functions prevent common attack vectors while maintaining usability. The URL validator ensures only legitimate YouTube links are processed, while the search query sanitizer removes potentially dangerous characters and limits length to prevent abuse.
Rate Limiting and Abuse Prevention
Implement rate limiting to prevent users from spamming commands and potentially crashing your bot or exhausting external API quotas. Create a simple cooldown system using a Map:
const cooldowns = new Map();
const COOLDOWN_DURATION = 3000; // 3 seconds

function checkCooldown(userId, command) {
  const key = `${userId}-${command}`;
  if (cooldowns.has(key)) {
    const expirationTime = cooldowns.get(key);
    if (Date.now() < expirationTime) {
      return false;
    }
  }
  cooldowns.set(key, Date.now() + COOLDOWN_DURATION);
  return true;
}
Apply this cooldown check at the beginning of your command handler to prevent rapid-fire command execution. Users who try to spam commands receive feedback about the cooldown period, encouraging normal usage patterns.
"Security isn't about paranoia—it's about respecting your users' servers and protecting your bot from becoming a tool for harassment or spam."
Permission Verification
Not all users should have access to all commands. Implement permission checks for sensitive operations like volume control, queue clearing, or bot configuration:
function hasPermission(member, requiredPermission) {
  return member.permissions.has(requiredPermission) || member.roles.cache.some(role => role.name === 'DJ');
}

if (command === 'clear') {
  if (!hasPermission(message.member, 'ManageMessages')) {
    return message.reply('You need Manage Messages permission or the DJ role to clear the queue!');
  }
  // Clear queue logic
}
This approach respects server hierarchies while providing flexibility through role-based access. Server administrators can create a "DJ" role for trusted users who should control music playback without requiring full moderation permissions.
Deploying Your Bot for 24/7 Operation
Running your bot locally works fine during development, but communities expect bots to be available around the clock. Deploying to a hosting service ensures your bot stays online even when your personal computer is off. Several platforms offer free or affordable hosting specifically designed for Discord bots, each with different tradeoffs regarding features, reliability, and ease of use.
Hosting Platform Options
Heroku remains one of the most popular choices for beginners due to its straightforward deployment process and generous free tier. The platform automatically handles many infrastructure concerns, though the free tier puts your bot to sleep after 30 minutes of inactivity. Upgrading to a paid dyno eliminates this limitation and provides more reliable performance.
Alternative platforms like Railway, Render, and Replit offer similar functionality with different pricing structures and feature sets. Railway provides excellent developer experience with automatic deployments from GitHub, while Render offers more predictable pricing. Replit works well for simple bots but may struggle with high-traffic scenarios due to resource constraints.
For maximum control and performance, consider virtual private servers (VPS) from providers like DigitalOcean, Linode, or AWS Lightsail. These require more technical knowledge to configure but provide complete flexibility over your environment and typically better performance per dollar spent. A basic VPS can host multiple bots simultaneously, making it cost-effective if you manage several projects.
Preparing for Deployment
Before deploying, ensure your code is production-ready. Add a start script to your package.json file that hosting platforms can use to launch your bot:
"scripts": {
  "start": "node index.js"
}
Configure environment variables for sensitive information. Most hosting platforms provide a web interface or CLI for setting these variables. At minimum, you need to set your Discord bot token. Create a .env file locally for testing (remember to add it to .gitignore):
DISCORD_TOKEN=your_token_here
PREFIX=!
Modify your code to read from environment variables with fallbacks for local development:
require('dotenv').config();
const token = process.env.DISCORD_TOKEN;
const prefix = process.env.PREFIX || '!';
Install the dotenv package to load environment variables from your .env file during local development: npm install dotenv
Deployment Process for Heroku
Heroku deployment involves several steps but becomes routine after the first time. Install the Heroku CLI tool from their website, then log in through your terminal with heroku login. Initialize a git repository in your project folder if you haven't already:
git init
git add .
git commit -m "Initial commit"
Create a new Heroku application and push your code:
heroku create your-bot-name
git push heroku main
Set your environment variables through the Heroku dashboard or CLI:
heroku config:set DISCORD_TOKEN=your_token_here
Finally, scale your worker dyno to run your bot:
heroku ps:scale worker=1
Your bot should now be online and accessible from any Discord server where it's installed. Monitor logs through the Heroku dashboard or CLI with heroku logs --tail to verify everything works correctly and troubleshoot any deployment issues.
Monitoring and Maintenance
Deployed bots require ongoing monitoring to ensure reliability. Implement logging that captures important events and errors:
client.on('ready', () => {
  console.log(`Bot logged in as ${client.user.tag} at ${new Date().toISOString()}`);
});

client.on('error', error => {
  console.error('Client error:', error);
});

process.on('unhandledRejection', error => {
  console.error('Unhandled promise rejection:', error);
});
Set up uptime monitoring using services like UptimeRobot or StatusCake that ping your bot periodically and alert you if it goes offline. For Heroku free tier bots, these services also prevent the dyno from sleeping by keeping it active through regular requests.
Regularly update your dependencies to patch security vulnerabilities and access new features. Run npm outdated to check for available updates, then npm update to install them. Test thoroughly after updates before deploying to production, as breaking changes occasionally occur in major version bumps.
How much does it cost to run a Discord music bot 24/7?
Running a basic music bot can be free using platforms like Heroku's free tier, Replit, or Railway's free plan, though these come with limitations like sleeping after inactivity or resource constraints. For reliable 24/7 operation without interruptions, expect to spend between five to ten dollars monthly for entry-level paid hosting on Heroku, Railway, or a basic VPS. Costs increase with bot complexity, number of servers, and simultaneous users, but most hobbyist bots operate comfortably within the ten to twenty dollar monthly range.
Can my Discord music bot get banned for copyright violations?
Discord itself doesn't typically ban bots for playing copyrighted music, as the bot is simply streaming content that already exists on platforms like YouTube. However, YouTube may block certain videos from being downloaded or rate-limit your bot if it detects excessive automated access. Your bot account could face action if it's reported for spam or abuse, but normal music playback in private servers rarely causes issues. Focus on implementing proper error handling for restricted content rather than worrying about copyright enforcement at the bot level.
Why does my bot's audio sound distorted or choppy?
Audio quality issues typically stem from insufficient bandwidth, server resource constraints, or incorrect audio encoding settings. Try lowering the audio quality in your ytdl configuration from 'highestaudio' to 'lowestaudio' to reduce bandwidth requirements. Ensure FFmpeg is properly installed and up to date, as outdated versions can cause encoding problems. If hosting on a free platform, resource limitations may be the culprit—upgrading to a paid tier or moving to a VPS often resolves persistent quality issues. Network latency between your hosting location and Discord's servers can also impact audio quality, so choosing a hosting region closer to major Discord data centers helps.
How can I add Spotify support to my music bot?
Direct Spotify streaming isn't possible due to Spotify's API restrictions, but you can implement Spotify playlist and track search that converts Spotify links to YouTube equivalents. Use the spotify-web-api-node package to fetch track metadata from Spotify, then search YouTube for matching songs using ytsr. This approach requires registering a Spotify application to obtain API credentials, but provides a seamless user experience where people can share Spotify links and your bot automatically finds and plays the corresponding YouTube videos. The conversion isn't always perfect, especially for obscure tracks, so implement fallback logic and user feedback when matches fail.
What's the best way to handle multiple servers using my bot simultaneously?
Your queue system naturally handles multiple servers by using guild IDs as Map keys, ensuring each server maintains independent state. The critical consideration is resource management—each active voice connection consumes memory and processing power, so monitor your hosting platform's resource usage as you scale. Implement queue limits per server to prevent resource exhaustion, and consider implementing a maximum concurrent connection limit if hosting resources are constrained. Most hosting platforms can comfortably handle ten to twenty simultaneous voice connections on basic plans, with higher tiers supporting hundreds. Profile your bot under realistic load to determine your specific limitations and upgrade hosting as needed.
How do I update my bot's code without causing downtime?
For most hobby bots, brief downtime during updates is acceptable—simply push your changes to your hosting platform and restart the bot. Users will experience a few seconds of disconnection while the new version starts. For more professional deployments, implement graceful shutdown that finishes playing current songs before disconnecting, then use your hosting platform's deployment features like Heroku's preboot or Railway's zero-downtime deployments. Maintain a development bot for testing changes before deploying to your production bot, preventing bugs from affecting users. Consider implementing a maintenance mode that notifies users when updates are imminent and temporarily disables new commands while allowing current playback to finish naturally.