How to Build Telegram Mini App
How to Build Telegram Mini App
The landscape of mobile applications has undergone a dramatic transformation, and Telegram Mini Apps represent one of the most significant shifts in how developers create and deploy lightweight, powerful applications. These innovative tools allow developers to build feature-rich experiences directly within the Telegram ecosystem, eliminating the need for users to download separate applications while providing seamless integration with one of the world's most popular messaging platforms. With over 800 million active users globally, Telegram offers an unprecedented opportunity for developers to reach massive audiences without the traditional barriers of app store approvals, hefty download requirements, or complex installation processes.
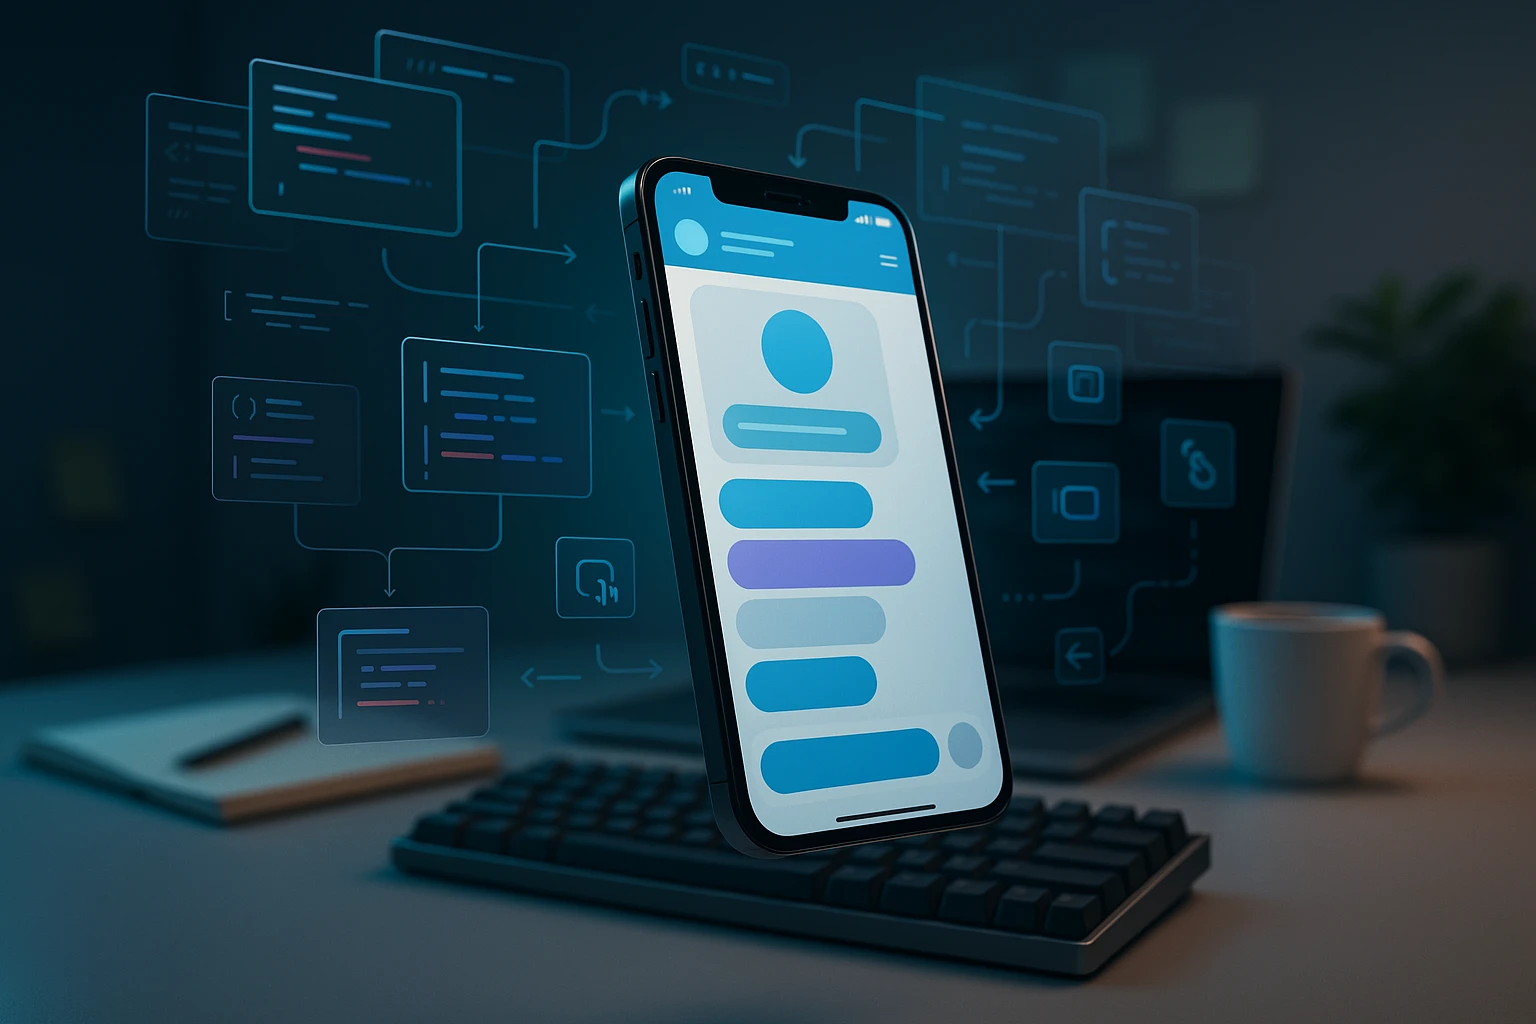
A Telegram Mini App is essentially a web application that runs inside the Telegram messenger, leveraging modern web technologies like HTML5, CSS3, and JavaScript while having access to Telegram's native features through specialized APIs. This hybrid approach combines the accessibility of web applications with the deep integration capabilities of native mobile apps, creating a unique development environment that promises both flexibility and power. Throughout this comprehensive guide, we'll explore multiple perspectives on building these applications, from the technical architecture to practical implementation strategies, ensuring you understand not just the "how" but also the "why" behind each decision.
By reading this guide, you'll gain complete knowledge of the Telegram Mini App development process, including setting up your development environment, understanding the Bot API and WebApp API, implementing authentication and payment systems, optimizing performance, and deploying your application to production. Whether you're a seasoned developer looking to expand into the Telegram ecosystem or a newcomer eager to build your first mini app, this resource will provide you with actionable insights, practical code examples, and strategic considerations that will accelerate your development journey and help you create applications that users will love.
Understanding the Telegram Mini App Architecture
Before diving into the actual development process, it's crucial to understand the fundamental architecture that powers Telegram Mini Apps. These applications operate within a sophisticated framework that bridges web technologies with native Telegram functionality. The architecture consists of several key components: the frontend web application, the Telegram Bot API, the WebApp API, and your backend server infrastructure. Each component plays a specific role in creating a cohesive user experience.
The frontend of your mini app is built using standard web technologies and runs inside Telegram's WebView component. This WebView acts as a container that renders your HTML, CSS, and JavaScript while providing a JavaScript bridge to access Telegram-specific features. The beauty of this approach lies in its simplicity—you can use any frontend framework or library you prefer, whether that's React, Vue, Angular, or vanilla JavaScript. The WebView handles all the rendering while maintaining a native feel through Telegram's interface guidelines and design patterns.
"The power of Telegram Mini Apps lies not in replacing native applications but in removing friction from the user experience while maintaining full functionality."
The backend architecture requires careful consideration of security, scalability, and integration with Telegram's services. Your server needs to communicate with Telegram's Bot API to handle user authentication, process commands, and manage data. The Bot API serves as the intermediary between your application and Telegram's infrastructure, providing endpoints for sending messages, handling callbacks, and managing user interactions. Understanding this communication flow is essential for building robust applications that can handle real-world usage patterns.
Core Components and Their Interactions
The interaction between components follows a specific pattern that ensures security and reliability. When a user launches your mini app, Telegram generates initialization data containing user information and authentication parameters. This data is cryptographically signed to prevent tampering and must be validated on your backend server. The validation process ensures that requests are genuinely coming from Telegram users and haven't been intercepted or modified by malicious actors.
| Component | Primary Function | Technology Stack | Security Considerations |
|---|---|---|---|
| Frontend WebApp | User interface and client-side logic | HTML5, CSS3, JavaScript, React/Vue/Angular | Input validation, XSS prevention, secure data handling |
| Telegram WebView | Container and JavaScript bridge | Native Telegram implementation | Sandboxed environment, controlled API access |
| Bot API | Communication with Telegram servers | RESTful API, HTTPS | Token authentication, rate limiting |
| Backend Server | Business logic and data management | Node.js, Python, Go, Java, etc. | Authentication validation, database security, API security |
| Database | Persistent data storage | PostgreSQL, MongoDB, Redis | Encryption at rest, access control, backup strategies |
Setting Up Your Development Environment
Creating a proper development environment is the foundation of successful mini app development. The process begins with obtaining a bot token from BotFather, Telegram's official bot for creating and managing bots. This token serves as your application's identity and authentication credential when communicating with Telegram's servers. Open Telegram, search for @BotFather, and use the /newbot command to create your bot. BotFather will guide you through naming your bot and choosing a username, after which you'll receive a unique token that must be kept secure.
Once you have your bot token, you need to configure your development tools and dependencies. For a modern development workflow, you'll want to set up a local development server with hot reloading capabilities, allowing you to see changes instantly without manual refreshes. Most developers choose Node.js as their runtime environment due to its excellent ecosystem and JavaScript compatibility, but Python, Go, and other languages work equally well for backend development.
Essential Tools and Technologies
Your development toolkit should include several essential components. First, you'll need a code editor or IDE configured for web development—Visual Studio Code, WebStorm, or Sublime Text are popular choices. Install Node.js and npm (or yarn) for package management and build tools. You'll also need a local HTTPS setup because Telegram requires secure connections for mini apps, even during development. Tools like ngrok or localtunnel can expose your local development server to the internet with HTTPS, enabling you to test your app directly in Telegram.
🔧 Install a modern code editor with JavaScript/TypeScript support
🔧 Set up Node.js version 16 or higher for optimal compatibility
🔧 Configure a package manager for dependency management
🔧 Install ngrok or similar tunneling service for HTTPS testing
🔧 Set up version control with Git for code management
The development workflow typically involves running your frontend application on a local development server while simultaneously running your backend API server. Both need to be accessible via HTTPS for Telegram integration to work properly. Modern frontend frameworks like React or Vue come with built-in development servers that support hot module replacement, making the development process smooth and efficient. Your backend server should implement CORS policies that allow requests from Telegram's domain while maintaining security.
"Proper environment setup isn't just about having the right tools—it's about creating a workflow that minimizes friction and maximizes productivity throughout the development cycle."
Creating Your First Mini App
With your environment ready, you can begin building your first mini app. The process starts with creating a basic HTML file that will serve as your application's entry point. This file needs to include the Telegram WebApp JavaScript library, which provides the interface for communicating with Telegram's native features. The library is loaded from Telegram's CDN and automatically handles initialization and communication with the parent Telegram application.
Your initial HTML structure should be minimal but complete, including proper meta tags for mobile responsiveness and the Telegram WebApp script. The viewport meta tag is particularly important as it ensures your app displays correctly on various mobile devices. Once the page loads, you'll initialize the Telegram WebApp object and configure basic settings like theme colors, button visibility, and header behavior. This initialization process establishes the connection between your web application and Telegram's native interface.
Basic Implementation Structure
The fundamental structure of a mini app consists of three layers: presentation (HTML), styling (CSS), and behavior (JavaScript). Your HTML provides the semantic structure of your application, defining the layout and content areas. CSS handles the visual presentation, and it's crucial to implement responsive design principles since users will access your app on devices with varying screen sizes. The JavaScript layer manages interactivity, data fetching, and communication with both your backend server and Telegram's APIs.
<!DOCTYPE html>
<html lang="en">
<head>
    <meta charset="UTF-8">
    <meta name="viewport" content="width=device-width, initial-scale=1.0, maximum-scale=1.0, user-scalable=no">
    <title>My Telegram Mini App</title>
    <script src="https://telegram.org/js/telegram-web-app.js"></script>
    <style>
        body {
            margin: 0;
            padding: 16px;
            font-family: -apple-system, BlinkMacSystemFont, 'Segoe UI', Roboto, sans-serif;
            background-color: var(--tg-theme-bg-color);
            color: var(--tg-theme-text-color);
        }
        .container {
            max-width: 600px;
            margin: 0 auto;
        }
    </style>
</head>
<body>
    <div class="container">
        <h1>Welcome to My Mini App</h1>
        <p id="user-info">Loading user information...</p>
        <button id="action-button">Click Me</button>
    </div>

    <script>
        let tg = window.Telegram.WebApp;
        tg.expand();

        document.getElementById('user-info').textContent =
            `Hello, ${tg.initDataUnsafe.user.first_name}!`;

        tg.MainButton.text = "Send Data";
        tg.MainButton.show();
        tg.MainButton.onClick(() => {
            tg.sendData("User clicked the button");
        });
    </script>
</body>
</html>
This basic structure demonstrates several key concepts. The Telegram WebApp object (accessed via window.Telegram.WebApp) provides access to all Telegram-specific functionality. The expand() method ensures your app takes up the full available screen space. The initDataUnsafe property contains user information that can be displayed immediately, though for sensitive operations, you should always validate this data on your backend server. The MainButton is a special UI element that appears at the bottom of the screen and follows Telegram's design guidelines.
Implementing Authentication and Security
Security is paramount when building mini apps because they handle user data and potentially sensitive operations. Telegram provides a robust authentication mechanism based on cryptographic signatures that verify the authenticity of user data. When your mini app launches, Telegram generates initialization data that includes user information, authentication timestamp, and a hash signature. This signature must be validated on your backend server to ensure the data hasn't been tampered with and genuinely comes from Telegram.
The validation process involves reconstructing the data string in a specific format, computing an HMAC-SHA256 hash using your bot token as the secret key, and comparing the computed hash with the one provided by Telegram. If the hashes match, you can trust that the data is authentic and hasn't been modified. This validation should occur on every request that requires authentication, not just during the initial app launch. Implementing this correctly protects your application from unauthorized access and data manipulation.
"Security in mini apps isn't optional—it's the foundation upon which user trust and application integrity are built."
Backend Authentication Implementation
Your backend server needs to implement a robust authentication system that validates Telegram's initialization data. This typically involves creating a middleware function that intercepts incoming requests, extracts the initialization data, performs the cryptographic validation, and either allows the request to proceed or rejects it with an appropriate error. The validation logic must be implemented carefully to avoid timing attacks and other security vulnerabilities.
const crypto = require('crypto');

function validateTelegramWebAppData(telegramInitData, botToken) {
    const initData = new URLSearchParams(telegramInitData);
    const hash = initData.get('hash');
    initData.delete('hash');

    const dataCheckString = Array.from(initData.entries())
        .sort(([a], [b]) => a.localeCompare(b))
        .map(([key, value]) => `${key}=${value}`)
        .join('\n');

    const secretKey = crypto
        .createHmac('sha256', 'WebAppData')
        .update(botToken)
        .digest();

    const calculatedHash = crypto
        .createHmac('sha256', secretKey)
        .update(dataCheckString)
        .digest('hex');

    return calculatedHash === hash;
}

// Express middleware example
function authenticateTelegramUser(req, res, next) {
    const initData = req.headers['x-telegram-init-data'];

    if (!initData) {
        return res.status(401).json({ error: 'Missing authentication data' });
    }

    if (!validateTelegramWebAppData(initData, process.env.BOT_TOKEN)) {
        return res.status(401).json({ error: 'Invalid authentication data' });
    }

    const userData = Object.fromEntries(new URLSearchParams(initData));
    req.telegramUser = JSON.parse(userData.user);
    next();
}
Working with Telegram WebApp API
The Telegram WebApp API provides a comprehensive set of methods and properties for interacting with Telegram's native features. Understanding these APIs is essential for creating mini apps that feel integrated and natural within the Telegram ecosystem. The API is divided into several categories: user interface controls, data exchange, device features, and utility functions. Each category serves specific purposes and enables different types of functionality.
User interface controls include the MainButton, BackButton, and SettingsButton, which provide standardized ways to implement common actions. These buttons automatically adapt to Telegram's current theme and follow platform-specific design guidelines, ensuring your app looks native on both iOS and Android. The MainButton is particularly versatile—it can be shown or hidden dynamically, its text and color can be customized, and it can trigger different actions based on your app's current state.
Essential WebApp Methods and Properties
The WebApp object exposes numerous methods for controlling your app's behavior and appearance. The expand() method maximizes your app to fill the available screen space, while setHeaderColor() and setBackgroundColor() allow you to customize the visual appearance to match your brand. The ready() method signals to Telegram that your app has finished loading and is ready for interaction, which can improve perceived performance by showing your interface as soon as possible.
| API Method/Property | Purpose | Example Usage |
|---|---|---|
| initData | Raw initialization data string | Send to backend for validation |
| initDataUnsafe | Parsed user and app data | Quick access to user info (client-side only) |
| MainButton | Primary action button | Submit forms, confirm actions, navigate |
| BackButton | Navigation back button | Return to previous screen or close app |
| HapticFeedback | Tactile feedback on actions | Provide physical feedback for interactions |
| showPopup() | Display native popup dialogs | Confirmations, alerts, simple choices |
| showAlert() | Show alert message | Error messages, notifications |
| showConfirm() | Show confirmation dialog | Destructive actions, important decisions |
| requestContact() | Request user's phone number | User registration, verification |
| openLink() | Open external URLs | Navigate to websites, documentation |
🎯 Always call tg.ready() after your app finishes initial loading
🎯 Use tg.expand() to maximize screen real estate
🎯 Implement tg.onEvent('viewportChanged') for responsive layouts
🎯 Leverage tg.HapticFeedback for better user experience
🎯 Use tg.CloudStorage for persisting user preferences
Building the User Interface
Creating an effective user interface for Telegram Mini Apps requires balancing functionality with simplicity. Users expect mini apps to be lightweight and fast, so your interface should prioritize essential features and minimize unnecessary complexity. The design should feel at home within Telegram's ecosystem, which means adopting similar visual patterns, respecting the platform's theme system, and ensuring smooth animations and transitions.
Telegram provides CSS variables that automatically adapt to the user's chosen theme (light or dark mode). Using these variables ensures your app looks consistent with the rest of Telegram and respects user preferences without requiring manual theme switching logic. Variables like --tg-theme-bg-color, --tg-theme-text-color, and --tg-theme-button-color provide access to the current theme's color palette, enabling seamless integration with Telegram's appearance.
"The best mini app interfaces are invisible—they feel like a natural extension of Telegram rather than a separate application."
Responsive Design Considerations
Mobile-first design is crucial for mini apps since the vast majority of users will access your application from smartphones. Your layout should adapt gracefully to different screen sizes, orientations, and device capabilities. CSS Grid and Flexbox are excellent tools for creating flexible layouts that respond to viewport changes. Remember that users might have accessibility features enabled, such as larger text sizes, so your design should accommodate these preferences without breaking.
Touch targets need to be sized appropriately for finger interaction—a minimum of 44x44 pixels is recommended for buttons and interactive elements. Spacing between interactive elements should be sufficient to prevent accidental taps. Consider the position of the MainButton at the bottom of the screen when designing your layout; important content shouldn't be hidden behind it. The BackButton, when visible, appears in the top-left corner and should be accounted for in your header design.
/* Theme-aware styling using Telegram CSS variables */
:root {
    --safe-area-inset-top: env(safe-area-inset-top);
    --safe-area-inset-bottom: env(safe-area-inset-bottom);
}

body {
    background-color: var(--tg-theme-bg-color);
    color: var(--tg-theme-text-color);
    padding-top: var(--safe-area-inset-top);
    padding-bottom: var(--safe-area-inset-bottom);
}

.button {
    background-color: var(--tg-theme-button-color);
    color: var(--tg-theme-button-text-color);
    border: none;
    border-radius: 8px;
    padding: 12px 24px;
    font-size: 16px;
    min-height: 44px;
    cursor: pointer;
    transition: opacity 0.2s;
}

.button:active {
    opacity: 0.7;
}

.card {
    background-color: var(--tg-theme-secondary-bg-color);
    border-radius: 12px;
    padding: 16px;
    margin-bottom: 12px;
}

.link {
    color: var(--tg-theme-link-color);
    text-decoration: none;
}

/* Responsive grid layout */
.grid {
    display: grid;
    grid-template-columns: repeat(auto-fit, minmax(280px, 1fr));
    gap: 16px;
    padding: 16px;
}
Implementing Data Persistence
Mini apps need reliable data storage mechanisms to maintain state, save user preferences, and cache information for offline access. Telegram provides CloudStorage, a simple key-value storage system that persists data across sessions and devices. This storage is associated with the user and your bot, making it perfect for storing user-specific settings, preferences, and small amounts of application data. CloudStorage has a limit of 1024 keys with each value up to 4096 bytes, which is sufficient for most configuration needs.
For more complex data requirements, you'll need to implement your own backend database. The choice of database technology depends on your application's needs. Relational databases like PostgreSQL are excellent for structured data with complex relationships, while NoSQL databases like MongoDB offer flexibility for document-based storage. Redis can serve as both a cache layer and a fast key-value store for session data. Your database architecture should consider scalability, backup strategies, and data security from the outset.
Using CloudStorage Effectively
CloudStorage operations are asynchronous and use callbacks to handle results. You can store, retrieve, and delete data using simple API calls. The storage is scoped to your bot and the current user, so different users have separate storage spaces. This makes CloudStorage ideal for user preferences, UI state, and other personalized data that should persist across sessions but doesn't need to be shared between users.
// CloudStorage wrapper with Promise support
class TelegramStorage {
    static setItem(key, value) {
        return new Promise((resolve, reject) => {
            window.Telegram.WebApp.CloudStorage.setItem(key, value, (error, success) => {
                if (error) reject(error);
                else resolve(success);
            });
        });
    }

    static getItem(key) {
        return new Promise((resolve, reject) => {
            window.Telegram.WebApp.CloudStorage.getItem(key, (error, value) => {
                if (error) reject(error);
                else resolve(value);
            });
        });
    }

    static removeItem(key) {
        return new Promise((resolve, reject) => {
            window.Telegram.WebApp.CloudStorage.removeItem(key, (error, success) => {
                if (error) reject(error);
                else resolve(success);
            });
        });
    }

    static getKeys() {
        return new Promise((resolve, reject) => {
            window.Telegram.WebApp.CloudStorage.getKeys((error, keys) => {
                if (error) reject(error);
                else resolve(keys);
            });
        });
    }
}

// Usage example
async function saveUserPreferences(preferences) {
    try {
        await TelegramStorage.setItem('user_prefs', JSON.stringify(preferences));
        console.log('Preferences saved successfully');
    } catch (error) {
        console.error('Failed to save preferences:', error);
    }
}

async function loadUserPreferences() {
    try {
        const data = await TelegramStorage.getItem('user_prefs');
        return data ? JSON.parse(data) : null;
    } catch (error) {
        console.error('Failed to load preferences:', error);
        return null;
    }
}
Integrating Payment Systems
Telegram Mini Apps support seamless in-app payments through Telegram's payment system, which integrates with multiple payment providers. This functionality enables you to sell digital goods, services, or subscriptions directly within your mini app without redirecting users to external payment pages. The payment flow is handled entirely within Telegram, providing a smooth user experience and reducing friction in the purchase process.
Implementing payments requires configuring a payment provider through BotFather and handling the payment flow in your application. Telegram supports various payment providers including Stripe, YooMoney, and others depending on your region. The payment process involves creating an invoice with product details and prices, sending it to the user, and handling the payment callback when the transaction completes. All sensitive payment information is processed by Telegram and the payment provider, so your application never handles credit card details directly.
"Integrated payments in mini apps remove the complexity of traditional e-commerce while maintaining security and compliance with payment industry standards."
Payment Flow Implementation
The payment process begins with your bot sending an invoice to the user. This invoice contains product information, pricing, and payment provider details. Users can review the invoice within Telegram and complete the payment using their saved payment methods or by entering new payment information. Once the payment is processed, Telegram sends a callback to your bot with the transaction details, allowing you to fulfill the order or grant access to purchased features.
// Backend payment invoice creation (Node.js example)
const TelegramBot = require('node-telegram-bot-api');
const bot = new TelegramBot(process.env.BOT_TOKEN);

async function createPaymentInvoice(chatId, productDetails) {
    const invoice = {
        title: productDetails.title,
        description: productDetails.description,
        payload: JSON.stringify({
            productId: productDetails.id,
            userId: chatId
        }),
        provider_token: process.env.PAYMENT_PROVIDER_TOKEN,
        currency: 'USD',
        prices: [
            {
                label: productDetails.title,
                amount: productDetails.price * 100 // Amount in cents
            }
        ],
        photo_url: productDetails.imageUrl,
        photo_width: 640,
        photo_height: 480,
        need_name: true,
        need_phone_number: false,
        need_email: true,
        need_shipping_address: false,
        is_flexible: false
    };

    try {
        await bot.sendInvoice(chatId, invoice.title, invoice.description,
            invoice.payload, invoice.provider_token, invoice.currency,
            invoice.prices, {
                photo_url: invoice.photo_url,
                photo_width: invoice.photo_width,
                photo_height: invoice.photo_height,
                need_name: invoice.need_name,
                need_email: invoice.need_email
            });
        return { success: true };
    } catch (error) {
        console.error('Payment invoice creation failed:', error);
        return { success: false, error: error.message };
    }
}

// Handle successful payment
bot.on('pre_checkout_query', async (query) => {
    // Validate the order before confirming
    const payload = JSON.parse(query.invoice_payload);
    const isValid = await validateOrder(payload);

    if (isValid) {
        await bot.answerPreCheckoutQuery(query.id, true);
    } else {
        await bot.answerPreCheckoutQuery(query.id, false, {
            error_message: 'Order validation failed'
        });
    }
});

bot.on('successful_payment', async (msg) => {
    const payment = msg.successful_payment;
    const payload = JSON.parse(payment.invoice_payload);

    // Fulfill the order
    await fulfillOrder(payload.userId, payload.productId, payment);

    // Send confirmation message
    await bot.sendMessage(msg.chat.id,
        'Thank you for your purchase! Your order has been processed.');
});
Optimizing Performance and Loading Speed
Performance optimization is critical for mini apps because users expect instant loading and smooth interactions. Slow or unresponsive applications lead to poor user experiences and high abandonment rates. The optimization process encompasses multiple areas: reducing initial load time, minimizing JavaScript bundle size, optimizing images and assets, implementing efficient data fetching strategies, and ensuring smooth animations and transitions.
Initial load time is particularly important because it directly impacts user perception of your app's quality. Users should see meaningful content within the first second of launching your mini app. This requires careful attention to resource loading priorities, code splitting, and progressive enhancement techniques. Critical CSS should be inlined in the HTML head, while non-critical styles can be loaded asynchronously. JavaScript should be deferred or loaded asynchronously when possible, and large libraries should be evaluated for necessity.
Code Splitting and Lazy Loading
Modern bundlers like Webpack, Rollup, or Vite support code splitting, which divides your application into smaller chunks that can be loaded on demand. This technique significantly reduces the initial bundle size, allowing your app to start faster. Route-based code splitting is particularly effective—each route or major feature can be loaded only when needed, rather than loading the entire application upfront.
Images and media files often constitute the largest portion of an application's payload. Implementing lazy loading for images ensures that only visible images are loaded initially, with additional images loading as users scroll. Modern image formats like WebP offer superior compression compared to JPEG and PNG, reducing file sizes without sacrificing quality. Consider using responsive images with the srcset attribute to serve appropriately sized images based on device screen size and resolution.
// Lazy loading implementation for images
class LazyImageLoader {
    constructor() {
        this.images = document.querySelectorAll('img[data-src]');
        this.observer = new IntersectionObserver(
            this.handleIntersection.bind(this),
            { rootMargin: '50px' }
        );
        this.init();
    }

    init() {
        this.images.forEach(img => this.observer.observe(img));
    }

    handleIntersection(entries) {
        entries.forEach(entry => {
            if (entry.isIntersecting) {
                const img = entry.target;
                img.src = img.dataset.src;
                img.removeAttribute('data-src');
                this.observer.unobserve(img);
            }
        });
    }
}

// Initialize lazy loading when DOM is ready
document.addEventListener('DOMContentLoaded', () => {
    new LazyImageLoader();
});

// Debounced scroll handler for performance
function debounce(func, wait) {
    let timeout;
    return function executedFunction(...args) {
        const later = () => {
            clearTimeout(timeout);
            func(...args);
        };
        clearTimeout(timeout);
        timeout = setTimeout(later, wait);
    };
}

// Efficient data fetching with caching
class DataCache {
    constructor(ttl = 300000) { // 5 minutes default TTL
        this.cache = new Map();
        this.ttl = ttl;
    }

    set(key, value) {
        this.cache.set(key, {
            value,
            timestamp: Date.now()
        });
    }

    get(key) {
        const item = this.cache.get(key);
        if (!item) return null;

        if (Date.now() - item.timestamp > this.ttl) {
            this.cache.delete(key);
            return null;
        }

        return item.value;
    }

    clear() {
        this.cache.clear();
    }
}

const dataCache = new DataCache();
Testing and Debugging Your Mini App
Thorough testing is essential for delivering a reliable mini app that works correctly across different devices, network conditions, and usage scenarios. Testing should cover functionality, performance, security, and user experience. The testing process begins during development and continues through staging and production deployment. Implementing a comprehensive testing strategy helps identify and fix issues before they affect users.
Telegram provides several tools for testing mini apps during development. You can use Telegram's test environment to experiment with features without affecting production users. The Web version of Telegram (web.telegram.org) includes developer tools that allow you to inspect your mini app's HTML, CSS, and JavaScript, set breakpoints, and monitor network requests. Mobile debugging can be accomplished using remote debugging features available in Chrome DevTools for Android and Safari Web Inspector for iOS.
"Effective testing isn't just about finding bugs—it's about understanding how users interact with your application under real-world conditions and ensuring every scenario is handled gracefully."
Testing Strategies and Tools
Unit testing focuses on individual functions and components, ensuring they work correctly in isolation. Integration testing verifies that different parts of your application work together properly. End-to-end testing simulates real user interactions, testing complete workflows from start to finish. Each testing level serves a specific purpose and catches different types of issues. Automated testing frameworks like Jest, Mocha, or Cypress can help maintain code quality as your application grows.
🧪 Test your app on both iOS and Android devices
🧪 Verify functionality in both light and dark themes
🧪 Test with different network speeds and offline scenarios
🧪 Validate authentication and security measures thoroughly
🧪 Monitor performance metrics and loading times
Deploying Your Mini App to Production
Deployment involves making your mini app available to users through proper hosting infrastructure and configuration. Your frontend application needs to be hosted on a web server with HTTPS support, as Telegram requires secure connections for mini apps. The backend API server must also be deployed with appropriate security measures, scalability considerations, and monitoring capabilities. Choosing the right hosting solution depends on your expected traffic, budget, and technical requirements.
Popular hosting options include cloud platforms like AWS, Google Cloud Platform, Microsoft Azure, or simpler solutions like Vercel, Netlify, or Heroku. These platforms offer different trade-offs between control, ease of use, and cost. Static site hosting services work well for frontend applications, while backend services require more sophisticated hosting with database support, environment variable management, and scaling capabilities. Consider using a Content Delivery Network (CDN) to serve static assets quickly to users worldwide.
Deployment Checklist and Best Practices
Before deploying to production, ensure all environment variables are properly configured, including your bot token, API keys, database credentials, and payment provider tokens. These sensitive values should never be committed to version control. Implement proper error logging and monitoring to track issues in production. Set up automated backups for your database and critical data. Configure HTTPS certificates—Let's Encrypt provides free SSL certificates that are widely trusted.
Once deployed, you need to register your mini app URL with BotFather. Use the /newapp command to create a new mini app entry, providing the app name, description, and URL where your application is hosted. You can also set a short name for easy access and upload an app icon. After registration, users can launch your mini app through the bot menu, inline buttons, or direct links. Monitor your application's performance and user feedback after launch, making adjustments as needed.
// Production-ready Express server configuration
const express = require('express');
const helmet = require('helmet');
const compression = require('compression');
const rateLimit = require('express-rate-limit');
const cors = require('cors');

const app = express();

// Security middleware
app.use(helmet({
    contentSecurityPolicy: {
        directives: {
            defaultSrc: ["'self'"],
            scriptSrc: ["'self'", "'unsafe-inline'", "https://telegram.org"],
            styleSrc: ["'self'", "'unsafe-inline'"],
            imgSrc: ["'self'", "data:", "https:"],
            connectSrc: ["'self'", "https://api.telegram.org"]
        }
    }
}));

// Compression for responses
app.use(compression());

// CORS configuration
app.use(cors({
    origin: ['https://web.telegram.org', 'https://telegram.org'],
    credentials: true
}));

// Rate limiting
const limiter = rateLimit({
    windowMs: 15 * 60 * 1000, // 15 minutes
    max: 100 // limit each IP to 100 requests per windowMs
});
app.use('/api/', limiter);

// Body parsing
app.use(express.json({ limit: '10mb' }));
app.use(express.urlencoded({ extended: true, limit: '10mb' }));

// Health check endpoint
app.get('/health', (req, res) => {
    res.status(200).json({ status: 'healthy', timestamp: Date.now() });
});

// Error handling middleware
app.use((err, req, res, next) => {
    console.error('Error:', err);
    res.status(err.status || 500).json({
        error: process.env.NODE_ENV === 'production'
            ? 'Internal server error'
            : err.message
    });
});

const PORT = process.env.PORT || 3000;
app.listen(PORT, () => {
    console.log(`Server running on port ${PORT}`);
});
Advanced Features and Integrations
Beyond basic functionality, Telegram Mini Apps support numerous advanced features that can enhance user experience and expand your application's capabilities. These include inline mode for quick interactions, bot commands for direct actions, web app buttons in chat interfaces, and integration with Telegram's gaming platform. Understanding these advanced features allows you to create more sophisticated and engaging applications.
Inline mode enables users to interact with your mini app directly from any chat by typing your bot's username followed by a query. This feature is particularly useful for apps that provide quick lookups, conversions, or content sharing. Web app buttons can be attached to messages, allowing users to launch your mini app with specific parameters or context. This creates seamless transitions between chat conversations and your application, maintaining context throughout the user journey.
Implementing Inline Mode
Inline mode requires handling inline queries in your bot code and returning appropriate results. Each result can include a button that launches your mini app with specific parameters, allowing users to complete actions without leaving their current chat. This functionality is perfect for productivity tools, games, or services that benefit from quick access within conversations.
// Inline query handler example
bot.on('inline_query', async (query) => {
    const searchTerm = query.query;
    const results = await searchDatabase(searchTerm);

    const inlineResults = results.map((item, index) => ({
        type: 'article',
        id: String(index),
        title: item.title,
        description: item.description,
        thumb_url: item.thumbnailUrl,
        reply_markup: {
            inline_keyboard: [[
                {
                    text: 'Open in Mini App',
                    web_app: {
                        url: `https://yourminiapp.com?item=${item.id}`
                    }
                }
            ]]
        },
        input_message_content: {
            message_text: item.shareText
        }
    }));

    await bot.answerInlineQuery(query.id, inlineResults, {
        cache_time: 300,
        is_personal: true
    });
});

// Web App button in regular messages
async function sendMessageWithWebAppButton(chatId, text, appUrl) {
    await bot.sendMessage(chatId, text, {
        reply_markup: {
            inline_keyboard: [[
                {
                    text: 'Open App',
                    web_app: { url: appUrl }
                }
            ]]
        }
    });
}
Monitoring and Analytics
Implementing comprehensive monitoring and analytics is crucial for understanding how users interact with your mini app, identifying performance bottlenecks, and making data-driven decisions for improvements. Analytics help you track user engagement, conversion rates, feature usage, and technical metrics like loading times and error rates. This data provides insights into what's working well and what needs improvement.
Several approaches exist for implementing analytics in mini apps. You can use traditional web analytics platforms like Google Analytics, implement custom analytics tracking through your backend, or use specialized platforms designed for mobile and web applications. The key is tracking meaningful metrics that align with your application's goals. User acquisition metrics show how people discover your app, engagement metrics reveal how they use it, and retention metrics indicate whether they return over time.
Key Metrics to Track
Focus on metrics that provide actionable insights. Daily and monthly active users indicate overall engagement levels. Session duration and frequency reveal how deeply users engage with your app. Conversion rates for key actions (purchases, registrations, feature usage) show how effectively your app achieves its goals. Technical metrics like page load time, API response times, and error rates help identify performance issues before they significantly impact users.
// Custom analytics tracking implementation
class AnalyticsTracker {
    constructor(apiEndpoint) {
        this.apiEndpoint = apiEndpoint;
        this.sessionId = this.generateSessionId();
        this.events = [];
        this.flushInterval = 30000; // 30 seconds
        this.startAutoFlush();
    }

    generateSessionId() {
        return `${Date.now()}-${Math.random().toString(36).substr(2, 9)}`;
    }

    track(eventName, properties = {}) {
        const event = {
            name: eventName,
            properties: {
                ...properties,
                timestamp: Date.now(),
                sessionId: this.sessionId,
                userAgent: navigator.userAgent,
                url: window.location.href
            }
        };

        this.events.push(event);

        // Flush immediately for critical events
        if (eventName === 'error' || eventName === 'purchase') {
            this.flush();
        }
    }

    async flush() {
        if (this.events.length === 0) return;

        const eventsToSend = [...this.events];
        this.events = [];

        try {
            await fetch(this.apiEndpoint, {
                method: 'POST',
                headers: { 'Content-Type': 'application/json' },
                body: JSON.stringify({ events: eventsToSend })
            });
        } catch (error) {
            console.error('Analytics flush failed:', error);
            // Re-add events to queue
            this.events.unshift(...eventsToSend);
        }
    }

    startAutoFlush() {
        setInterval(() => this.flush(), this.flushInterval);

        // Flush on page unload
        window.addEventListener('beforeunload', () => this.flush());
    }
}

// Usage
const analytics = new AnalyticsTracker('/api/analytics');

// Track page views
analytics.track('page_view', {
    page: 'home'
});

// Track user actions
analytics.track('button_click', {
    buttonId: 'purchase',
    value: 29.99
});

// Track errors
window.addEventListener('error', (event) => {
    analytics.track('error', {
        message: event.message,
        filename: event.filename,
        line: event.lineno,
        column: event.colno
    });
});
Maintaining and Updating Your Mini App
Ongoing maintenance is essential for keeping your mini app secure, performant, and relevant to users. Regular updates should address bug fixes, security patches, performance improvements, and new features based on user feedback. Establishing a maintenance schedule and update process ensures your app remains reliable and continues meeting user needs over time.
Version control and deployment pipelines facilitate smooth updates. Using Git for version control allows you to track changes, collaborate with team members, and roll back problematic updates if necessary. Implementing continuous integration and continuous deployment (CI/CD) pipelines automates testing and deployment, reducing the risk of human error and enabling faster iteration. Semantic versioning helps communicate the nature of updates to users and other developers.
"A successful mini app is never truly finished—it evolves continuously based on user feedback, technological advances, and changing requirements."
Update Strategies and Best Practices
When releasing updates, consider implementing feature flags that allow you to enable or disable features without deploying new code. This technique enables gradual rollouts, A/B testing, and quick feature toggles if issues arise. Maintain backward compatibility when possible, especially for API endpoints that external systems might depend on. Communicate significant changes to users through in-app notifications or update notes.
Monitor your application closely after deploying updates, watching for increased error rates, performance degradation, or user complaints. Keep detailed changelog documentation to track what changed in each version and why. This documentation helps with troubleshooting issues and provides valuable historical context for future development decisions. Regularly review and update dependencies to incorporate security patches and performance improvements from libraries and frameworks you use.
Frequently Asked Questions
What programming languages can I use to build a Telegram Mini App?
You can use any programming language for the backend (Node.js, Python, Go, Java, PHP, etc.) since it communicates with Telegram via HTTP APIs. The frontend must use web technologies (HTML, CSS, JavaScript) but you can use any framework like React, Vue, Angular, or vanilla JavaScript. The choice depends on your team's expertise and project requirements.
Do users need to install anything to use my Mini App?
No, users don't need to install anything. Mini Apps run directly inside the Telegram application using its built-in WebView component. Users simply click a button or link to launch your app, and it loads instantly within Telegram. This eliminates installation friction and makes your app immediately accessible to all Telegram users.
How do I monetize my Telegram Mini App?
Several monetization options exist: integrated payments through Telegram's payment system for selling products or services, subscription models for premium features, advertising (though it should be implemented carefully to maintain user experience), affiliate marketing, or freemium models where basic features are free and advanced features require payment. Choose the model that aligns best with your app's value proposition and target audience.
What are the size limits and technical constraints for Mini Apps?
While Telegram doesn't enforce strict size limits on your web application, practical constraints exist. CloudStorage allows 1024 keys with values up to 4096 bytes each. Your app should load quickly, ideally under 3 seconds on mobile networks. Keep JavaScript bundles under 1MB compressed for optimal performance. Images and assets should be optimized for mobile delivery. The WebView has memory constraints similar to mobile browsers, so avoid memory-intensive operations.
Can Mini Apps work offline or with poor network connectivity?
Mini Apps can implement offline functionality using service workers, local storage, and caching strategies. The initial load requires network connectivity, but you can cache assets and data for subsequent offline use. Implement progressive enhancement so core features work with limited connectivity, and provide clear feedback when network operations are required. CloudStorage synchronizes when connectivity is restored, making it suitable for offline-first applications.
How do I handle user authentication securely?
Telegram provides built-in authentication through the initialization data that includes user information and a cryptographic signature. Always validate this signature on your backend server using your bot token as the secret key. Never trust client-side data alone for authentication decisions. For sensitive operations, implement additional verification steps like one-time passwords or biometric authentication if needed.