How to Implement Container Registry
Container registries have become the backbone of modern software deployment, serving as critical infrastructure for organizations navigating the complexities of cloud-native architectures. Whether you're a startup building your first microservices application or an enterprise managing thousands of containers, understanding how to properly implement a container registry can mean the difference between seamless deployments and operational chaos. The ability to store, manage, and distribute container images efficiently directly impacts your development velocity, security posture, and overall infrastructure reliability.
A container registry is essentially a specialized storage and distribution system for container images—the packaged applications that run in containerized environments like Docker or Kubernetes. Think of it as a sophisticated library where your application blueprints are cataloged, versioned, and made available to the systems that need them. This implementation involves choosing between public cloud services, private hosted solutions, or hybrid approaches, each offering distinct advantages depending on your security requirements, budget constraints, and technical capabilities.
Throughout this exploration, you'll discover the practical steps required to establish a functional container registry, from initial planning and architecture decisions through security hardening and operational optimization. We'll examine the technical considerations that influence registry selection, walk through detailed implementation procedures for various platforms, and address the common challenges that teams encounter. By the end, you'll possess a comprehensive understanding of not just the "how" but the "why" behind each implementation decision, empowering you to build a registry infrastructure that scales with your organization's needs.
Understanding Container Registry Fundamentals
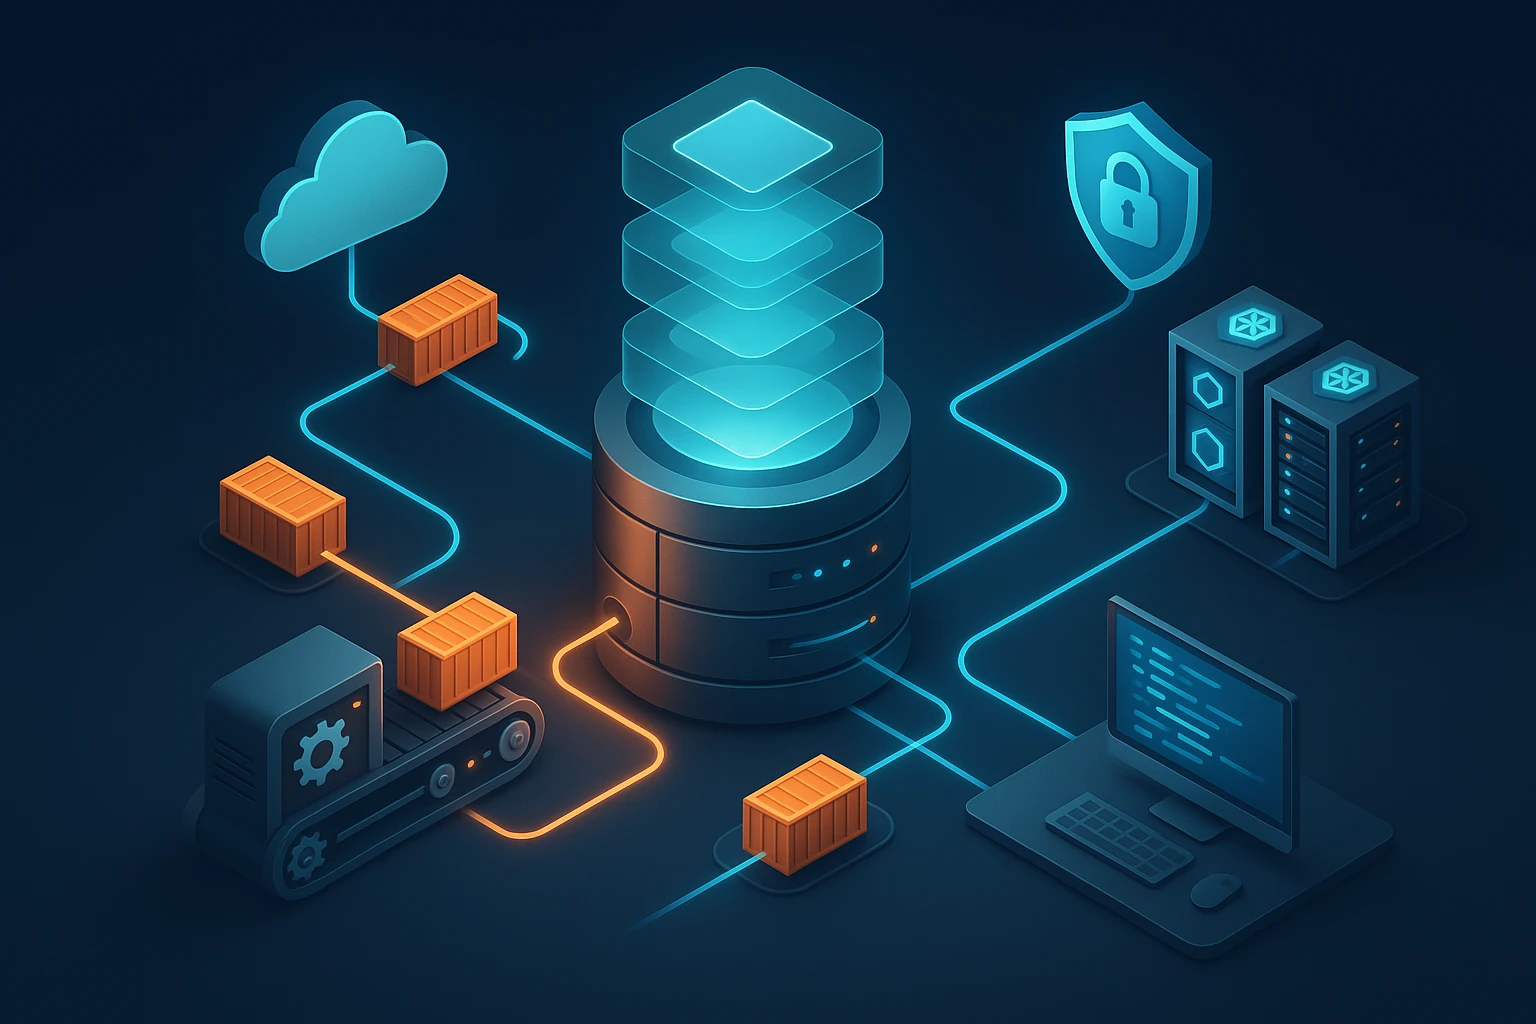
Before diving into implementation specifics, establishing a solid conceptual foundation proves invaluable. Container registries operate on a client-server model where container engines (like Docker or containerd) act as clients, pulling images from the registry server when needed. These images consist of layered filesystems, with each layer representing a set of changes to the previous layer. The registry stores these layers efficiently, using content-addressable storage to avoid duplication and optimize bandwidth usage during pulls and pushes.
The architecture typically includes several key components: a storage backend (which might be local disk, object storage like S3, or specialized storage systems), an authentication and authorization layer controlling access to images, a metadata database tracking image information and tags, and an API layer implementing the OCI Distribution Specification. This specification, maintained by the Open Container Initiative, ensures compatibility across different registry implementations and container runtimes.
"The registry is not just storage—it's the central nervous system of your container infrastructure, coordinating how applications move from development to production."
Registry implementations vary significantly in their feature sets. Basic registries provide simple push and pull functionality, while enterprise solutions add vulnerability scanning, image signing, replication across geographic regions, access control policies, and integration with CI/CD pipelines. Understanding which features your organization requires helps narrow down the implementation approach and prevents over-engineering or under-provisioning your registry infrastructure.
Public vs Private Registry Considerations
The decision between public and private registries represents one of the first forks in your implementation journey. Public registries like Docker Hub, GitHub Container Registry, or Quay.io offer convenience and zero infrastructure overhead—you simply create an account and start pushing images. These services handle all the operational complexity, provide generous free tiers, and offer global content delivery networks ensuring fast image pulls worldwide. For open-source projects, public images, or teams just starting with containers, public registries provide an excellent entry point.
Private registries, whether self-hosted or managed private instances in the cloud, become necessary when dealing with proprietary code, compliance requirements, or specific performance needs. Organizations in regulated industries often cannot store container images containing business logic or customer data on shared public infrastructure. Private registries also offer greater control over image retention policies, custom authentication mechanisms, and network-level access restrictions. The tradeoff involves increased operational responsibility—you'll need to handle updates, backups, scaling, and security patching.
| Aspect | Public Registry | Private Registry |
|---|---|---|
| Setup Complexity | Minimal (account creation only) | Moderate to High (infrastructure required) |
| Operational Overhead | None (fully managed) | Significant (maintenance, updates, monitoring) |
| Cost Structure | Free tier + usage-based pricing | Infrastructure costs + management time |
| Security Control | Limited (shared infrastructure) | Complete (full policy control) |
| Compliance | Depends on provider certifications | Fully customizable to requirements |
| Performance | Variable (shared resources) | Predictable (dedicated resources) |
| Customization | Limited to provider features | Extensive (full configuration access) |
Selecting the Right Registry Solution
The container registry landscape offers numerous options, each with distinct characteristics suited to different use cases. Docker Hub remains the most widely recognized public registry, offering both free public repositories and paid private repositories with features like automated builds and vulnerability scanning. Its ubiquity means most documentation and tutorials reference Docker Hub, reducing the learning curve for teams new to containers. However, rate limiting introduced in recent years has pushed some organizations toward alternatives.
Cloud provider registries integrate seamlessly with their respective ecosystems. Amazon Elastic Container Registry (ECR) works naturally with ECS and EKS, offering IAM-based authentication and automatic integration with AWS security services. Google Container Registry (now Artifact Registry) provides similar tight coupling with GKE and Google Cloud services, while Azure Container Registry integrates with AKS and Azure DevOps. These managed services eliminate operational overhead while providing enterprise features like geo-replication, vulnerability scanning, and fine-grained access control.
Self-Hosted Registry Options
For organizations requiring maximum control or operating in air-gapped environments, self-hosted registries provide complete autonomy. The official Docker Registry (distribution/distribution) offers a lightweight, open-source option that implements the OCI Distribution Specification. It's straightforward to deploy but lacks advanced features like user management or a web interface out of the box. Teams often pair it with additional tools like Portus or Harbor to provide these missing capabilities.
"Choosing a registry isn't about finding the 'best' solution—it's about identifying what aligns with your team's skills, infrastructure, and security requirements."
Harbor has emerged as a popular self-hosted option, offering enterprise features in an open-source package. It includes role-based access control, vulnerability scanning through Trivy or Clair, image signing and verification, replication policies for multi-datacenter deployments, and a comprehensive web UI. Harbor can run on Kubernetes or via Docker Compose, making it flexible for various infrastructure setups. The project's active community and CNCF graduation status provide confidence in its long-term viability.
JFrog Artifactory, while primarily known as a universal artifact repository, provides robust container registry capabilities. Its strength lies in supporting multiple package formats beyond containers—Maven, npm, PyPI, Helm charts—making it attractive for organizations standardizing on a single artifact management platform. Artifactory offers both cloud-hosted and self-managed deployment options, with advanced features like federated repositories, fine-grained permission models, and extensive REST APIs for automation.
Planning Your Registry Architecture
Successful registry implementation begins with thoughtful architectural planning. Start by assessing your organization's container usage patterns: how many images will you store, what's the expected push/pull frequency, how many concurrent users or systems will access the registry, and what geographic distribution do you need? These factors directly influence storage requirements, network bandwidth needs, and whether you'll need replication or caching layers.
Storage backend selection significantly impacts registry performance and reliability. Local disk storage works for small deployments but lacks scalability and introduces a single point of failure. Object storage services like AWS S3, Google Cloud Storage, or Azure Blob Storage provide virtually unlimited capacity, built-in redundancy, and pay-as-you-go pricing. Most modern registries support these backends natively, making them the preferred choice for production deployments. Consider storage costs carefully—container images can accumulate quickly, and without proper lifecycle policies, storage expenses can surprise you.
- Network topology considerations: Position your registry to minimize latency for the systems pulling images most frequently, whether that's your Kubernetes clusters, CI/CD runners, or developer workstations
- High availability requirements: Determine if you need active-passive or active-active configurations, understanding that stateless registry components scale horizontally while the storage backend needs careful consideration
- Disaster recovery planning: Establish backup strategies for both image data and registry metadata, testing restore procedures before you actually need them
- Capacity planning: Calculate storage needs based on average image sizes multiplied by the number of images and versions you'll retain, adding buffer for growth
- Security zones: Decide whether the registry sits in a DMZ accessible from multiple networks or remains within a protected internal network with VPN or bastion access
Authentication and Authorization Strategy
Access control represents a critical architectural decision that's difficult to change later. The simplest approach uses basic authentication with username and password, suitable for small teams but lacking integration with existing identity systems. Token-based authentication provides better security and enables integration with CI/CD systems—the registry issues time-limited tokens that clients present instead of credentials.
Enterprise environments typically require integration with existing identity providers. Most registries support LDAP or Active Directory for user authentication, allowing centralized credential management. OAuth2 and OIDC integration enables single sign-on experiences, letting users authenticate with corporate credentials. Some registries support SAML for integration with enterprise identity platforms like Okta or Azure AD.
"Security isn't a feature you add later—it must be foundational to your registry architecture, influencing every implementation decision from day one."
Authorization policies define who can push or pull specific images. Role-based access control (RBAC) assigns permissions to roles rather than individual users, simplifying management as teams grow. Consider implementing a namespace or project structure that mirrors your organization—separate repositories for different teams, products, or environments. This structure makes it easier to apply appropriate access controls: developers might push to development repositories, while only CI/CD systems can push to production repositories.
Implementing a Cloud-Based Registry
Cloud-managed registries offer the fastest path to a production-ready registry with minimal operational overhead. Let's walk through implementing Amazon ECR as a representative example, though the principles apply broadly to other cloud providers. ECR provides private registries with IAM-based access control, encryption at rest and in transit, vulnerability scanning, and lifecycle policies—all without managing any infrastructure.
Begin by creating a repository in the AWS Console, CLI, or through infrastructure-as-code tools like Terraform or CloudFormation. Each repository holds multiple versions of a single container image, identified by tags. The naming convention matters: use descriptive repository names that reflect the application or service, avoiding generic names that become ambiguous as your registry grows. For example, frontend/web-app or backend/api-service provides clarity about what each repository contains.
Authentication with ECR requires obtaining a temporary authentication token using the AWS CLI. The command aws ecr get-login-password retrieves a token valid for 12 hours, which you pipe to your container engine's login command. For automated systems like CI/CD pipelines, use IAM roles attached to the compute resources (EC2 instances, ECS tasks, or Kubernetes service accounts) to obtain tokens automatically without embedding credentials in code or configuration files.
Configuring Repository Policies
ECR uses two types of policies to control access and image lifecycle. Repository policies define who can perform actions on the repository itself—pushing images, pulling images, or managing the repository. These JSON-based policies follow IAM syntax, allowing fine-grained control. A common pattern grants push access to CI/CD roles while allowing broader pull access to application runtime roles.
Lifecycle policies automatically manage image retention, preventing repository bloat and controlling storage costs. You define rules that expire images based on criteria like age, count, or tag status. For example, retain the last 10 tagged images while deleting untagged images older than 7 days. This automation ensures you keep recent, relevant images while purging old versions that no longer serve a purpose. Test lifecycle policies carefully in non-production repositories first—accidentally deleting images still in use causes deployment failures.
{
  "rules": [
    {
      "rulePriority": 1,
      "description": "Keep last 10 tagged images",
      "selection": {
        "tagStatus": "tagged",
        "countType": "imageCountMoreThan",
        "countNumber": 10
      },
      "action": {
        "type": "expire"
      }
    },
    {
      "rulePriority": 2,
      "description": "Remove untagged images after 7 days",
      "selection": {
        "tagStatus": "untagged",
        "countType": "sinceImagePushed",
        "countUnit": "days",
        "countNumber": 7
      },
      "action": {
        "type": "expire"
      }
    }
  ]
}
Enabling Vulnerability Scanning
ECR offers integrated vulnerability scanning using either basic scanning (powered by Clair) or enhanced scanning (powered by Amazon Inspector). Basic scanning triggers on image push, identifying known vulnerabilities in software packages within the image. Enhanced scanning provides continuous monitoring, detecting vulnerabilities in both OS packages and programming language packages, with findings updated as new vulnerabilities are disclosed.
Enable scanning at the repository level through the console or API. Scan results appear in the ECR console and integrate with AWS Security Hub for centralized security management. Establish policies for handling scan findings: perhaps blocking deployment of images with critical vulnerabilities, requiring security team review for high-severity findings, or automatically creating tickets for remediation. Integrating scan results into your CI/CD pipeline enables shift-left security, catching vulnerabilities before they reach production.
Deploying a Self-Hosted Registry
Self-hosted registries provide maximum control and customization but require more setup and ongoing maintenance. We'll implement Harbor as a comprehensive example, though the principles apply to other self-hosted options. Harbor requires a container runtime (Docker or containerd), a reverse proxy (typically nginx), and a database (PostgreSQL), along with optional components like Redis for caching and Trivy for vulnerability scanning.
The recommended deployment method uses Docker Compose for simpler environments or Helm charts for Kubernetes deployments. Download the Harbor installer from the official GitHub releases, which includes a configuration file where you specify essential parameters: the hostname where Harbor will be accessible, the protocol (HTTP or HTTPS), admin password, database credentials, and storage backend configuration. For production use, always enable HTTPS—Harbor includes built-in certificate management or can integrate with external certificate providers like Let's Encrypt.
Storage Backend Configuration
Harbor supports multiple storage backends through its configurable storage driver. The default filesystem storage works for testing but isn't recommended for production due to scalability and redundancy limitations. For production deployments, configure an object storage backend. With S3-compatible storage, you'll provide the endpoint URL, access credentials, bucket name, and region. Harbor encrypts credentials and stores them securely in its database.
"The storage backend is your registry's foundation—choose wisely based on your durability, scalability, and cost requirements, not just what's easiest to configure initially."
Storage configuration happens in the harbor.yml file before installation. For AWS S3, the configuration looks like this:
storage_service:
  s3:
    accesskey: YOUR_ACCESS_KEY
    secretkey: YOUR_SECRET_KEY
    region: us-east-1
    bucket: harbor-images
    encrypt: true
    secure: true
    v4auth: true
After configuring storage, run the Harbor installer script which pulls necessary container images, generates configuration files, and starts all components. The installation process takes several minutes as it initializes the database, sets up the registry core, and starts supporting services. Once complete, access the Harbor web interface using the hostname you configured, logging in with the admin credentials you specified.
Configuring Projects and Access Control
Harbor organizes images into projects—logical groupings that serve as namespaces for repositories. Create projects for different teams, applications, or environments. Each project has its own access control settings, determining who can push or pull images. Projects can be public (anyone can pull images) or private (requires authentication and authorization).
Harbor's RBAC system includes several predefined roles: Project Admin (full control over the project), Master (can push and pull images), Developer (can pull and push images), Guest (can only pull images), and Limited Guest (can pull images with restrictions). Assign users or groups to projects with appropriate roles. For LDAP integration, configure the LDAP connection in Harbor's system settings, then import LDAP groups and assign them to projects, enabling centralized user management.
| Harbor Role | Permissions | Typical Use Case |
|---|---|---|
| Project Admin | Full project control, user management, configuration | Team leads, project owners |
| Master | Push/pull images, scan images, view logs | Senior developers, CI/CD systems |
| Developer | Push/pull images, view scan results | Development team members |
| Guest | Pull images, view projects | QA teams, read-only access |
| Limited Guest | Pull specific images only | External partners, restricted access |
Integrating with CI/CD Pipelines
Container registries become truly valuable when integrated into automated workflows. Your CI/CD pipeline should build container images, push them to the registry, scan them for vulnerabilities, and deploy them to target environments—all without manual intervention. This integration requires careful credential management, proper tagging strategies, and error handling for various failure scenarios.
Most CI/CD platforms provide native integrations with popular registries. GitHub Actions, for example, can authenticate to GitHub Container Registry using the built-in GITHUB_TOKEN, eliminating the need for separate credentials. For other registries, store authentication credentials as secrets in your CI/CD platform, never committing them to source code repositories. Use service accounts or robot accounts rather than personal user credentials—these accounts have limited permissions and can be rotated without affecting individual users.
Implementing Image Tagging Strategies
Consistent image tagging enables reliable deployments and simplifies troubleshooting. Avoid using only the latest tag in production—it's ambiguous and makes rollbacks difficult. Instead, implement a tagging strategy that includes multiple tags for each image. A common approach tags each image with the git commit SHA (providing precise traceability), the semantic version if applicable (like v1.2.3), and environment-specific tags (like production or staging).
"Tagging isn't just metadata—it's your deployment history, your rollback mechanism, and your audit trail all encoded in a simple string."
In your CI/CD pipeline, build the image once and tag it multiple times before pushing. This approach ensures all tags reference the exact same image layers, avoiding subtle differences between "the same" image with different tags. Here's an example workflow:
- 🔨 Build the image with a temporary tag
- 🏷️ Tag the image with the commit SHA:
myapp:abc123 - 📦 If this is a release, add the version tag:
myapp:v1.2.3 - 🚀 Push all tags to the registry
- ✅ Update deployment manifests to reference the specific SHA tag
Some teams include additional metadata in tags, like the build number, branch name, or timestamp. While informative, overly complex tags become difficult to manage. Strike a balance between information and simplicity—tags should be human-readable and machine-parseable without requiring extensive documentation to understand.
Automated Vulnerability Scanning
Integrating vulnerability scanning into your pipeline prevents insecure images from reaching production. Configure your CI/CD system to trigger scans after pushing images to the registry. Most registries with built-in scanning expose APIs or webhooks that report scan results. Your pipeline can query these results and fail the build if vulnerabilities exceeding a defined severity threshold are found.
For registries without native scanning, integrate standalone tools like Trivy, Grype, or Snyk into your pipeline. These tools scan images locally before pushing or can scan images in the registry. The advantage of scanning before pushing is catching issues earlier, but it requires the scanning tool in your build environment. Scanning after pushing centralizes the scanning infrastructure but means vulnerable images briefly exist in your registry.
Establish clear policies for handling scan findings. Not all vulnerabilities require immediate action—some affect components your application doesn't use, others have no available fix yet. Create a vulnerability management process that triages findings, prioritizes remediation based on exploitability and impact, and tracks exceptions for accepted risks. Document these decisions in your security documentation, providing audit trails for compliance requirements.
Securing Your Container Registry
Registry security extends beyond authentication and authorization. Container images themselves can become attack vectors if not properly secured, and the registry infrastructure requires hardening against various threats. A comprehensive security approach addresses multiple layers: network security, image security, access control, and operational security.
Network-level security starts with limiting registry exposure. For internal-only registries, place them on private networks accessible only through VPN or bastion hosts. If the registry must be internet-accessible (for remote workers or distributed teams), implement IP allowlisting where feasible, restricting access to known corporate IP ranges. Use TLS for all communications—never transmit credentials or images over unencrypted connections. Consider implementing mutual TLS (mTLS) for high-security environments, where both client and server verify each other's certificates.
Image Signing and Verification
Image signing provides cryptographic assurance that images haven't been tampered with and originate from trusted sources. Docker Content Trust (DCT) and Notary provide one implementation, while the newer Sigstore project offers an alternative approach. Signing works by generating a cryptographic signature of the image manifest and storing it separately. When pulling images, the client verifies the signature before running the image, rejecting images with invalid or missing signatures.
"Trust, but verify—image signing transforms your registry from a storage system into a trusted distribution platform where every image carries proof of its origin and integrity."
Implementing image signing requires generating signing keys and configuring your CI/CD pipeline to sign images during the build process. Store private keys securely, preferably in a hardware security module (HSM) or key management service. Distribute public keys to systems that need to verify images. In Kubernetes environments, configure admission controllers like Connaisseur or Kyverno to enforce image signature verification, preventing unsigned images from running in your clusters.
Image signing adds complexity to your workflow but provides significant security benefits. It prevents various attack scenarios: an attacker gaining access to your registry can't inject malicious images because they lack the signing key; if your registry is compromised and images are modified, verification will fail; if someone intercepts images during transfer and modifies them, the signature won't match. These protections make signing essential for high-security or regulated environments.
Implementing Least Privilege Access
Apply the principle of least privilege to registry access: grant users and systems only the minimum permissions necessary for their function. Developers need push access to development repositories but not production repositories. CI/CD systems need push access to specific repositories but shouldn't have administrative privileges. Production deployment systems need pull access but not push access. Kubernetes clusters pulling images need only read permissions.
Regularly audit registry access logs to identify suspicious patterns: unusual access times, access from unexpected locations, or high-volume pulls that might indicate data exfiltration. Many registries provide audit logging features that record all actions—enable these and forward logs to a centralized logging system for analysis and long-term retention. Set up alerts for sensitive operations like repository deletion, permission changes, or failed authentication attempts.
Optimizing Registry Performance
Registry performance affects every container deployment in your infrastructure. Slow image pulls delay application starts, impacting auto-scaling responsiveness and increasing deployment times. Several optimization strategies can dramatically improve registry performance, from caching layers to strategic replication.
Image layer caching provides the most significant performance improvement. Container images consist of layers, and many layers are shared across different images—base OS layers, common language runtimes, and shared libraries. Registries implement layer deduplication, storing each unique layer once regardless of how many images reference it. When pulling an image, if layers already exist locally, the container runtime skips downloading them. Structuring your Dockerfiles to maximize layer reuse amplifies this benefit: place frequently changing instructions (like copying application code) near the end of the Dockerfile, allowing earlier layers (like installing dependencies) to be cached.
Implementing Pull-Through Caching
Pull-through caching registries act as transparent proxies to upstream registries, caching images locally after the first pull. Subsequent pulls of the same image come from the cache, eliminating repeated downloads from the upstream registry. This approach is particularly valuable for public base images from Docker Hub or other public registries—your infrastructure pulls these images frequently, and caching them locally improves speed and reduces bandwidth costs.
Harbor and other enterprise registries support proxy projects that implement pull-through caching. Configure a proxy project pointing to an upstream registry (like Docker Hub), then configure your container runtimes to pull images through your registry instead of directly from the upstream. The first pull retrieves the image from upstream and stores it in your registry; subsequent pulls come from your local cache. This also provides resilience against upstream registry outages or rate limiting.
- Bandwidth reduction: Especially significant in environments with many nodes pulling the same images, like large Kubernetes clusters
- Faster pulls: Local network speeds typically far exceed internet speeds, particularly for large images
- Rate limit mitigation: Avoid hitting Docker Hub's rate limits by caching images locally
- Upstream outage protection: Continue operating even if upstream registries become unavailable
- Cost savings: Reduce data transfer costs in cloud environments where egress charges apply
Geographic Replication
For globally distributed infrastructure, geographic replication places registry replicas in multiple regions, serving images from the nearest location. This reduces latency and improves reliability—if one region becomes unavailable, other regions continue serving images. Cloud-managed registries often provide replication as a managed feature; for self-hosted registries, you'll need to configure replication manually.
Harbor supports replication through policies that define what to replicate (specific projects or repositories), where to replicate (target registry), and when to replicate (on push, on schedule, or manually). Configure replication between registries in different geographic regions, creating a mesh of registries that keep each other synchronized. Be mindful of replication lag—images pushed to one registry take time to replicate to others, so time-critical deployments should target the primary registry.
Monitoring and Maintaining Your Registry
Ongoing monitoring ensures your registry remains healthy, performant, and secure. Establish monitoring for key metrics: storage utilization, API response times, pull/push success rates, authentication failures, and vulnerability scan results. Most registries expose metrics in Prometheus format, making integration with Prometheus and Grafana straightforward for visualization and alerting.
Storage monitoring is particularly critical—running out of storage causes push failures and can corrupt the registry database. Monitor both the storage backend (object storage bucket or disk volume) and the registry's metadata database. Set alerts well before reaching capacity, giving you time to expand storage or implement lifecycle policies to reclaim space. Review storage growth trends to predict when expansion will be necessary.
"A registry that's not monitored is a ticking time bomb—you'll only discover problems when they cause production incidents, which is far too late."
Backup and Disaster Recovery
Registry backups protect against data loss from accidental deletion, corruption, or infrastructure failures. Your backup strategy must cover both image data and metadata. Image data—the actual layers and manifests—typically lives in your storage backend. If using object storage, enable versioning to protect against accidental deletion and configure cross-region replication for geographic redundancy. For filesystem storage, implement regular snapshots or backups to separate storage.
Registry metadata—user accounts, access control policies, vulnerability scan results, audit logs—typically resides in a database. Back up this database regularly using the database's native backup tools. Test backup restoration periodically—untested backups are merely hope, not a recovery plan. Document the restoration procedure step-by-step, ensuring anyone on your team could restore the registry from backup without prior experience.
Consider the recovery time objective (RTO) and recovery point objective (RPO) for your registry. RTO defines how quickly you need to restore service after a failure; RPO defines how much data you can afford to lose. These objectives influence your backup frequency and restoration approach. Critical registries might require hot standby systems that can take over within minutes, while less critical registries might tolerate hours of downtime and daily backups.
Updating and Patching
Registry software requires regular updates for security patches, bug fixes, and new features. Establish a patching schedule that balances security with stability—critical security patches warrant immediate application, while feature updates can follow a more measured approach. Before updating production registries, test updates in a non-production environment to identify any breaking changes or compatibility issues.
For self-hosted registries, updates typically involve pulling new container images or installing new packages, then restarting services. Harbor provides upgrade scripts that handle database migrations and configuration updates. Always backup before upgrading—if the upgrade fails or introduces problems, you can roll back to the previous version. For cloud-managed registries, the provider handles updates, but you should still monitor release notes for changes that might affect your workflows.
Troubleshooting Common Issues
Even well-implemented registries encounter problems. Understanding common issues and their solutions helps you resolve problems quickly. Authentication failures represent the most frequent issue, often caused by expired tokens, incorrect credentials, or misconfigured authentication backends. Check the registry logs for authentication errors, verify credentials are correct, and ensure token generation is working properly. For cloud registries, confirm IAM roles or service accounts have the necessary permissions.
Push and pull failures can result from network issues, storage problems, or client-side configuration errors. Check network connectivity between the client and registry—firewalls, security groups, or network policies might block traffic. Verify storage backend health—full disks or unavailable object storage cause push failures. Examine client-side configuration—incorrect registry URLs, missing certificates, or proxy settings can prevent successful operations.
Debugging Performance Problems
Slow image pulls frustrate developers and delay deployments. Start by identifying where the slowness occurs: is it slow for all images or specific ones? Does slowness affect all clients or just some? Network bandwidth limitations often cause slow pulls—large images take time to transfer over slow connections. Consider implementing pull-through caching or geographic replication to improve pull speeds.
Registry server performance issues might stem from insufficient resources, inefficient storage backends, or database bottlenecks. Monitor server CPU, memory, and disk I/O during pulls—resource saturation indicates you need to scale up or out. Check storage backend performance—slow object storage or disk I/O impacts registry operations. Database performance issues manifest as slow API responses—optimize database queries, add indexes, or scale the database.
Client-side issues include insufficient bandwidth, slow disk I/O, or container runtime problems. Test network speed between the client and registry to identify bandwidth constraints. Monitor disk I/O during pulls—slow disks delay layer extraction. Update container runtimes to recent versions—older versions have performance issues fixed in newer releases.
Advanced Registry Features
Beyond basic push and pull functionality, advanced registry features enable sophisticated workflows and enhanced security. Content trust and image signing, already discussed, provide cryptographic verification of image integrity. Webhook notifications enable event-driven automation—the registry sends HTTP requests to configured endpoints when events occur, like image pushes or vulnerability scan completions. Use webhooks to trigger downstream processes: deploying updated images, sending notifications to chat systems, or updating configuration management databases.
Image promotion workflows move images through environments in a controlled manner. Rather than building separate images for each environment, build once and promote the same image from development through staging to production. This ensures what you test in staging is exactly what runs in production. Implement promotion through tagging—tag the image with dev initially, then add staging after passing development tests, and finally production after staging validation. Access controls prevent direct pushes to production repositories, requiring images to flow through the promotion pipeline.
Multi-Tenancy Considerations
Organizations supporting multiple teams or projects need multi-tenant registry capabilities. Isolation between tenants prevents one team from accessing another team's images while enabling shared infrastructure for efficiency. Harbor's project model provides good multi-tenancy support—each project is isolated with separate access controls, resource quotas, and vulnerability scanning policies. Some registries support namespace-based isolation, where each tenant gets a namespace prefix for their repositories.
Resource quotas prevent individual tenants from consuming excessive storage or bandwidth. Configure per-project or per-namespace quotas limiting the number of repositories, total storage, or number of images. When a tenant reaches their quota, further pushes fail until they delete old images or request a quota increase. This prevents runaway storage growth and ensures fair resource distribution among tenants.
Compliance and Audit Requirements
Regulated industries face specific requirements for container registries related to audit logging, access control, and data retention. Financial services, healthcare, and government sectors often require detailed audit trails showing who accessed what images and when. Enable comprehensive audit logging in your registry, capturing all operations—pushes, pulls, deletions, permission changes, and administrative actions. Forward these logs to a tamper-proof logging system for long-term retention.
Some regulations require images to be retained for specific periods, even after they're no longer actively used. Configure lifecycle policies that archive rather than delete old images, moving them to cheaper storage tiers while maintaining accessibility. Document your retention policies and ensure they align with regulatory requirements. For highly regulated environments, consider implementing immutable repositories where images cannot be deleted or overwritten once pushed—only new versions can be added.
What's the difference between Docker Hub and a private registry?
Docker Hub is a public, hosted registry service where images are stored on shared infrastructure managed by Docker, Inc. While convenient and free for public images, it offers limited control and may not meet security or compliance requirements. A private registry, whether self-hosted or a managed private instance, gives you complete control over access, storage, and policies, making it suitable for proprietary applications and regulated environments. Private registries can be air-gapped from the internet, integrated with corporate authentication systems, and configured to meet specific compliance requirements that public registries cannot satisfy.
How do I handle registry authentication in automated systems like CI/CD pipelines?
Use service accounts or robot accounts specifically created for automation rather than personal user credentials. These accounts have limited, specific permissions and can be rotated without affecting human users. Store credentials as secrets in your CI/CD platform's secret management system, never in source code or configuration files. For cloud registries, leverage platform-native authentication like IAM roles for AWS ECR or service accounts for Google Container Registry—these eliminate the need to manage credentials directly. Implement token-based authentication where possible, as tokens can have limited lifetimes and scopes, reducing risk if compromised.
What image tagging strategy should I use for production deployments?
Avoid relying solely on the latest tag in production, as it's ambiguous and makes rollbacks difficult. Instead, use immutable tags based on git commit SHAs or build numbers that uniquely identify each image version. Supplement these with semantic version tags for releases and environment-specific tags for tracking what's deployed where. A robust strategy tags each image multiple times: with its commit SHA for precise traceability, with a semantic version for releases, and potentially with a timestamp or build number. Always deploy using the immutable tag in your deployment manifests, ensuring you can trace exactly what code is running and easily roll back to previous versions if needed.
How much storage should I plan for my container registry?
Storage requirements depend on your image sizes, number of images, and retention policy. Calculate baseline needs by multiplying average image size by the number of unique images and versions you'll maintain. Container images typically range from 100MB to several GB, with most application images falling between 200MB and 1GB. Plan for growth—if you're building images daily and retaining 30 versions per image across 50 applications, you'll need substantial storage. Implement lifecycle policies early to automatically remove old images, preventing unbounded growth. Cloud object storage offers virtually unlimited capacity with pay-as-you-go pricing, making it easier to scale than pre-provisioned disk storage. Monitor actual usage patterns after deployment and adjust retention policies based on real data.
Should I scan images before or after pushing to the registry?
Both approaches have merit, and many organizations implement both. Scanning before pushing (in your CI/CD pipeline) catches vulnerabilities earlier, preventing insecure images from ever reaching the registry. This fails builds immediately if critical vulnerabilities are found, providing the fastest feedback to developers. However, it requires scanning tools in your build environment and may slow build times. Scanning after pushing (in the registry) centralizes scanning infrastructure, provides continuous monitoring as new vulnerabilities are disclosed, and works even for images pushed outside your standard pipeline. The ideal approach combines both: scan in CI/CD for immediate feedback, then enable registry scanning for continuous monitoring and catching vulnerabilities discovered after the image was built.
How do I secure my registry against unauthorized access?
Implement defense in depth with multiple security layers. Start with network security—place the registry on a private network or implement IP allowlisting to restrict access to known sources. Always use TLS encryption for all communications to protect credentials and image data in transit. Enable strong authentication using integration with your corporate identity provider rather than local accounts. Implement role-based access control with the principle of least privilege—grant users and systems only the minimum permissions necessary. Enable audit logging to track all access and operations, forwarding logs to a secure logging system. For high-security environments, implement image signing to verify image integrity and origin. Regularly review access logs for suspicious patterns and conduct periodic access reviews to remove unnecessary permissions. Keep the registry software updated with security patches and follow the vendor's security hardening guidelines.