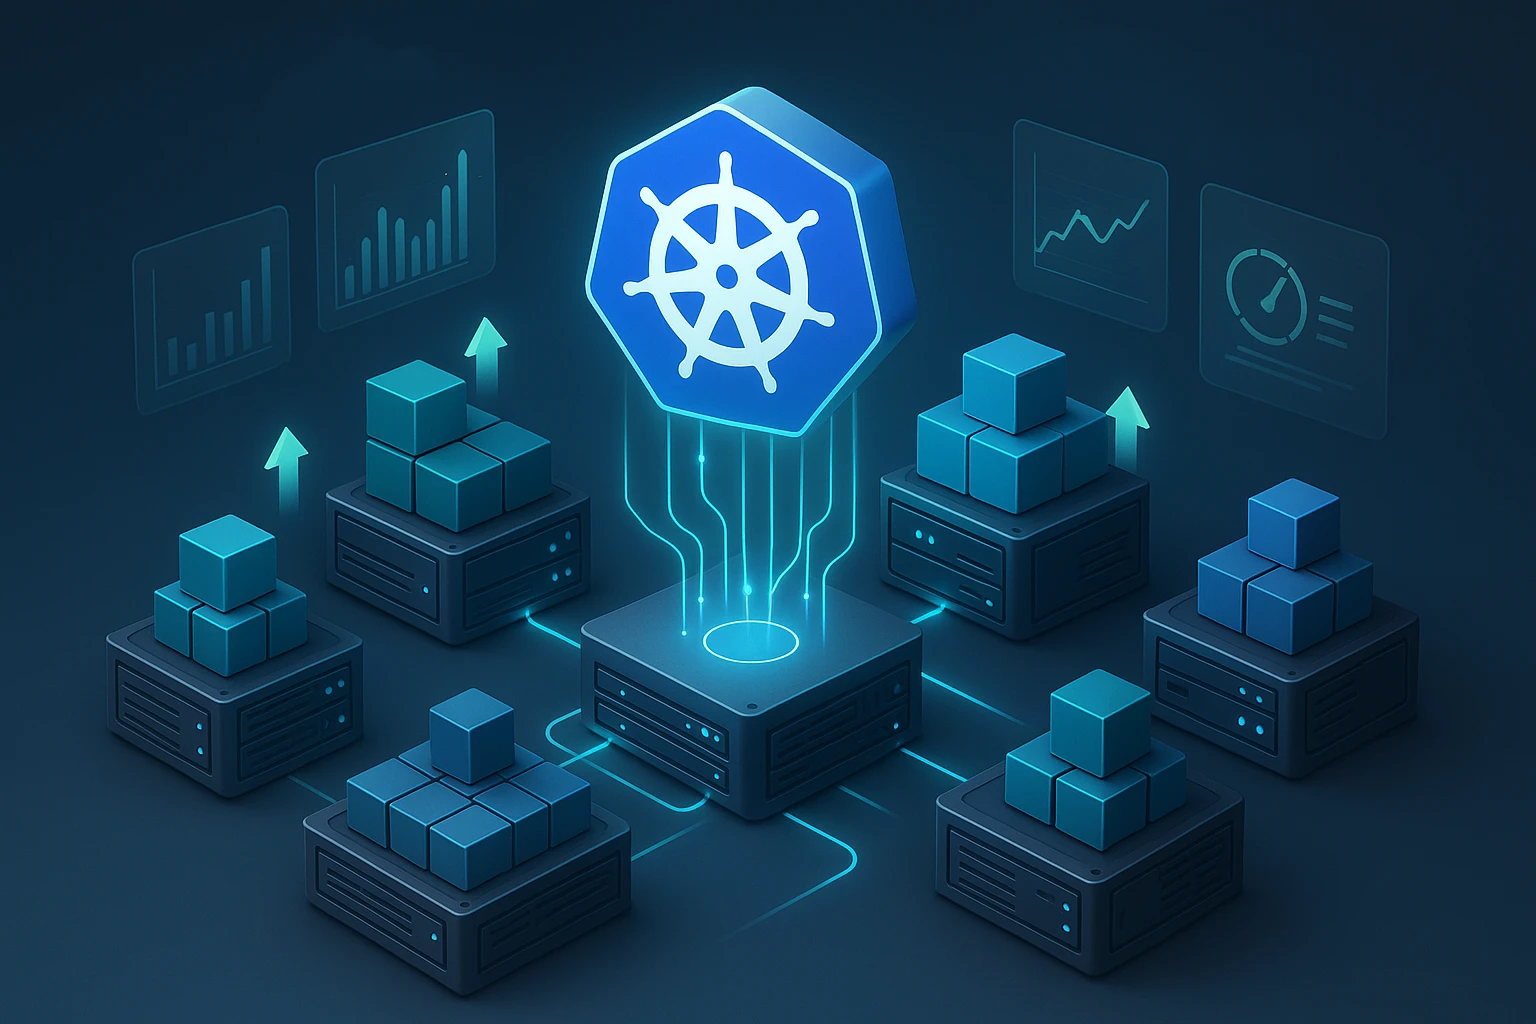
How to Implement Kubernetes Network Policies
Illustration of Kubernetes NetworkPolicy concepts: pods. namespaces labels selectors, ingress and egress rules, allow/deny policies, and traffic enforcement across cluster network.
Why Network Security in Kubernetes Matters More Than Ever
In today's cloud-native landscape, securing communication between services isn't just a technical requirement—it's a fundamental necessity. As organizations move their critical workloads to Kubernetes clusters, the attack surface expands exponentially. Without proper network controls, a single compromised pod can become a gateway to your entire infrastructure. The challenge isn't just about blocking threats; it's about enabling secure communication patterns that align with your application architecture while maintaining the flexibility that makes Kubernetes powerful.
Network policies in Kubernetes function as distributed firewalls that control traffic flow at the IP address or port level. They define rules for how groups of pods can communicate with each other and with external network endpoints. Unlike traditional network security that operates at the infrastructure level, Kubernetes network policies work at the application layer, understanding the dynamic nature of containerized workloads where IP addresses change constantly and services scale up and down based on demand.
Throughout this comprehensive guide, you'll discover practical approaches to implementing network policies, from basic isolation patterns to advanced multi-tenant scenarios. We'll explore the technical foundations, walk through real-world implementation strategies, examine common pitfalls and their solutions, and provide actionable configurations you can adapt to your environment. Whether you're securing a development cluster or hardening production workloads, you'll gain the knowledge needed to build robust network security into your Kubernetes infrastructure.
Understanding the Foundation of Kubernetes Network Policies
Before diving into implementation, it's essential to grasp how network policies operate within the Kubernetes ecosystem. Network policies are namespace-scoped resources that use label selectors to identify pods and define rules for ingress and egress traffic. The beauty of this approach lies in its declarative nature—you specify what traffic should be allowed, and the underlying network plugin enforces these rules automatically.
The Kubernetes network model assumes a flat network where every pod can communicate with every other pod by default. This design simplifies application development but creates security challenges in production environments. Network policies flip this model by implementing a default-deny approach once you create your first policy targeting specific pods. This shift from implicit trust to explicit permission forms the cornerstone of container network security.
"The moment you apply your first network policy to a set of pods, those pods become isolated. Only traffic explicitly allowed by policies will reach them. This fundamental principle catches many teams off guard during initial implementation."
Not all Kubernetes installations support network policies out of the box. The functionality requires a network plugin (CNI) that implements the NetworkPolicy API. Popular options include Calico, Cilium, Weave Net, and Romana. Each plugin brings different capabilities and performance characteristics, but they all implement the core NetworkPolicy specification. Before proceeding with policy implementation, verify that your cluster has a compatible CNI installed and properly configured.
Key Components of a Network Policy
Every network policy consists of several critical elements that work together to define traffic rules:
- Pod Selector: Identifies which pods the policy applies to using label matching
- Policy Types: Specifies whether the policy governs ingress traffic, egress traffic, or both
- Ingress Rules: Defines what incoming traffic is permitted to reach selected pods
- Egress Rules: Controls what outgoing traffic selected pods can initiate
- Selectors for Sources/Destinations: Uses pod selectors, namespace selectors, or IP blocks to identify allowed traffic endpoints
The interaction between these components creates a powerful yet flexible security framework. A policy might allow database pods to receive connections only from application pods in the same namespace, while blocking all other traffic. Another policy could permit application pods to make external API calls to specific IP ranges while preventing access to internal cluster services.
Preparing Your Cluster for Network Policy Implementation
Successful network policy deployment requires careful preparation. Rushing into production with restrictive policies can cause service disruptions, while overly permissive policies fail to provide meaningful security. The preparation phase involves understanding your application architecture, documenting communication patterns, and establishing a testing methodology.
Auditing Current Network Communication
Begin by mapping all communication paths in your cluster. Tools like Cilium Hubble, Calico Enterprise, or open-source solutions like kubectl-trace can help visualize network flows. Document which services communicate with each other, what protocols they use, and whether communication crosses namespace boundaries. This inventory becomes your blueprint for policy creation.
For existing clusters, consider enabling flow logging before implementing policies. Many CNI plugins offer observability features that capture network traffic metadata. Analyze this data over several days to capture periodic jobs, backup processes, and other intermittent communication patterns that might not be obvious during a single observation window.
| CNI Plugin | Network Policy Support | Advanced Features | Performance Impact |
|---|---|---|---|
| Calico | Full support | Global policies, host endpoint protection, encryption | Low |
| Cilium | Full support | Layer 7 policies, service mesh integration, eBPF-based | Very Low |
| Weave Net | Full support | Network encryption, multicast support | Medium |
| Flannel | No native support | Simple overlay network | Low |
| Canal | Full support | Combines Flannel networking with Calico policies | Low |
Establishing a Testing Environment
Never implement network policies directly in production. Create a testing environment that mirrors your production topology, including the same namespaces, service dependencies, and network plugin. This environment allows you to validate policies without risking service availability. Use tools like kubectl auth can-i and custom test scripts to verify that allowed traffic flows correctly and blocked traffic is properly rejected.
"Testing network policies requires patience and thoroughness. A single overlooked communication path can cause mysterious failures in production. Always test both positive cases—traffic that should work—and negative cases—traffic that should be blocked."
Creating Your First Network Policy
Let's start with a practical example: isolating a database tier from unauthorized access. This scenario demonstrates fundamental concepts while providing immediate security value. We'll create a policy that allows only application pods to connect to database pods on the database port.
apiVersion: networking.k8s.io/v1
kind: NetworkPolicy
metadata:
  name: database-isolation
  namespace: production
spec:
  podSelector:
    matchLabels:
      tier: database
  policyTypes:
  - Ingress
  ingress:
  - from:
    - podSelector:
        matchLabels:
          tier: application
    ports:
    - protocol: TCP
      port: 5432
This policy targets pods labeled tier: database in the production namespace. It specifies that only ingress traffic is controlled (leaving egress unrestricted). The ingress rule permits connections from pods labeled tier: application on TCP port 5432 (PostgreSQL). All other traffic to database pods is implicitly denied.
Understanding Policy Behavior
When you apply this policy, several things happen immediately. First, all database pods matching the selector become isolated. Second, only traffic matching the ingress rule can reach these pods. Third, because we specified only Ingress in policyTypes, egress traffic from database pods remains unrestricted—they can still initiate outbound connections.
This asymmetric behavior is intentional and powerful. Database pods might need to make outbound connections for replication, backup uploads, or monitoring. By controlling only ingress, we secure the most critical attack vector without unnecessarily restricting legitimate operations.
Testing the Policy
After applying the policy, verify its effectiveness with practical tests:
# Test allowed connection (should succeed)
kubectl run test-app --image=postgres:latest --labels="tier=application" -it --rm -- psql -h database-service -U postgres

# Test blocked connection (should fail)
kubectl run test-unauthorized --image=postgres:latest --labels="tier=frontend" -it --rm -- psql -h database-service -U postgres
The first command creates a pod with the tier: application label, which should successfully connect. The second uses a different label and should timeout or be rejected. These simple tests confirm that the policy is active and enforcing rules correctly.
Implementing Namespace-Level Isolation
As your cluster grows, namespace-based isolation becomes increasingly important. Different teams, projects, or security zones often map to separate namespaces. Network policies can enforce boundaries between these logical divisions while allowing controlled cross-namespace communication where needed.
Default Deny All Traffic
A common security pattern involves creating a default-deny policy in each namespace, then explicitly allowing required traffic. This approach follows the security principle of least privilege:
apiVersion: networking.k8s.io/v1
kind: NetworkPolicy
metadata:
  name: default-deny-all
  namespace: production
spec:
  podSelector: {}
  policyTypes:
  - Ingress
  - Egress
This policy applies to all pods in the namespace (empty podSelector matches everything) and blocks both ingress and egress traffic. With this foundation in place, you then create additional policies that selectively allow necessary communication.
"A default-deny policy is like closing all doors in a building before deciding which ones should remain open. It's more secure than trying to remember which doors to close after opening them all."
Allowing Cross-Namespace Communication
Many applications require communication across namespace boundaries. For example, applications in a production namespace might need to access shared services in a platform namespace. Network policies support this through namespace selectors:
apiVersion: networking.k8s.io/v1
kind: NetworkPolicy
metadata:
  name: allow-platform-services
  namespace: production
spec:
  podSelector:
    matchLabels:
      tier: application
  policyTypes:
  - Egress
  egress:
  - to:
    - namespaceSelector:
        matchLabels:
          name: platform
      podSelector:
        matchLabels:
          tier: shared-service
    ports:
    - protocol: TCP
      port: 8080
This policy allows application pods in the production namespace to make outbound connections to shared-service pods in the platform namespace on port 8080. The combination of namespace and pod selectors creates precise targeting that maintains security while enabling necessary integration.
Advanced Policy Patterns and Techniques
Once you've mastered basic policies, several advanced patterns can address complex security requirements. These techniques build on foundational concepts to handle real-world scenarios that go beyond simple pod-to-pod communication.
Allowing External Traffic with IP Blocks
Applications often need to communicate with external services—databases, APIs, or monitoring systems outside the cluster. Network policies support this through CIDR-based IP blocks:
apiVersion: networking.k8s.io/v1
kind: NetworkPolicy
metadata:
  name: allow-external-api
  namespace: production
spec:
  podSelector:
    matchLabels:
      tier: application
  policyTypes:
  - Egress
  egress:
  - to:
    - ipBlock:
        cidr: 203.0.113.0/24
        except:
        - 203.0.113.5/32
    ports:
    - protocol: TCP
      port: 443
This policy permits application pods to make HTTPS connections to IP addresses in the 203.0.113.0/24 range, except for 203.0.113.5. The except clause provides fine-grained control, useful for excluding specific addresses within a larger range.
DNS Resolution Requirements
A common pitfall when implementing egress policies is forgetting about DNS. Pods need to resolve service names to IP addresses, which requires communication with the cluster DNS service. Without explicit DNS allowance, even correctly configured policies will fail:
apiVersion: networking.k8s.io/v1
kind: NetworkPolicy
metadata:
  name: allow-dns
  namespace: production
spec:
  podSelector: {}
  policyTypes:
  - Egress
  egress:
  - to:
    - namespaceSelector:
        matchLabels:
          name: kube-system
      podSelector:
        matchLabels:
          k8s-app: kube-dns
    ports:
    - protocol: UDP
      port: 53
    - protocol: TCP
      port: 53
This policy should be applied in every namespace where you use egress restrictions. It allows all pods to query the cluster DNS service in the kube-system namespace on both UDP and TCP port 53.
"DNS is the silent dependency that breaks everything when forgotten. If your services can't resolve names, no amount of network policy tweaking will help. Always include DNS in your egress rules."
Combining Multiple Policies
Kubernetes applies all matching network policies additively. If multiple policies select the same pod, the allowed traffic is the union of all policies. This behavior enables layered security approaches where you can combine general policies with specific exceptions:
- 🔒 Base policy: Default deny all traffic
- 🌐 Infrastructure policy: Allow DNS, monitoring, and logging
- 🔗 Application policy: Allow specific service-to-service communication
- 🚪 Ingress policy: Allow traffic from ingress controllers
- 📊 Observability policy: Allow connections to metrics endpoints
This layered approach makes policies easier to manage and understand. Each policy addresses a specific concern, and together they create comprehensive protection without creating monolithic, difficult-to-maintain configurations.
Securing Ingress Traffic from Load Balancers
Web applications typically receive traffic through ingress controllers or load balancers. Securing this entry point requires careful consideration of how external traffic enters your cluster and which pods should be reachable from outside.
apiVersion: networking.k8s.io/v1
kind: NetworkPolicy
metadata:
  name: allow-ingress-controller
  namespace: production
spec:
  podSelector:
    matchLabels:
      tier: frontend
  policyTypes:
  - Ingress
  ingress:
  - from:
    - namespaceSelector:
        matchLabels:
          name: ingress-nginx
      podSelector:
        matchLabels:
          app.kubernetes.io/name: ingress-nginx
    ports:
    - protocol: TCP
      port: 8080
This policy allows frontend pods to receive traffic from the ingress controller pods running in the ingress-nginx namespace. Only the application port (8080) is exposed, and only to the ingress controller—not to arbitrary pods or external sources.
Handling Load Balancer Source IPs
When using cloud load balancers, traffic often appears to come from the load balancer's IP addresses rather than the original client. Some CNI plugins preserve source IPs, while others require special configuration. Test your specific setup to ensure policies correctly identify traffic sources:
| Load Balancer Type | Source IP Preservation | Policy Approach | Considerations |
|---|---|---|---|
| NodePort | No (shows node IP) | Allow from all cluster nodes | Less secure, but simple |
| LoadBalancer (standard) | Depends on cloud provider | Allow from LB IP range | Requires knowing LB IPs |
| LoadBalancer (externalTrafficPolicy: Local) | Yes | Allow from client IPs | Most secure, may affect distribution |
| Ingress Controller | Depends on configuration | Allow from ingress pods | Recommended approach |
Troubleshooting Network Policy Issues
Even carefully planned network policies can cause unexpected problems. Troubleshooting requires systematic approaches and the right tools to identify where traffic is being blocked and why.
Common Symptoms and Solutions
When applications fail after implementing network policies, certain patterns emerge repeatedly. Understanding these common issues accelerates diagnosis:
Symptom: Services can't connect to each other despite apparently correct policies.
Likely Cause: Missing DNS egress rules. Pods can't resolve service names.
Solution: Add a policy allowing UDP/TCP port 53 to kube-dns in kube-system namespace.
Symptom: Intermittent connection failures to the same service.
Likely Cause: Policy doesn't account for all pod replicas or uses incorrect label selectors.
Solution: Verify that all pods providing the service have matching labels and are covered by the policy.
Symptom: External API calls fail with timeout errors.
Likely Cause: Egress policy doesn't include the external service's IP range or uses wrong CIDR notation.
Solution: Check the actual IP addresses being accessed (use tcpdump or flow logs) and update the ipBlock accordingly.
"The most frustrating network policy bugs come from typos in label selectors. A single character difference means the policy won't match, and traffic gets blocked. Always verify your labels match exactly."
Diagnostic Tools and Techniques
Several tools help diagnose network policy issues. Start with basic connectivity tests using temporary pods:
# Test basic connectivity
kubectl run test-connectivity --image=nicolaka/netshoot -it --rm -- /bin/bash

# Inside the pod, test specific connections
curl -v http://service-name:port
nslookup service-name
telnet service-ip port
For deeper analysis, many CNI plugins provide policy visualization and testing tools. Calico offers calicoctl for policy analysis, while Cilium provides cilium connectivity test for comprehensive connectivity validation. These tools can show which policies are being applied to specific pods and simulate traffic to predict whether it will be allowed or denied.
Logging and Monitoring
Enable network policy logging in your CNI plugin to see blocked connections in real-time. Most plugins can log denied connections, which helps identify legitimate traffic that's being inadvertently blocked:
# Example for Calico
kubectl annotate networkpolicy database-isolation \
  projectcalico.org/metadata='{"annotations":{"log-prefix":"DB-POLICY"}}'
Monitor these logs during policy rollout to catch issues before they impact users. Look for patterns in blocked traffic—repeated denials from the same source might indicate a missing policy rule rather than malicious activity.
Best Practices for Production Deployments
Moving network policies to production requires discipline and careful planning. These practices help ensure smooth deployments and maintainable security configurations.
Start with Monitoring, Not Enforcement
Some CNI plugins support audit mode, where policies log what they would block without actually blocking it. This capability is invaluable for validating policies before enforcement. If your CNI doesn't support audit mode, consider using a phased rollout:
- Phase 1: Deploy policies to development environment, monitor for issues
- Phase 2: Deploy to staging with full enforcement, run comprehensive tests
- Phase 3: Deploy to production during maintenance window, monitor closely
- Phase 4: Gradually expand policy coverage to additional namespaces
Document Policy Intent and Dependencies
Network policies should include annotations explaining their purpose and the communication patterns they enable. This documentation helps future maintainers understand why policies exist and what might break if they're modified:
apiVersion: networking.k8s.io/v1
kind: NetworkPolicy
metadata:
  name: payment-service-isolation
  namespace: production
  annotations:
    description: "Isolates payment processing pods from non-PCI components"
    owner: "security-team@company.com"
    compliance: "PCI-DSS requirement 1.2.1"
    dependencies: "Requires payment-gateway pods in namespace payment-processing"
spec:
  # ... policy rules
"Six months after implementing a policy, no one remembers why it exists or what it protects. Good annotations are the difference between confident policy updates and fearful 'don't touch it' attitudes."
Version Control and Change Management
Treat network policies as critical infrastructure code. Store them in version control, use pull requests for changes, and implement automated testing. Tools like Conftest or Open Policy Agent can validate policies against organizational standards before they're applied to clusters.
Implement a change approval process for production network policies. Even small changes can have significant impact, so requiring review by security teams or senior engineers helps catch potential issues before they affect services.
Regular Policy Audits
Application architectures evolve, and policies must evolve with them. Schedule regular audits—quarterly or semi-annually—to review all network policies and verify they still match current requirements. Remove obsolete policies that no longer serve a purpose, as policy sprawl makes the security posture harder to understand and maintain.
Scaling Network Policies Across Large Clusters
As clusters grow to hundreds of namespaces and thousands of pods, managing network policies becomes a significant operational challenge. Strategic approaches help maintain security without creating overwhelming administrative burden.
Policy Templates and Automation
Rather than creating unique policies for every application, develop policy templates that address common patterns. Use tools like Helm, Kustomize, or Carvel ytt to generate policies from templates with application-specific parameters:
# Helm values for policy template
application:
  name: user-service
  tier: backend
  allowedClients:
    - frontend
    - api-gateway
  externalAPIs:
    - cidr: 198.51.100.0/24
      port: 443
This approach ensures consistency across applications while allowing necessary customization. Teams can deploy new services with appropriate network policies automatically, reducing both deployment time and security gaps.
Namespace-Level Defaults
Implement organization-wide defaults that apply automatically to new namespaces. Many organizations use admission controllers like Kyverno or OPA Gatekeeper to inject default network policies when namespaces are created:
- Default-deny ingress and egress
- Allow DNS resolution
- Allow connections to monitoring and logging infrastructure
- Allow traffic from ingress controllers (for public-facing namespaces)
These defaults create a secure baseline that teams then customize based on application requirements. This approach prevents the common scenario where new applications are deployed without any network policies because teams forgot or didn't know how to create them.
Multi-Cluster Considerations
Organizations running multiple Kubernetes clusters face additional complexity. Network policies are cluster-scoped and don't automatically synchronize across clusters. Consider using policy management tools like Anthos Config Management, ArgoCD, or Flux to maintain consistent policies across clusters.
For multi-cluster applications that communicate across cluster boundaries, network policies can't directly control this traffic. Instead, use service mesh technologies like Istio or Linkerd that provide cross-cluster security capabilities, or implement network-level controls at the infrastructure layer.
Integrating Network Policies with Security Frameworks
Network policies don't exist in isolation—they're one component of a comprehensive Kubernetes security strategy. Integration with other security tools and frameworks creates defense in depth.
Pod Security Standards
Combine network policies with Pod Security Standards (PSS) to control both what pods can do and how they can communicate. For example, restrict privileged containers while also limiting their network access. This layered approach ensures that even if a container is compromised, network policies limit lateral movement.
Service Mesh Integration
Service meshes like Istio provide Layer 7 network policies that complement Kubernetes' Layer 3/4 policies. While Kubernetes network policies control IP addresses and ports, service meshes can enforce rules based on HTTP methods, paths, headers, and JWT claims. Using both creates comprehensive protection:
- Kubernetes network policy: Allow traffic from frontend namespace to backend namespace on port 8080
- Istio authorization policy: Within that traffic, only allow GET requests to /api/v1/* paths from authenticated users
This combination provides coarse-grained network segmentation with fine-grained application-level authorization.
"Network policies are the outer walls of your castle. Service mesh policies are the guards at each door inside. You need both to truly secure your applications."
Compliance and Audit Requirements
Many regulatory frameworks require network segmentation and access controls. Network policies help satisfy these requirements, but you must demonstrate their effectiveness. Implement continuous compliance monitoring using tools like Falco or Sysdig that can alert on policy violations or unexpected network activity.
Maintain audit logs showing policy changes, who made them, and when. Git-based workflows naturally provide this audit trail, but ensure logs are preserved according to your compliance requirements. Some organizations need to retain security configuration history for years.
Future-Proofing Your Network Policy Strategy
The Kubernetes ecosystem evolves rapidly, and network policy capabilities continue to expand. Staying current with developments helps you leverage new features while maintaining stable, secure configurations.
Emerging Standards and Features
The Kubernetes community is actively developing enhanced network policy capabilities. Network Policy API v2 proposals include features like policy priorities, more flexible selectors, and better support for multi-cluster scenarios. While these features aren't yet standardized, understanding the direction helps you design policies that will transition smoothly to future versions.
Some CNI plugins already offer extensions beyond the standard NetworkPolicy API. Calico's GlobalNetworkPolicy, for example, can apply across all namespaces. Cilium's CiliumNetworkPolicy supports Layer 7 filtering and DNS-based rules. Evaluate whether these extensions provide value for your use cases, but be aware they create CNI-specific dependencies.
Observability and Analytics
Modern network policy implementations increasingly focus on observability. Flow logs, policy visualization tools, and impact analysis capabilities help teams understand what their policies actually do. Invest in these capabilities—they transform network policies from opaque security controls into understandable, manageable components of your infrastructure.
Consider implementing policy recommendation systems that analyze actual traffic patterns and suggest policies. Some commercial offerings and open-source projects can observe cluster traffic for a period, then generate network policies that codify the observed behavior. This approach accelerates policy creation while ensuring policies match reality.
Organizational Knowledge Building
Network policy expertise shouldn't reside with a single team or individual. Develop training programs, documentation, and runbooks that spread knowledge across your organization. Create a community of practice where teams share policy patterns, troubleshooting techniques, and lessons learned.
Establish clear ownership and responsibility for network policies. In some organizations, security teams own policies; in others, development teams manage policies for their applications. Either model can work, but ambiguity creates security gaps. Define who creates policies, who reviews them, who troubleshoots issues, and who makes emergency changes.
Frequently Asked Questions
Do network policies affect cluster performance significantly?
Modern CNI plugins implement network policies with minimal performance impact, typically less than 5% overhead. The exact impact depends on your CNI choice—eBPF-based solutions like Cilium often have lower overhead than iptables-based implementations. Performance impact is usually negligible compared to the security benefits, but test in your specific environment with realistic workloads to measure actual impact.
Can I use network policies to block internet access completely?
Yes, you can create egress policies that block all traffic except specific allowed destinations. However, remember to allow DNS resolution and any required cluster services like monitoring or logging. A complete internet block requires careful planning to ensure legitimate internal services remain accessible. Test thoroughly before deploying such restrictive policies to production.
What happens if I apply conflicting network policies to the same pod?
Kubernetes doesn't have conflicting policies in the traditional sense. All policies that select a pod are applied additively—the allowed traffic is the union of all matching policies. If one policy allows traffic from source A and another allows traffic from source B, the pod will accept traffic from both A and B. This additive behavior makes it impossible to accidentally create contradictory rules.
How do I migrate existing applications to use network policies without downtime?
Start by implementing permissive policies that allow all current traffic, then gradually tighten them. Use monitoring and flow logs to understand actual traffic patterns before restricting them. Deploy policies in audit mode if your CNI supports it, or test in non-production environments first. Roll out policies namespace by namespace rather than cluster-wide to limit blast radius if issues occur.
Are network policies sufficient for complete Kubernetes security?
No, network policies are one important layer but not a complete security solution. You also need pod security policies or standards, RBAC for API access, secrets management, image scanning, runtime security monitoring, and regular security updates. Network policies control network communication but can't prevent vulnerabilities in application code, misconfigured permissions, or compromised credentials. Think of them as essential but not sufficient for comprehensive security.