How to Manage Users and Groups in Linux Step by Step
Managing users and groups within a Linux environment represents one of the foundational responsibilities that separates casual computer users from system administrators who maintain secure, organized, and efficient computing environments. Whether you're running a personal server, managing enterprise infrastructure, or simply exploring the capabilities of Linux-based operating systems, understanding how to properly control who accesses your system and what permissions they possess becomes absolutely critical. Every misconfigured user account or improperly assigned group membership creates potential security vulnerabilities that could compromise sensitive data, system stability, or organizational compliance requirements.
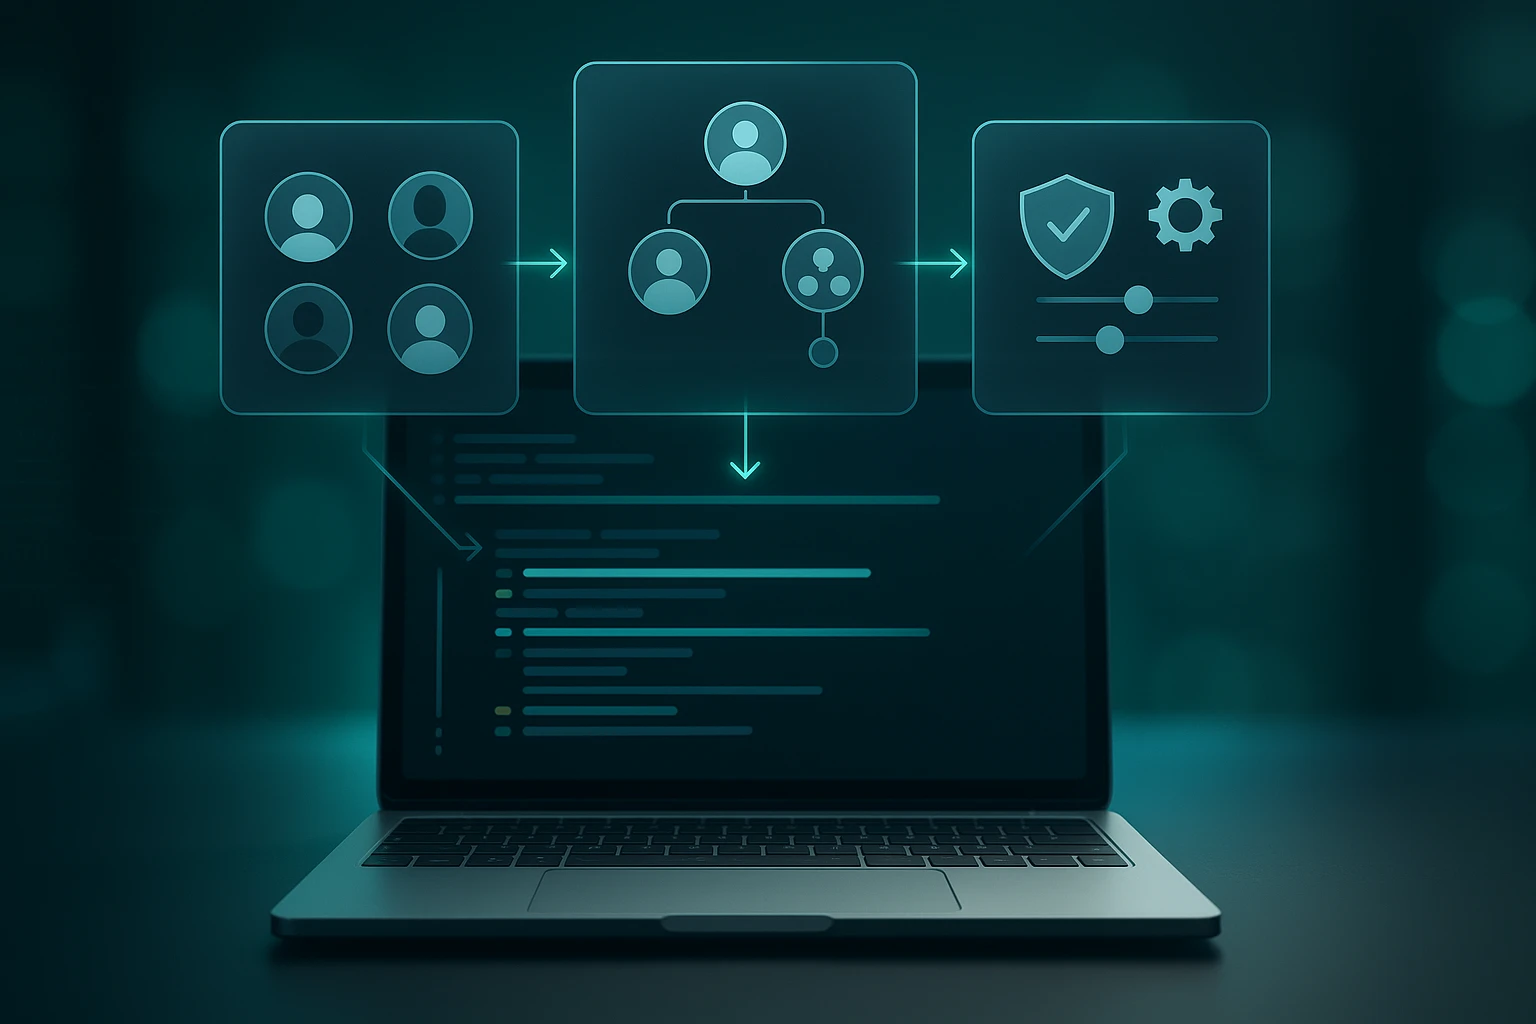
User and group management in Linux refers to the systematic process of creating, modifying, and deleting user accounts and organizing them into logical collections called groups that share common access rights and permissions. This hierarchical permission structure allows administrators to efficiently manage dozens, hundreds, or even thousands of users without manually configuring each individual's access to every file, directory, or system resource. The operating system treats each user as a unique entity with specific identification numbers, home directories, login shells, and authentication credentials, while groups function as containers that simplify permission assignments across multiple users simultaneously.
Throughout this comprehensive exploration, you'll discover the exact commands, configuration files, and best practices needed to confidently manage users and groups on any Linux distribution. We'll examine practical techniques for creating and removing accounts, modifying user properties, implementing password policies, understanding the relationship between primary and secondary groups, troubleshooting common permission issues, and maintaining security through proper access control. By working through real-world examples and detailed explanations, you'll develop the expertise necessary to handle user management tasks efficiently while maintaining the security and organizational standards that professional Linux administration demands.
Understanding Linux User Architecture
The Linux operating system implements a multi-user design philosophy that fundamentally differs from single-user desktop environments. Every process, file, and system resource belongs to a specific user, and the kernel enforces strict boundaries between different users' spaces. This separation ensures that one user cannot accidentally or maliciously interfere with another user's data or processes unless explicitly granted permission through the group and permission system.
When Linux identifies users, it doesn't actually work with usernames during most operations. Instead, the system assigns each user a unique numerical identifier called a User ID (UID). Similarly, every group receives a Group ID (GID). These numerical identifiers appear throughout the system in file ownership records, process tables, and permission structures. The human-readable usernames and group names simply provide convenient labels that map to these underlying numbers.
Understanding that Linux fundamentally operates on numerical identifiers rather than text names changes how you approach user management, especially when dealing with shared filesystems or migrating users between systems.
The system reserves certain UID ranges for specific purposes. Typically, UID 0 always belongs to the root superuser account, which possesses unrestricted access to all system resources. System service accounts usually occupy UIDs from 1 to 999, while regular user accounts begin at 1000 or higher, depending on your distribution's configuration. This separation helps distinguish between accounts intended for human login and those created specifically for running system services with limited privileges.
Essential User Configuration Files
Linux stores user and group information in several plain-text configuration files that the system reads during authentication and permission checks. Understanding these files proves essential for both routine administration and troubleshooting complex permission issues.
The /etc/passwd file contains basic information about every user account on the system. Despite its name suggesting password storage, modern Linux systems have moved actual password hashes to a separate file for security reasons. Each line in /etc/passwd represents one user account with seven colon-separated fields containing the username, a placeholder for the password field, UID, primary GID, comment field (often containing the user's full name), home directory path, and login shell.
The /etc/shadow file stores encrypted password hashes and password aging information. Only the root user can read this file, preventing regular users from accessing password hashes that could potentially be subjected to offline cracking attempts. This file includes fields for the encrypted password, date of last password change, minimum and maximum password age, warning period, inactivity period, and account expiration date.
Group information resides in /etc/group, which lists all groups and their members. Each line contains the group name, password placeholder (rarely used), GID, and a comma-separated list of usernames belonging to that group as a secondary group. The distinction between primary and secondary groups often confuses newcomers, but understanding this relationship becomes crucial for proper permission management.
The /etc/gshadow file provides shadow functionality for groups, containing encrypted group passwords and group administrator information. While less commonly used than user passwords, group passwords allow users to temporarily join groups using the newgrp command if they know the group password.
| Configuration File | Purpose | Readable By | Key Information Stored |
|---|---|---|---|
/etc/passwd |
User account information | All users | Username, UID, GID, home directory, shell |
/etc/shadow |
Secure password storage | Root only | Password hashes, aging policies, expiration |
/etc/group |
Group definitions | All users | Group names, GIDs, member lists |
/etc/gshadow |
Secure group information | Root only | Group passwords, administrators |
/etc/login.defs |
Default settings for user creation | All users | UID/GID ranges, password policies, home directory defaults |
Creating and Managing User Accounts
Creating new user accounts represents one of the most common administrative tasks in Linux environments. While you could theoretically create users by manually editing the configuration files discussed earlier, Linux provides specialized commands that handle all the necessary steps automatically while maintaining consistency and applying security best practices.
Adding New Users with useradd
The useradd command serves as the low-level utility for creating new user accounts. This command offers extensive flexibility through numerous options that control every aspect of the new account's configuration. When executed without options, useradd creates a basic account using system defaults defined in /etc/login.defs and /etc/default/useradd.
A basic user creation command looks like this: sudo useradd john. This creates a user named "john" with default settings, though the account won't be immediately usable because no password has been set. The system assigns the next available UID, creates a primary group (behavior varies by distribution), but might not create a home directory depending on your system's defaults.
For more complete user creation, administrators typically specify additional options. The -m flag ensures home directory creation, -s specifies the login shell, -c adds a comment (usually the full name), and -G assigns supplementary groups. A comprehensive example might look like: sudo useradd -m -s /bin/bash -c "John Smith" -G developers,sudo john.
The difference between useradd and adduser causes endless confusion among Linux newcomers. Remember that useradd is the low-level system tool, while adduser is typically a more user-friendly Perl script wrapper that interactively prompts for information.
Interactive User Creation with adduser
Many Linux distributions, particularly Debian-based systems, provide the adduser command as a higher-level, more user-friendly alternative to useradd. This interactive script guides you through the user creation process by prompting for information like the full name, room number, work phone, home phone, and other details that populate the comment field in /etc/passwd.
Running sudo adduser john initiates an interactive session that automatically creates the home directory, copies skeleton files from /etc/skel, sets up the appropriate group memberships, and prompts you to set an initial password. This approach reduces errors and ensures consistent user creation without memorizing numerous command-line options.
Modifying Existing User Accounts
The usermod command provides the primary tool for modifying existing user accounts after creation. This versatile command accepts many of the same options as useradd, allowing you to change virtually any aspect of a user account without deleting and recreating it.
Common modifications include changing the user's primary group with -g, modifying supplementary group memberships with -G, changing the home directory with -d, altering the login shell with -s, or even changing the username itself with -l. The -L option locks an account by prefixing the password hash with an exclamation mark, effectively disabling password authentication without deleting the account, while -U unlocks it.
When modifying group memberships, understanding the difference between -G and -aG becomes critical. Using -G alone replaces all supplementary groups with the newly specified list, potentially removing the user from groups you intended to preserve. The -a flag (append) used in conjunction with -G adds the user to additional groups without removing existing memberships: sudo usermod -aG docker john.
Removing User Accounts
Deleting user accounts requires careful consideration of what data should be preserved or removed. The userdel command handles account removal, with behavior that varies depending on the options provided.
Executing sudo userdel john removes the user account from /etc/passwd and /etc/shadow but leaves the home directory intact. This conservative approach prevents accidental data loss, though orphaned home directories can accumulate over time if not managed. The -r option removes the home directory and mail spool simultaneously with the account: sudo userdel -r john.
Before removing users, administrators should consider whether any important files exist in the user's home directory, whether the user owns files elsewhere in the filesystem, and whether any processes currently run under that user's credentials. Finding all files owned by a user before deletion helps prevent orphaned files: sudo find / -user john -ls.
Important Note: After deleting a user, files they owned elsewhere in the system don't disappear but instead show the numeric UID in place of the username. If you later create a new user who receives the same UID, they'll automatically own these orphaned files, potentially creating security issues.
Group Management Fundamentals
Groups provide the organizational structure that makes Linux permission management practical and scalable. Rather than assigning permissions to individual users, administrators create groups representing job functions, departments, or access levels, then assign users to appropriate groups. This approach dramatically simplifies permission management, especially in environments with many users and complex access requirements.
Primary Versus Secondary Groups
Every Linux user belongs to at least one group called their primary group (also called the login group). When users create files, the system assigns group ownership to their primary group by default. The primary group membership appears in /etc/passwd as the fourth field (GID), directly associated with the user's account.
Users may also belong to multiple secondary groups (also called supplementary groups). These additional memberships grant access to resources shared among group members without changing the user's primary group. Secondary group memberships appear in /etc/group as comma-separated lists of usernames.
Understanding this distinction matters when troubleshooting permission issues. A user might have access to read a file because their secondary group has read permissions, but files they create won't automatically be readable by that group unless they change their effective group or modify the directory's set-group-ID bit.
The primary versus secondary group distinction trips up even experienced administrators. Remember that primary groups affect default ownership of new files, while secondary groups only affect access permissions.
Creating and Removing Groups
The groupadd command creates new groups with optional parameters for specifying the GID or creating system groups. A simple group creation looks like: sudo groupadd developers. The system assigns the next available GID automatically unless you specify one with the -g option: sudo groupadd -g 5000 developers.
System groups, typically created for service accounts, use the -r flag and receive GIDs from the system range: sudo groupadd -r appservice. This distinction helps organize groups logically and prevents conflicts between user groups and system groups.
Removing groups uses the groupdel command: sudo groupdel developers. The system prevents deletion of any user's primary group, requiring you to either delete the user first or change their primary group. Deleting a group doesn't affect files owned by that group; they simply show the numeric GID instead of a group name until you assign them to a different group.
Modifying Group Properties and Membership
The groupmod command changes group properties like the group name or GID. Renaming a group: sudo groupmod -n newname oldname. Changing the GID: sudo groupmod -g 5001 developers. When changing GIDs, remember that files owned by the group continue showing the old GID numerically unless you update their ownership.
Adding users to groups happens through usermod as discussed earlier, or through the gpasswd command, which offers group-specific management capabilities. Adding a user to a group: sudo gpasswd -a john developers. Removing a user from a group: sudo gpasswd -d john developers. The gpasswd command also supports setting group administrators who can manage group membership without full root access.
Users can view their current group memberships with the groups command, which lists all groups they belong to. The id command provides more detailed information, showing UID, primary GID, and all secondary GIDs: id john.
Password Management and Security Policies
Implementing robust password policies represents a critical security responsibility for system administrators. Linux provides comprehensive tools for setting, changing, and enforcing password requirements that balance security needs with usability concerns.
Setting and Changing Passwords
The passwd command handles password changes for user accounts. When regular users run passwd without arguments, they can change their own password after providing their current password for authentication. The root user can change any user's password without knowing the current password: sudo passwd john.
The command prompts twice for the new password to prevent typing errors. Modern Linux systems enforce password complexity requirements through PAM (Pluggable Authentication Modules), rejecting passwords that are too short, too similar to the username, or found in dictionary word lists. These requirements help prevent weak passwords that attackers could easily guess or crack.
For automated scripts or initial account setup, you might need to set passwords non-interactively. The chpasswd command reads username:password pairs from standard input: echo "john:newpassword" | sudo chpasswd. Alternatively, passwd accepts the --stdin option on some distributions: echo "newpassword" | sudo passwd --stdin john.
Password Aging and Expiration
The chage command (change age) manages password aging policies that force periodic password changes and account expiration. These policies help limit the damage from compromised passwords by ensuring they don't remain valid indefinitely.
Setting maximum password age forces users to change passwords periodically: sudo chage -M 90 john (password expires after 90 days). Setting minimum password age prevents users from immediately changing back to their old password: sudo chage -m 7 john (must wait 7 days between changes). Warning days notify users before expiration: sudo chage -W 14 john (warn 14 days before expiration).
Account expiration differs from password expiration by completely disabling the account on a specific date: sudo chage -E 2024-12-31 john. This feature proves useful for temporary employees, contractors, or time-limited access scenarios. Viewing current aging information: sudo chage -l john.
Password aging policies must balance security with usability. Overly aggressive expiration policies frustrate users and often result in weaker passwords as people cycle through predictable variations.
Locking and Unlocking Accounts
Temporarily disabling accounts without deletion proves useful for suspended employees, security incidents, or accounts under investigation. Multiple methods exist for locking accounts, each with slightly different implications.
The passwd -l command locks an account by prefixing the password hash with an exclamation mark, preventing password authentication: sudo passwd -l john. Unlocking: sudo passwd -u john. This method doesn't prevent authentication via SSH keys or other non-password methods.
The usermod -L command provides similar functionality: sudo usermod -L john, with unlocking via sudo usermod -U john. For more complete account disabling, changing the shell to /sbin/nologin or /bin/false prevents all interactive logins: sudo usermod -s /sbin/nologin john.
Setting an account expiration date in the past immediately disables the account: sudo chage -E 0 john. This method provides a clear audit trail showing when and why the account was disabled.
| Command | Function | Example | Effect on Authentication |
|---|---|---|---|
passwd -l |
Lock password | sudo passwd -l john |
Blocks password auth, allows SSH keys |
usermod -L |
Lock account | sudo usermod -L john |
Blocks password auth, allows SSH keys |
usermod -s |
Change shell | sudo usermod -s /sbin/nologin john |
Prevents all interactive logins |
chage -E |
Expire account | sudo chage -E 0 john |
Completely disables account |
passwd -u |
Unlock password | sudo passwd -u john |
Restores password authentication |
Advanced User and Group Operations
Beyond basic creation and modification, Linux provides sophisticated capabilities for managing users and groups at scale, implementing special permissions, and handling complex organizational requirements.
Working with User Defaults and Skeleton Files
The system uses default settings when creating new users, stored in /etc/default/useradd and /etc/login.defs. These files define default values for home directory locations, shell assignments, UID/GID ranges, password aging policies, and mail spool locations. Modifying these defaults affects all subsequently created users while leaving existing accounts unchanged.
The /etc/skel directory (skeleton) contains files and directories automatically copied to new users' home directories during account creation. Administrators customize this directory with organization-specific configuration files, welcome messages, default application settings, or directory structures. Any file placed in /etc/skel appears in every subsequently created user's home directory, providing consistent initial environments.
Viewing current defaults: sudo useradd -D. Modifying defaults: sudo useradd -D -s /bin/zsh (changes default shell for new users). These settings prove particularly valuable in environments where many users need identical initial configurations.
Special Group Permissions and the Sudo System
The sudo (superuser do) command allows designated users to execute commands with elevated privileges without sharing the root password. This approach provides better security, accountability, and granular control compared to giving users direct root access or sharing the root password.
User sudo privileges typically come from membership in a special group (often named "sudo" or "wheel" depending on distribution) or through entries in the /etc/sudoers file. Adding a user to the sudo group: sudo usermod -aG sudo john. After logging out and back in, the user can prefix commands with sudo to execute them with root privileges.
The /etc/sudoers file controls sudo behavior and should only be edited using the visudo command, which performs syntax checking to prevent configuration errors that could lock you out of administrative access. The sudoers file supports complex rules specifying which users can run which commands on which hosts, with or without password authentication.
Never edit /etc/sudoers directly with a regular text editor. Always use visudo, which validates syntax before saving and prevents you from creating a broken configuration that locks you out of sudo access.
Managing Shared Directories with SGID
The Set Group ID (SGID) permission bit solves a common problem in shared directories where multiple users need to collaborate on files. Normally, when users create files, those files belong to their primary group, potentially making them inaccessible to collaborators in different groups.
Setting SGID on a directory causes all files created within that directory to inherit the directory's group ownership rather than the creating user's primary group. This ensures all files in a shared project directory belong to the project group, regardless of which team member created them.
Setting SGID: sudo chmod g+s /shared/project or sudo chmod 2775 /shared/project. The numeric mode uses 2 in the first position to set SGID, while the symbolic mode uses g+s. Combined with appropriate group permissions, this creates truly collaborative directories where all team members can create, modify, and delete each other's files.
Bulk User Management and Scripting
Managing dozens or hundreds of users manually becomes impractical, necessitating scripted approaches for bulk operations. Shell scripts can read user lists from CSV files or databases and execute the necessary commands to create, modify, or remove accounts systematically.
A simple user creation script might read a CSV file with usernames, full names, and group memberships, then loop through each line executing appropriate useradd commands. More sophisticated scripts might integrate with LDAP directories, Active Directory, or HR databases to automatically provision accounts when employees join the organization.
The newusers command provides batch user creation by reading a file formatted similarly to /etc/passwd. Each line contains the seven passwd fields plus the plaintext password, allowing mass user creation from a prepared list. While less flexible than custom scripts, newusers offers a quick solution for bulk account creation.
Troubleshooting Common User and Group Issues
Even experienced administrators encounter puzzling permission problems, authentication failures, and group membership mysteries. Understanding common issues and their solutions helps resolve problems quickly and prevents recurring difficulties.
Permission Denied Errors Despite Group Membership
Users frequently report "permission denied" errors even after being added to the appropriate group. The most common cause: group membership changes don't affect existing login sessions. Users must log out and back in (or start a new login session) for group changes to take effect. The newgrp command provides a temporary workaround by starting a new shell with updated group membership: newgrp developers.
Another common issue involves misunderstanding primary versus secondary groups. Files created by users belong to their primary group by default, not necessarily the group that owns the parent directory (unless SGID is set). Verify actual group membership with id username and check file permissions carefully with ls -l.
UID and GID Conflicts
When migrating users between systems or restoring backups, UID/GID mismatches cause ownership problems. A user named "john" might have UID 1001 on one system but 1002 on another. Files copied between systems retain their numeric ownership, potentially giving the wrong user access to files.
Resolving these conflicts requires either changing user UIDs to match (using usermod -u) or recursively changing file ownership (using chown). For large migrations, planning UID/GID allocation beforehand prevents these issues. Some organizations maintain centralized user databases (LDAP, Active Directory) that ensure consistent UIDs across all systems.
Locked Accounts and Authentication Failures
When users cannot log in despite correct passwords, check whether the account is locked. Examine /etc/shadow for exclamation marks prefixing the password hash, check account expiration with chage -l username, and verify the login shell hasn't been changed to /sbin/nologin or /bin/false.
PAM (Pluggable Authentication Modules) can also prevent logins based on time restrictions, maximum failed login attempts, or other policies. Check system logs (/var/log/auth.log or /var/log/secure) for authentication failure messages that often indicate the specific reason for login denial.
System logs are your best friend when troubleshooting authentication issues. The auth.log or secure log files contain detailed information about why login attempts fail, including PAM module rejections and password policy violations.
Orphaned Files and Missing Users
After deleting users, their files remain on the system showing numeric UIDs instead of usernames. Finding these orphaned files: sudo find / -nouser -ls or sudo find / -nogroup -ls. Depending on your requirements, you might delete these files, assign them to a different user, or archive them for future reference.
If you accidentally delete a user and need to restore access to their files, recreating the user with the same UID immediately restores proper ownership display and access. This technique works because Linux tracks ownership by UID, not username.
Security Best Practices for User Management
Implementing security best practices around user and group management protects systems from both external attackers and internal threats while maintaining usability and administrative efficiency.
Principle of Least Privilege
Grant users only the minimum permissions necessary to perform their job functions. Avoid adding users to the sudo or wheel group unless they genuinely need administrative access. Create specific groups for different access levels rather than giving everyone broad permissions. Use sudo rules in /etc/sudoers to grant specific command permissions rather than full root access when possible.
Regular audits of user permissions help identify privilege creep where users accumulate unnecessary access over time. Review group memberships periodically and remove users from groups they no longer need. Document the purpose of each group and the justification for each user's membership.
Strong Password Policies
Enforce password complexity requirements through PAM configuration, typically in /etc/pam.d/common-password or /etc/pam.d/system-auth. Common requirements include minimum length (12-16 characters), character diversity (uppercase, lowercase, numbers, symbols), and preventing password reuse.
Implement password aging to force periodic changes, but avoid overly aggressive policies that frustrate users and lead to predictable password patterns. A 90-day maximum age with 14-day warning period balances security with usability for most environments. Consider longer periods (180 days) for low-risk systems or shorter periods (30-60 days) for high-security environments.
Account Monitoring and Auditing
Regularly review user accounts to identify inactive accounts that should be disabled or removed. The lastlog command shows when each user last logged in, helping identify dormant accounts. The last command displays login history, useful for detecting unusual access patterns or compromised accounts.
Implement logging and monitoring for user management activities. Commands like useradd, usermod, userdel, and passwd should generate audit log entries for security review. Many compliance frameworks require detailed audit trails of who created, modified, or deleted accounts and when these actions occurred.
Service Accounts and System Users
Create dedicated service accounts for applications and services rather than running them as root or under personal user accounts. These accounts should use system UIDs (below 1000), have /sbin/nologin or /bin/false as their shell to prevent interactive login, and possess only the minimum permissions needed for their specific function.
Document all service accounts, their purpose, and which applications use them. This documentation proves invaluable during security audits, troubleshooting, and system migrations. Avoid sharing service account credentials between multiple applications; each service should have its own dedicated account for accountability and access control.
Service accounts represent one of the most commonly overlooked security vulnerabilities. Every application running as root or under a shared account multiplies your attack surface and complicates security auditing.
Integration with Enterprise Directory Services
Large organizations typically centralize user management through directory services like LDAP (Lightweight Directory Access Protocol), Active Directory, or FreeIPA rather than maintaining separate user databases on each Linux system. These centralized approaches provide single sign-on capabilities, consistent user information across all systems, and simplified administration at scale.
LDAP Integration
LDAP integration allows Linux systems to authenticate users against a central directory server. Users maintain a single password that works across all LDAP-enabled systems, and administrators manage accounts from a central location rather than individually on each server.
Configuring LDAP authentication typically involves installing client packages (like sssd or nslcd), configuring the LDAP server connection details, and modifying PAM and NSS (Name Service Switch) configuration to query LDAP for user information. The /etc/nsswitch.conf file controls which sources the system queries for user and group information, adding LDAP as an option alongside local files.
SSSD (System Security Services Daemon) provides modern LDAP integration with caching, offline authentication support, and improved performance compared to older approaches. When properly configured, LDAP-authenticated users can log in to any integrated Linux system using their directory credentials, with home directories automatically created on first login.
Active Directory Integration
Many organizations run Microsoft Active Directory for Windows systems and need to integrate Linux servers into the same authentication infrastructure. Several approaches exist, including Samba Winbind, SSSD with Active Directory provider, and third-party solutions.
SSSD offers robust Active Directory integration, allowing Linux systems to join AD domains and authenticate users against AD controllers. The realm command simplifies AD joining: sudo realm join --user=administrator domain.example.com. After joining, AD users can log in to Linux systems using their domain credentials, with group memberships and policies applied from Active Directory.
This integration supports advanced features like Kerberos-based single sign-on, Group Policy application (to varying degrees), and centralized access control through AD security groups. Linux systems appear in Active Directory as computer objects, allowing administrators to manage them through familiar Windows tools.
Identity Management with FreeIPA
FreeIPA provides an integrated identity management solution specifically designed for Linux and Unix environments. It combines LDAP directory services, Kerberos authentication, DNS services, certificate management, and policy enforcement into a cohesive system.
FreeIPA offers web-based and command-line management interfaces, making it accessible to administrators with varying skill levels. The system supports trust relationships with Active Directory, allowing organizations to maintain separate identity stores while enabling authentication between them.
Client enrollment in FreeIPA domains uses the ipa-client-install command, which automatically configures all necessary services and integrations. Once enrolled, users authenticate via Kerberos, receive automatic home directory creation, and inherit group memberships and sudo rules defined in the FreeIPA server.
Practical Scenarios and Real-World Examples
Understanding commands and concepts becomes much more valuable when applied to realistic scenarios that administrators commonly encounter. These examples demonstrate how the various tools and techniques work together to solve actual problems.
🔧 Setting Up a Development Team Environment
Your organization hires a new development team of five people who need shared access to project files, sudo privileges for installing development tools, and consistent environments across multiple servers. This scenario requires creating users, establishing a shared group, configuring a collaborative directory, and granting appropriate permissions.
First, create the development group: sudo groupadd developers. Then create user accounts for each team member with appropriate settings: sudo useradd -m -s /bin/bash -G developers,sudo -c "Jane Developer" janed. Repeat for each team member, adjusting the username and full name accordingly.
Set initial passwords: sudo passwd janed, prompting for a temporary password that users must change on first login. Enforce password change on first login: sudo chage -d 0 janed.
Create a shared project directory with SGID: sudo mkdir /projects/webapp, sudo chgrp developers /projects/webapp, sudo chmod 2775 /projects/webapp. The 2775 permissions allow group members to create, modify, and delete files while preventing other users from accessing the directory. The SGID bit ensures all files created in this directory belong to the developers group.
🔐 Implementing Temporary Contractor Access
A contractor needs system access for a three-month project. You must create an account that automatically expires at the project's end, has limited sudo privileges for specific commands only, and maintains clear audit trails of all actions.
Create the contractor account: sudo useradd -m -s /bin/bash -c "John Contractor" -e 2024-06-30 jcontractor. The -e option sets an automatic expiration date, ensuring the account disables itself when the contract ends.
Set a temporary password: sudo passwd jcontractor, and force password change on first login: sudo chage -d 0 jcontractor.
Configure limited sudo access by editing /etc/sudoers with sudo visudo. Add a line granting specific command permissions: jcontractor ALL=(ALL) /usr/bin/systemctl restart webapp, /usr/bin/tail /var/log/webapp/*. This allows the contractor to restart a specific service and view certain log files without full root access.
Enable detailed command logging by ensuring sudo logs to a dedicated file. Verify that /etc/sudoers contains: Defaults logfile="/var/log/sudo.log". This creates an audit trail of all sudo commands the contractor executes.
🛠️ Migrating Users Between Systems
Your organization replaces an old server with a new one, requiring migration of 50 user accounts while preserving UIDs, GIDs, passwords, and home directory contents. This scenario demands careful planning to prevent permission problems and data loss.
On the old system, extract user information: sudo grep -E "^[^:]+:[^:]+:[0-9]{4,}:" /etc/passwd > users.txt (captures users with UID ≥ 1000). Extract password hashes: sudo grep -E "^[^:]+:" /etc/shadow | grep -f <(cut -d: -f1 users.txt) > shadow.txt. Extract group information: sudo grep -E "^[^:]+:[^:]+:[0-9]{4,}:" /etc/group > groups.txt.
Transfer these files securely to the new system: scp users.txt shadow.txt groups.txt newserver:/root/migration/. Also transfer home directories: sudo rsync -avz /home/ newserver:/home/.
On the new system, create groups first to ensure correct GIDs: sudo newusers groups.txt (after formatting appropriately). Then create users: sudo newusers users.txt. Restore password hashes by carefully merging shadow.txt into /etc/shadow, or use a script to set passwords individually.
Verify ownership and permissions: sudo chown -R username:groupname /home/username for each user. Test by logging in as several users to confirm authentication works and home directories are accessible.
📊 Auditing User Access and Cleaning Up Unused Accounts
Security policy requires quarterly audits of user accounts to identify and remove unused accounts, verify appropriate group memberships, and ensure compliance with password policies. This systematic review helps maintain security hygiene and compliance.
Generate a report of all users and their last login: sudo lastlog | grep -v "Never" > active_users.txt and sudo lastlog | grep "Never" > inactive_users.txt. Review the inactive users list to determine which accounts should be disabled or removed.
Check password aging for all users: for user in $(cut -d: -f1 /etc/passwd); do echo "User: $user"; sudo chage -l $user; echo "---"; done > password_audit.txt. Review this report for users without password expiration, expired accounts that should be removed, or policy violations.
List all users with sudo access: sudo grep -E "^%sudo|^%wheel" /etc/group and review /etc/sudoers for individual grants. Verify that each user with administrative access genuinely requires these privileges and document the business justification.
Disable inactive accounts rather than immediately deleting them: sudo usermod -L -s /sbin/nologin username. This prevents login while preserving the account for potential future reference. After a retention period (typically 90 days), permanently remove truly unused accounts: sudo userdel -r username.
👥 Creating a Shared Resource with Fine-Grained Permissions
Multiple departments need access to a shared reporting directory, but with different permission levels. The finance team needs full access, the management team needs read-only access, and the IT team needs ability to manage the directory structure without viewing sensitive financial data.
Create groups for each access level: sudo groupadd finance_full, sudo groupadd management_read, sudo groupadd it_admin. Add appropriate users to each group.
Create the base directory: sudo mkdir -p /shared/reports. Set ownership and permissions: sudo chgrp finance_full /shared/reports, sudo chmod 2770 /shared/reports. The SGID bit ensures new files belong to finance_full by default.
Use ACLs (Access Control Lists) for fine-grained permissions beyond standard user/group/other model: sudo setfacl -m g:management_read:rx /shared/reports grants read and execute to management_read group. sudo setfacl -m g:it_admin:rwx /shared/reports grants full access to IT administrators.
Set default ACLs so new files inherit these permissions: sudo setfacl -d -m g:management_read:r /shared/reports, sudo setfacl -d -m g:it_admin:rw /shared/reports. These default ACLs apply to all newly created files within the directory.
Verify ACL configuration: sudo getfacl /shared/reports. This displays all standard permissions plus ACL entries, confirming the complex permission structure works as intended.
Automation and Scripting for User Management
Manual user management becomes impractical and error-prone as organizations grow. Automation through scripting ensures consistency, reduces administrative overhead, and enables integration with HR systems, ticketing platforms, and compliance tools.
Bash Scripts for Bulk Operations
Shell scripts provide powerful automation for repetitive user management tasks. A script reading user information from a CSV file can create dozens of accounts consistently, applying standard settings and generating documentation automatically.
A basic user creation script might look like this structure: read each line from a CSV file containing username, full name, department, and manager information. For each line, execute useradd with appropriate options, set a temporary password, configure password aging, add the user to department-specific groups, and log the action to an audit file. Send an email notification to the new user and their manager with login instructions.
Error handling becomes critical in automation scripts. Check whether each username already exists before attempting creation. Verify that specified groups exist before adding users to them. Validate that home directories were created successfully. Log both successes and failures for troubleshooting and audit purposes.
Configuration Management Tools
Enterprise environments typically use configuration management platforms like Ansible, Puppet, Chef, or SaltStack to manage users across hundreds or thousands of servers. These tools ensure consistent user configuration across entire infrastructure and automatically remediate configuration drift.
Ansible provides user management through the user module, which abstracts the differences between various Linux distributions. An Ansible playbook might define users declaratively, specifying desired state rather than procedural commands. The platform automatically determines what actions are necessary to achieve that state, creating users that don't exist, modifying users whose properties differ from the specification, and optionally removing users not defined in the configuration.
Configuration management approaches treat user definitions as code, stored in version control systems. This provides change tracking, peer review through pull requests, and the ability to roll back problematic changes. Infrastructure-as-code methodologies extend these benefits throughout your entire environment.
Integration with Identity Providers
Modern cloud-native approaches often integrate directly with identity providers like Okta, Azure AD, or AWS IAM Identity Center. These systems provision and deprovision user access automatically based on HR data, eliminating manual account creation entirely.
SCIM (System for Cross-domain Identity Management) provides a standardized protocol for automated user provisioning. When an employee joins the organization, the HR system triggers SCIM calls to identity providers, which automatically create accounts across all integrated systems. When employees leave, deprovisioning happens automatically, immediately revoking access across all systems simultaneously.
This automation dramatically reduces security risks from delayed account deprovisioning, eliminates errors from manual account creation, and provides comprehensive audit trails of all access changes. The initial implementation requires significant effort, but the long-term benefits in security, compliance, and administrative efficiency justify the investment for medium and large organizations.
How do I reset a forgotten root password?
Resetting a forgotten root password requires physical or console access to the system. Reboot the server and interrupt the boot process (usually by pressing 'e' at the GRUB menu). Edit the kernel boot parameters to append init=/bin/bash or rd.break (depending on distribution). Boot with these parameters to gain a root shell without authentication. Remount the root filesystem as read-write: mount -o remount,rw /. Change the password: passwd root. If SELinux is enabled, create a trigger file for relabeling: touch /.autorelabel. Reboot the system normally. This process works because you have physical access; it demonstrates why physical security is crucial for servers.
What's the difference between /sbin/nologin and /bin/false as a user shell?
Both /sbin/nologin and /bin/false prevent interactive login, but they behave slightly differently. The /sbin/nologin shell displays a polite message (from /etc/nologin.txt if it exists) explaining that the account is not available, then exits. The /bin/false shell simply exits immediately with a non-zero status without any message. For service accounts, either works fine. For disabled user accounts, /sbin/nologin provides better user experience by explaining why login failed rather than appearing as a generic failure. Some systems use /usr/sbin/nologin instead of /sbin/nologin; check which path exists on your distribution. Neither shell prevents the user from running processes via cron jobs or other non-interactive methods.
How do I find all files owned by a specific user or group?
Use the find command to locate files by ownership. Finding files by user: sudo find / -user username -ls. Finding files by group: sudo find / -group groupname -ls. The -ls option provides detailed output similar to ls -l. For numeric UID/GID (useful for orphaned files): sudo find / -uid 1001 -ls or sudo find / -gid 1001 -ls. These commands search the entire filesystem starting from root (/); restrict the search to specific directories for faster results: sudo find /home -user username. Finding files owned by deleted users: sudo find / -nouser -ls or sudo find / -nogroup -ls. These searches can take considerable time on large filesystems; consider running them during off-peak hours or limiting scope to specific directories.
Why can't a user access a file even though they're in the correct group?
Several common issues cause this frustrating problem. First, group membership changes don't affect existing login sessions; the user must log out and back in for new group memberships to take effect. Verify current effective groups with the groups command or id command. Second, check that file permissions actually grant the group appropriate access; use ls -l filename to verify. Third, parent directory permissions might prevent access even if the file itself has correct permissions; users need execute permission on all parent directories to access a file. Fourth, check for ACLs that might override standard permissions: getfacl filename. Fifth, SELinux or AppArmor policies might deny access regardless of file permissions; check /var/log/audit/audit.log for SELinux denials or dmesg for AppArmor messages. Finally, verify the user is actually in the group you think they are; sometimes administrators add users to similarly-named groups by mistake.
How do I transfer user accounts between different Linux distributions?
Transferring users between distributions requires careful handling because of subtle differences in default settings, UID/GID ranges, and configuration file formats. First, extract user information from the source system: copy relevant entries from /etc/passwd, /etc/shadow, /etc/group, and /etc/gshadow for users with UIDs ≥ 1000 (or your organization's starting UID). Second, transfer home directories using rsync to preserve permissions and ownership: sudo rsync -avz /home/ targetserver:/home/. Third, on the target system, create groups first to ensure GIDs match, then create users. You can manually add entries to configuration files or use newusers for bulk creation. Fourth, restore password hashes from the shadow file backup. Fifth, verify and fix any ownership issues: sudo chown -R username:groupname /home/username. Sixth, test by logging in as several users. Consider using configuration management tools like Ansible for more complex migrations involving many servers. For production migrations, thoroughly test the process in a development environment first.
What happens to a user's running processes when I delete their account?
Deleting a user account with userdel does not automatically terminate processes currently running under that user's credentials. The processes continue running under the numeric UID, even though the username no longer exists in /etc/passwd. This creates orphaned processes that show the numeric UID instead of a username in process listings. To properly remove a user, first identify their running processes: sudo ps -u username or sudo pgrep -u username. Terminate these processes before deleting the account: sudo pkill -u username (terminates gracefully) or sudo pkill -9 -u username (forces immediate termination). Check for cron jobs: sudo crontab -u username -l and remove them if necessary: sudo crontab -u username -r. Also check for at jobs: sudo atq -u username. After ensuring no processes or scheduled jobs remain, delete the account: sudo userdel -r username. The -r flag removes the home directory and mail spool. Some administrators prefer to first lock the account and wait a few days to ensure no critical processes break before permanent deletion.