How to Set Up Azure Kubernetes Service for Beginners
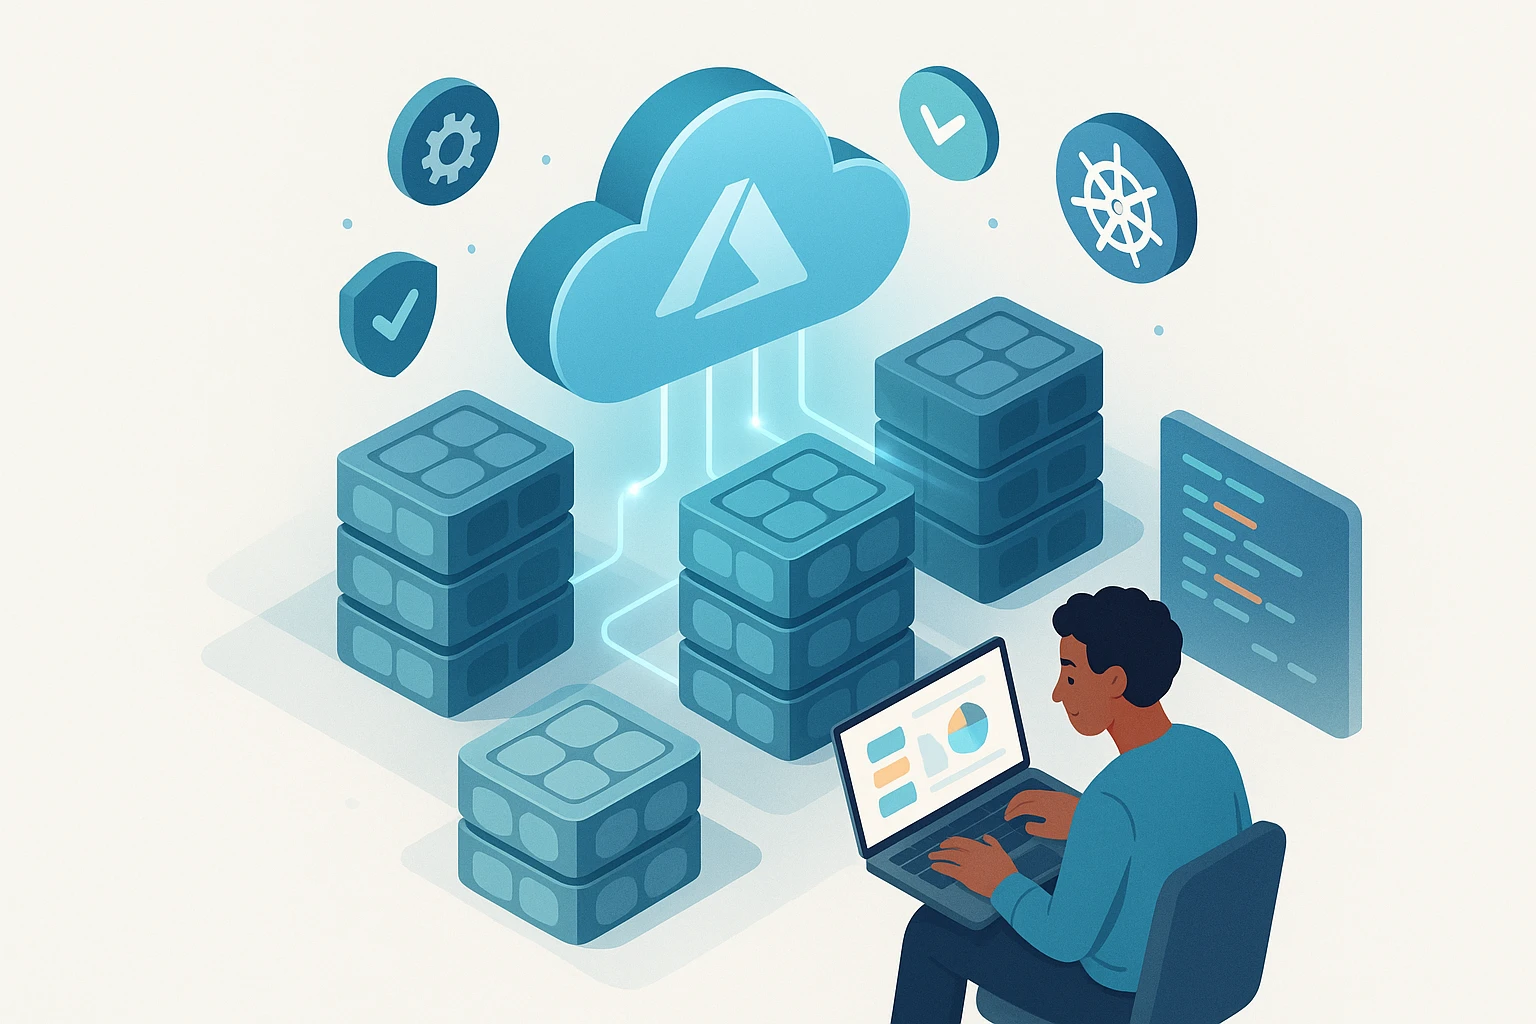
How to Set Up Azure Kubernetes Service for Beginners
Cloud-native application deployment has become the cornerstone of modern software infrastructure, and understanding how to leverage managed Kubernetes services can dramatically accelerate your development journey. Organizations worldwide are migrating their workloads to container orchestration platforms, and Azure Kubernetes Service (AKS) stands as one of the most accessible entry points for teams beginning this transformation. Whether you're a developer looking to modernize your deployment pipeline or an IT professional tasked with infrastructure modernization, mastering AKS opens doors to scalable, resilient, and efficient application management.
Azure Kubernetes Service represents Microsoft's fully managed container orchestration platform that simplifies the complexity of running Kubernetes clusters by handling critical tasks like health monitoring, maintenance, and patching. This comprehensive guide will walk you through multiple approaches to setting up AKS, from basic cluster creation to advanced configuration options, ensuring you understand not just the "how" but also the "why" behind each decision. We'll explore various perspectives including Azure Portal setup, command-line interfaces, infrastructure as code approaches, and best practices that align with production-ready deployments.
Throughout this resource, you'll gain practical knowledge about cluster architecture decisions, networking configurations, security considerations, and cost optimization strategies. By the end, you'll have the confidence to provision your first AKS cluster, deploy containerized applications, and understand the foundational concepts that will support your continued growth in Kubernetes administration. Each section builds upon the previous, creating a structured learning path that respects your time while ensuring thorough comprehension of this powerful platform.
Essential Prerequisites and Account Setup
Before diving into cluster creation, establishing the proper foundation ensures a smooth setup experience. Your Azure subscription serves as the billing and organizational boundary for all resources you'll create. If you're new to Azure, Microsoft offers a free tier with $200 credit for the first 30 days, providing ample resources to experiment with AKS without financial commitment. Navigate to the Azure portal and verify your subscription is active and has sufficient permissions to create resources.
The Azure CLI represents your most powerful tool for interacting with AKS programmatically. Installing this command-line interface on your local machine enables scripting, automation, and faster cluster management compared to clicking through the portal. For Windows users, the MSI installer provides the simplest installation method, while macOS users can leverage Homebrew with a single command. Linux distributions typically support installation through their native package managers, ensuring the CLI stays updated alongside system packages.
"Setting up the right tools before starting saves hours of troubleshooting later. The Azure CLI isn't just convenient—it's essential for any serious Kubernetes work."
Kubectl, the Kubernetes command-line tool, acts as your interface for communicating with any Kubernetes cluster, including AKS. While Azure CLI handles cluster lifecycle operations, kubectl manages the applications and resources running inside your cluster. Installing kubectl can be accomplished through Azure CLI itself using the command az aks install-cli, which automatically configures the correct version compatible with your AKS clusters. This approach eliminates version mismatch issues that commonly plague beginners.
Resource groups in Azure function as logical containers that organize related resources and simplify management through unified lifecycle control. Creating a dedicated resource group for your AKS cluster before provisioning ensures clean organization and makes eventual cleanup straightforward. Consider naming conventions that reflect environment, project, and region—for example, rg-aks-dev-eastus—to maintain clarity as your Azure footprint grows. This organizational discipline becomes increasingly valuable as you manage multiple clusters across different environments.
Authentication and Permission Configuration
Azure Active Directory integration provides enterprise-grade authentication and authorization for your AKS clusters. While optional for learning environments, understanding identity management from the start builds good security habits. Service principals or managed identities grant your AKS cluster permission to interact with other Azure resources like container registries, virtual networks, and storage accounts. Managed identities represent the modern, more secure approach as they eliminate the need to manage credentials directly.
- Contributor role at the subscription or resource group level for creating and managing AKS resources
- User Access Administrator if you plan to configure role-based access control (RBAC) for cluster access
- Network Contributor when integrating with existing virtual networks
- Azure Container Registry access for pulling private container images
Multiple Approaches to Cluster Creation
Azure provides several pathways to create AKS clusters, each suited to different skill levels, automation needs, and organizational workflows. Understanding these options empowers you to choose the method that best aligns with your current requirements while recognizing when to graduate to more sophisticated approaches as your expertise develops.
Azure Portal Method: Visual and Intuitive
The Azure Portal offers the most beginner-friendly approach, presenting all configuration options through a guided wizard interface. After logging into portal.azure.com, searching for "Kubernetes services" brings you to the AKS management page where the "Create" button initiates the cluster creation workflow. The wizard divides configuration into logical tabs: Basics, Node pools, Networking, Integrations, and Tags, preventing overwhelm by progressively revealing complexity.
In the Basics tab, you'll select your subscription, resource group, and cluster name while choosing a region that balances latency requirements with cost considerations. The Kubernetes version dropdown typically defaults to a stable release, though understanding the difference between stable, preview, and deprecated versions helps you make informed decisions about feature availability versus long-term support. Selecting an appropriate VM size for your nodes requires balancing CPU and memory requirements against budget constraints—Standard_DS2_v2 serves as a reasonable starting point for development workloads.
| Configuration Aspect | Recommended for Beginners | Production Consideration |
|---|---|---|
| Node Count | 1-2 nodes | 3+ nodes for high availability |
| VM Size | Standard_DS2_v2 (2 vCPU, 7GB RAM) | Based on workload profiling |
| Network Plugin | Kubenet (simpler) | Azure CNI (advanced networking) |
| Authentication | Local accounts enabled | Azure AD integration |
| Monitoring | Container Insights enabled | Container Insights + custom dashboards |
The Node pools tab allows configuration of your worker nodes where applications actually run. System node pools host critical cluster components like CoreDNS and metrics-server, while user node pools run your applications. For learning purposes, a single node pool suffices, but understanding this separation prepares you for production architectures that isolate workload types. Enabling autoscaling at this stage, even with conservative limits, demonstrates how AKS automatically adjusts capacity based on resource utilization.
Azure CLI Method: Scriptable and Repeatable
Command-line cluster creation accelerates provisioning once you understand the parameters and enables version-controlled infrastructure definitions. The fundamental command structure follows a pattern that becomes familiar with practice, starting with az aks create followed by required and optional parameters that define cluster characteristics. This approach excels when you need to create multiple similar clusters or integrate cluster provisioning into larger automation workflows.
A basic cluster creation command might look like this: az aks create --resource-group myResourceGroup --name myAKSCluster --node-count 2 --enable-addons monitoring --generate-ssh-keys. Each parameter serves a specific purpose: resource group and name provide identity and organization, node count determines initial capacity, the monitoring addon enables Container Insights from day one, and SSH key generation ensures you can access nodes if troubleshooting requires it. The CLI provides immediate feedback during creation, displaying progress as Azure provisions networking, compute, and control plane components.
"The command line might seem intimidating at first, but once you understand the pattern, you'll never want to go back to clicking through portal wizards for repetitive tasks."
Advanced CLI options unlock powerful capabilities like specifying exact Kubernetes versions, configuring network policies, attaching Azure Container Registry instances, and defining node taints for workload isolation. The --help flag appended to any command reveals all available parameters with brief descriptions, serving as built-in documentation. Combining CLI commands with shell scripts or Azure DevOps pipelines transforms cluster creation from a manual task into an automated, consistent process that reduces human error and documents infrastructure decisions through code.
Infrastructure as Code with Terraform
Terraform represents the gold standard for managing cloud infrastructure through declarative configuration files that describe desired state rather than imperative steps. While requiring more upfront learning investment, this approach provides unmatched benefits for team collaboration, change tracking, and environment consistency. The Azure provider for Terraform includes comprehensive AKS resource definitions that expose every configuration option available through the Azure API.
A minimal Terraform configuration for AKS begins with provider initialization, resource group declaration, and the AKS cluster resource block. The declarative syntax reads almost like documentation: you specify what you want (a cluster with certain characteristics) rather than how to create it (the sequence of API calls). Terraform handles dependency resolution automatically, ensuring resources are created in the correct order—for example, creating the resource group before attempting to place a cluster within it. Running terraform plan before applying changes provides a preview of modifications, building confidence that your infrastructure changes will produce expected results.
Version control systems like Git transform Terraform configurations into living documentation of your infrastructure evolution. Commit messages explain why changes were made, pull requests enable peer review before applying modifications to production environments, and branches allow experimentation without risk to stable clusters. This workflow elevates infrastructure management from ad-hoc changes to engineered processes with the same rigor applied to application code development.
Understanding AKS Networking Models
Networking represents one of the most critical yet complex aspects of Kubernetes cluster design, directly impacting security, performance, and integration capabilities with existing infrastructure. AKS offers two primary networking plugins—kubenet and Azure CNI—each with distinct characteristics that suit different scenarios. Making an informed choice at cluster creation time prevents costly migrations later, as changing network plugins requires recreating the entire cluster.
Kubenet: Simplicity and IP Conservation
Kubenet, the default networking option, creates a simpler network topology where nodes receive IP addresses from your virtual network subnet, but pods receive addresses from a completely separate, internal CIDR range. This approach conserves IP addresses in your Azure virtual network since only nodes consume VNet IPs, making it ideal for development environments or scenarios where VNet IP space is constrained. Network address translation (NAT) handles communication between pods and external resources, adding a layer of abstraction that simplifies initial setup.
The tradeoff with kubenet involves limited integration with Azure networking services. Pods cannot be directly accessed from other resources in your virtual network without additional configuration like ingress controllers or load balancers. For beginners focused on learning Kubernetes concepts rather than complex Azure networking integration, kubenet removes unnecessary complexity and allows concentration on container orchestration fundamentals. User-defined routes (UDRs) automatically manage traffic routing between nodes, requiring no manual network configuration in most cases.
Azure CNI: Advanced Integration Capabilities
Azure Container Networking Interface (CNI) assigns IP addresses from your virtual network directly to both nodes and pods, enabling seamless integration with other Azure services and existing network infrastructure. This direct addressing means pods are first-class citizens on your virtual network, accessible through standard Azure networking constructs like network security groups, service endpoints, and private links. Enterprises with established Azure footprints typically prefer Azure CNI for its alignment with existing network architectures and security policies.
"Network planning isn't glamorous, but it's the foundation everything else builds upon. Invest time understanding your options before creating production clusters."
IP address planning becomes crucial with Azure CNI since each pod consumes a VNet IP address. Calculating required address space involves multiplying maximum nodes by maximum pods per node, then adding buffer for scaling. A cluster with 10 nodes, each supporting 30 pods, requires at least 300 IP addresses just for pods, plus additional addresses for nodes and Azure-reserved ranges. Subnets must be sized generously to accommodate growth, as exhausting IP space prevents scaling and requires complex subnet expansion procedures.
| Networking Feature | Kubenet | Azure CNI |
|---|---|---|
| IP Address Consumption | Low (nodes only) | High (nodes + all pods) |
| Pod-to-VNet Communication | Through NAT | Direct |
| Network Policy Support | Calico only | Azure Network Policies or Calico |
| Setup Complexity | Lower | Higher |
| Best For | Dev/test, IP-constrained environments | Production, enterprise integration |
Load Balancing and Ingress Configuration
Exposing applications running in your AKS cluster to external traffic requires understanding Kubernetes service types and Azure load balancing options. LoadBalancer services automatically provision Azure Load Balancers with public IP addresses, providing simple external access but consuming a public IP per service. This approach works well for small numbers of services but becomes unwieldy and expensive at scale. Ingress controllers offer a more sophisticated solution, routing multiple services through a single load balancer based on hostnames or URL paths.
Popular ingress controllers like NGINX Ingress Controller, Traefik, and Azure Application Gateway Ingress Controller each bring different capabilities and operational characteristics. NGINX enjoys widespread adoption and extensive documentation, making it an excellent choice for beginners. The ingress controller runs as pods within your cluster, receiving traffic from a single Azure Load Balancer and routing it to appropriate backend services based on ingress resource definitions. This architecture reduces cost, simplifies DNS management, and enables advanced traffic management features like SSL termination and URL rewriting.
Network policies provide firewall-like controls within your cluster, defining which pods can communicate with each other and with external endpoints. By default, Kubernetes allows all pod-to-pod communication, which may not align with security requirements for production workloads. Implementing network policies follows a whitelist approach: deny all traffic by default, then explicitly permit required communication paths. This micro-segmentation limits blast radius if a container is compromised and enforces architectural boundaries between application tiers.
Connecting to Your AKS Cluster
Successfully creating a cluster represents only the first step; actually interacting with it requires configuring local tools and understanding authentication mechanisms. The kubectl configuration file, typically located at ~/.kube/config, stores cluster connection information including API server endpoints, authentication certificates, and context definitions. Azure CLI simplifies this configuration through the az aks get-credentials command, which automatically retrieves and merges cluster credentials into your kubectl config.
Executing az aks get-credentials --resource-group myResourceGroup --name myAKSCluster performs several operations behind the scenes: it contacts the Azure API to retrieve cluster endpoint and certificate information, creates or updates your kubeconfig file, and sets the current context to your new cluster. The --admin flag, sometimes seen in tutorials, grants cluster-admin privileges and should be avoided except for emergency access, as it bypasses Azure RBAC integration and audit logging.
Verifying Cluster Connectivity
Testing connectivity immediately after configuration prevents confusion later when deploying applications. The command kubectl cluster-info displays control plane component endpoints, confirming kubectl can reach your cluster's API server. Following up with kubectl get nodes lists all nodes in your cluster along with their status, Kubernetes version, and age. Healthy nodes show "Ready" status, indicating the kubelet agent is running and the node can accept pod scheduling.
Understanding cluster contexts becomes important when managing multiple clusters across development, staging, and production environments. The command kubectl config get-contexts lists all configured clusters, with an asterisk marking the currently active context. Switching between clusters uses kubectl config use-context [context-name], preventing accidental modifications to the wrong environment. Tools like kubectx streamline context switching for users frequently moving between clusters, reducing the cognitive load of remembering exact context names.
"Double-checking which cluster you're connected to before running commands isn't paranoia—it's professional discipline that prevents career-limiting mistakes."
Exploring Cluster Components
Kubernetes clusters consist of numerous components working together to provide container orchestration capabilities. Examining these components builds understanding of how Kubernetes functions internally. The command kubectl get pods --all-namespaces reveals system pods running in namespaces like kube-system, which includes critical components like CoreDNS for service discovery, metrics-server for resource utilization tracking, and tunnelfront for secure communication between control plane and nodes.
Namespaces provide logical isolation within a single cluster, similar to folders in a filesystem. The default namespace receives resources when no namespace is specified, but production environments typically create dedicated namespaces for different applications or teams. Creating a namespace for your learning experiments keeps them separate from system components: kubectl create namespace learning establishes this boundary. Subsequent commands can target this namespace using the --namespace learning flag or by changing your context's default namespace.
- 🔍 kubectl get namespaces - Lists all namespaces in the cluster
- 🔍 kubectl get all -n kube-system - Shows all resources in the system namespace
- 🔍 kubectl describe node [node-name] - Displays detailed node information including capacity and conditions
- 🔍 kubectl top nodes - Shows current CPU and memory utilization per node
- 🔍 kubectl api-resources - Lists all resource types available in the cluster
Deploying Your First Application
Theory solidifies through practice, and deploying an actual application transforms abstract concepts into tangible results. Starting with a simple containerized application allows focus on Kubernetes deployment mechanics without the complexity of building custom containers. The classic NGINX web server serves as an excellent first deployment target due to its simplicity, immediate visual feedback, and minimal resource requirements.
Creating a Deployment Resource
Deployments represent the standard method for running applications in Kubernetes, managing replica sets that in turn manage pods. Creating a deployment imperatively through kubectl provides immediate feedback: kubectl create deployment nginx --image=nginx:latest instructs Kubernetes to run one or more pods based on the NGINX container image. Within seconds, Kubernetes schedules the pod to an available node, pulls the container image if not already cached, and starts the container.
Monitoring deployment progress uses kubectl get deployments to see high-level status and kubectl get pods to view individual pod instances. Pods transition through several states: Pending while scheduling and pulling images, Running once containers start successfully, and eventually Ready when health checks pass. The kubectl describe pod [pod-name] command provides detailed information about events, container status, and any errors encountered during startup.
Exposing the Application
Pods receive internal IP addresses that change whenever pods are recreated, making direct pod access impractical. Services provide stable endpoints that load-balance traffic across pods matching a label selector. Creating a service for your NGINX deployment exposes it within the cluster: kubectl expose deployment nginx --port=80 --type=ClusterIP creates an internal endpoint accessible from other pods but not from outside the cluster.
Changing the service type to LoadBalancer provisions an Azure Load Balancer with a public IP address, making your application accessible from the internet: kubectl expose deployment nginx --port=80 --type=LoadBalancer --name=nginx-public. Azure takes a minute or two to provision the load balancer and assign a public IP. Running kubectl get service nginx-public repeatedly shows the external IP progressing from "pending" to an actual IP address. Navigating to this IP in a web browser displays the NGINX welcome page, confirming end-to-end connectivity.
"Seeing your first application respond through a LoadBalancer service is a milestone moment—suddenly all the YAML and commands click into place as a cohesive system."
Scaling Applications
One of Kubernetes' core strengths is effortless horizontal scaling. Increasing replica count distributes load across multiple pod instances and provides redundancy if individual pods fail. The command kubectl scale deployment nginx --replicas=3 instructs Kubernetes to maintain three pod instances. Kubernetes immediately creates additional pods to reach the desired count, automatically distributing them across available nodes for optimal resource utilization and fault tolerance.
Watching pods scale in real-time demonstrates Kubernetes' reconciliation loop in action: kubectl get pods --watch displays pod status updates as they're created and become ready. The service automatically includes new pods in its load balancing pool once they pass health checks, requiring no manual intervention or configuration changes. This declarative model—stating desired state rather than executing procedural steps—fundamentally changes how we think about application deployment and scaling.
Autoscaling takes manual scaling further by automatically adjusting replica count based on observed metrics like CPU utilization or custom metrics. The Horizontal Pod Autoscaler (HPA) monitors resource usage and scales deployments within defined boundaries. Creating an autoscaler for your NGINX deployment: kubectl autoscale deployment nginx --cpu-percent=50 --min=1 --max=10 configures Kubernetes to maintain average CPU utilization around 50% by adding or removing pods between 1 and 10 replicas. Load testing tools can demonstrate autoscaling behavior by generating artificial traffic that triggers scale-up events.
Persistent Storage in AKS
Containers are ephemeral by design—when a pod is deleted, all data stored in its filesystem disappears. Applications requiring data persistence, like databases or file uploads, need external storage that survives pod lifecycle events. Kubernetes abstracts storage through Persistent Volumes (PV) and Persistent Volume Claims (PVC), decoupling storage provisioning from consumption and enabling portability across different storage backends.
Understanding Storage Classes
AKS includes pre-configured storage classes that automatically provision Azure storage resources when applications request persistent volumes. Running kubectl get storageclass displays available options, typically including managed-premium (SSD-backed), managed-standard (HDD-backed), and azurefile classes for shared filesystem scenarios. Each storage class defines performance characteristics, replication options, and cost implications, allowing developers to request appropriate storage without understanding underlying Azure storage intricacies.
The default storage class automatically fulfills persistent volume claims that don't specify a class explicitly. Administrators can change the default or create custom storage classes with specific parameters like zone-redundant storage or encryption settings. Storage class definitions include provisioner (which plugin handles volume creation), parameters (Azure-specific settings like storage account type), and reclaim policy (what happens to volumes when claims are deleted).
Creating and Using Persistent Volumes
Applications request storage by creating Persistent Volume Claim resources that specify size and access mode requirements. A simple PVC for 5GB of storage might look like this in YAML format, defining the desired capacity and access mode (ReadWriteOnce for single-node access, ReadWriteMany for multi-node shared access). Applying this YAML with kubectl apply -f pvc.yaml triggers the storage class provisioner to create an Azure Managed Disk and bind it to the claim.
Mounting persistent volumes in pods requires referencing the PVC in the pod specification's volumes section, then mounting those volumes into container filesystems at specified paths. This two-step process separates storage lifecycle from pod lifecycle—the PVC continues existing even when pods using it are deleted, preserving data across application restarts and updates. Database deployments particularly benefit from this persistence, maintaining data integrity through pod rescheduling and cluster maintenance operations.
- 💾 Azure Disks provide high-performance block storage for single-pod scenarios
- 💾 Azure Files offer SMB-based shared storage accessible from multiple pods simultaneously
- 💾 Volume snapshots enable backup and restore capabilities for disaster recovery
- 💾 Ephemeral volumes provide temporary storage tied to pod lifecycle for caching scenarios
- 💾 CSI drivers extend storage options to third-party solutions like NetApp or Portworx
"Storage seems straightforward until you need it. Understanding persistent volumes before deploying stateful applications saves countless hours of troubleshooting and potential data loss."
Monitoring and Logging Strategies
Observability transforms opaque systems into understandable, debuggable environments. Without proper monitoring and logging, troubleshooting issues becomes guesswork and performance optimization remains impossible. Azure provides Container Insights as an integrated monitoring solution specifically designed for AKS, collecting metrics, logs, and performance data without requiring complex configuration or third-party tools.
Enabling Container Insights
Container Insights can be enabled during cluster creation or added to existing clusters through Azure CLI: az aks enable-addons --resource-group myResourceGroup --name myAKSCluster --addons monitoring. This command deploys the OMS agent as a DaemonSet, ensuring one monitoring pod runs on every node to collect metrics and logs. Data flows to a Log Analytics workspace where it's stored, indexed, and made available for querying through Kusto Query Language (KQL).
The Azure Portal provides pre-built dashboards showing cluster health, node performance, and container metrics without writing queries. Navigation through the AKS resource's "Insights" blade reveals visualizations of CPU and memory utilization, pod counts, and performance trends over time. These dashboards help identify resource bottlenecks, unusual patterns, and capacity planning needs through intuitive graphical representations that don't require deep Kubernetes expertise to interpret.
Log Collection and Analysis
Container logs—everything written to stdout and stderr by application processes—are automatically collected and forwarded to Log Analytics. Viewing logs through the portal or CLI provides debugging capabilities when applications misbehave. The command kubectl logs [pod-name] displays recent logs for a specific pod, while adding --previous shows logs from the last terminated container instance, crucial for debugging crash loops.
Advanced log analysis leverages KQL queries against the Log Analytics workspace. Queries can filter logs by time range, search for specific error messages, aggregate log volumes by namespace, or correlate logs with performance metrics. Example queries might identify pods that logged errors in the past hour, track request latency patterns, or alert when specific error conditions occur. Saving frequently used queries and creating custom dashboards builds a personalized monitoring environment tailored to your specific applications and concerns.
Alerting and Proactive Monitoring
Reactive monitoring—checking dashboards when problems occur—gives way to proactive alerting that notifies operators before users notice issues. Azure Monitor alerts trigger based on metric thresholds or log query results, sending notifications through email, SMS, webhooks, or integration with incident management tools like PagerDuty. Creating an alert for high node CPU utilization prevents resource exhaustion from impacting application performance.
Alert rules combine conditions (what to monitor), thresholds (when to trigger), and action groups (who to notify and how). Starting with conservative thresholds prevents alert fatigue from false positives, then tuning based on observed patterns. Common initial alerts include node resource utilization above 80%, pod restart counts exceeding normal baselines, and persistent volume capacity approaching limits. Each alert should include runbook links or remediation steps, transforming alerts from mere notifications into actionable guidance.
Security Fundamentals for AKS
Security cannot be an afterthought in container orchestration platforms that often run critical business applications and handle sensitive data. AKS provides multiple security layers from cluster access control to network isolation to container runtime security. Understanding and implementing these controls from the beginning establishes good habits and prevents costly security incidents.
Role-Based Access Control (RBAC)
Kubernetes RBAC defines who can perform which actions on which resources within the cluster. Roles define permissions (verbs like get, list, create, delete applied to resources like pods, services, deployments), while RoleBindings associate roles with users or service accounts. AKS integrates with Azure Active Directory, allowing cluster access control through familiar identity management rather than sharing certificate files or static tokens.
Enabling Azure AD integration during cluster creation or through the az aks update command establishes this connection. Users authenticate through Azure AD, receiving kubeconfig credentials that include their identity. Cluster administrators then create RoleBindings that grant appropriate permissions based on team membership or job function. This approach provides audit trails showing who performed which operations and enables immediate access revocation when team members change roles or leave the organization.
Network Security and Policies
Network policies implement micro-segmentation within your cluster, controlling which pods can communicate with each other and with external endpoints. By default, Kubernetes allows all pod-to-pod communication, which may not align with security requirements for multi-tenant clusters or applications handling sensitive data. Implementing network policies follows a whitelist approach: deny all traffic by default, then explicitly permit required communication paths.
"Security is layers, not a single control. Network policies, RBAC, pod security policies, and monitoring work together to create defense in depth."
Azure Network Policies or Calico provide policy enforcement engines that interpret NetworkPolicy resources and configure node-level firewall rules. A policy might restrict database pods to only accept connections from application tier pods, or prevent pods in the development namespace from accessing production services. Testing policies in non-production environments before applying to production prevents accidental service disruption from overly restrictive rules.
Image Security and Scanning
Container images form the foundation of your applications, and vulnerabilities in base images or dependencies create security risks. Azure Container Registry includes integrated vulnerability scanning through Microsoft Defender for Containers, automatically analyzing pushed images for known CVEs. Scan results appear in the Azure Portal, highlighting severity levels and providing remediation guidance.
Establishing image promotion workflows ensures only scanned, approved images reach production clusters. Development images might be pushed to a "dev" registry with relaxed policies, while production images must pass security scans and be promoted to a separate "prod" registry. Admission controllers like Azure Policy for AKS can enforce that only images from approved registries are deployed, preventing accidental deployment of unvetted containers.
Pod Security Standards define three levels of security controls: privileged (unrestricted), baseline (minimally restrictive), and restricted (heavily restricted). Applying these standards through admission controllers prevents pods from running with dangerous configurations like privileged containers, host network access, or excessive Linux capabilities. Starting with baseline policies for production namespaces establishes a security foundation without breaking most applications, then progressively tightening to restricted policies as applications are audited and modified to comply.
Cost Management and Optimization
Cloud costs can spiral quickly without proper management, and Kubernetes' ease of scaling amplifies this risk. Understanding AKS cost components and implementing optimization strategies from the start prevents budget surprises and ensures efficient resource utilization. Azure charges for the underlying virtual machines running as nodes, associated storage, networking egress, and optional services like Container Insights.
Right-Sizing Node Pools
Selecting appropriate VM sizes for your workloads balances performance requirements against cost. Over-provisioning wastes money on unused capacity, while under-provisioning causes performance issues and frequent scaling events. Analyzing actual resource utilization through Container Insights reveals whether nodes consistently run at low utilization (indicating over-provisioning) or frequently hit resource limits (indicating under-provisioning).
Node pool diversification allows mixing VM sizes within a single cluster, matching each workload type to appropriate compute resources. CPU-intensive workloads might use compute-optimized VMs, memory-intensive applications like databases benefit from memory-optimized instances, and general workloads run efficiently on balanced VMs. Kubernetes scheduling features like node selectors and taints/tolerations direct pods to appropriate node pools based on resource requirements.
Autoscaling for Efficiency
Cluster autoscaler automatically adjusts node count based on pod scheduling needs, adding nodes when pods can't be scheduled due to insufficient resources and removing nodes when utilization drops. Enabling cluster autoscaler during creation or through Azure CLI prevents paying for idle nodes during low-traffic periods while ensuring capacity availability during peak demand. Configuration parameters define minimum and maximum node counts per node pool, preventing runaway scaling while maintaining availability.
Combining cluster autoscaler with Horizontal Pod Autoscaler creates a responsive system that scales both applications and infrastructure in concert. As traffic increases, HPA adds pod replicas; if existing nodes lack capacity, cluster autoscaler adds nodes. When traffic subsides, HPA reduces replicas, and cluster autoscaler eventually removes underutilized nodes. This two-level autoscaling optimizes costs without manual intervention or capacity planning guesswork.
- 💰 Spot VMs offer up to 90% discount for fault-tolerant workloads that can handle interruptions
- 💰 Reserved instances provide discounts for predictable, long-term workloads with 1-3 year commitments
- 💰 Dev/Test pricing reduces costs for non-production environments through special subscription types
- 💰 Azure Hybrid Benefit applies existing Windows Server licenses to reduce node costs
- 💰 Resource quotas prevent individual namespaces from consuming excessive resources
Monitoring and Budget Alerts
Azure Cost Management provides visibility into spending patterns, breaking down costs by resource, resource group, or custom tags. Tagging AKS resources with project names, cost centers, or environments enables detailed cost allocation and chargeback to appropriate teams or departments. Regular cost reviews identify unexpected spending increases and opportunities for optimization.
Budget alerts notify stakeholders when spending approaches or exceeds defined thresholds, preventing surprise bills at month-end. Creating budgets at the resource group level containing your AKS cluster provides early warning of cost overruns. Action groups can automatically trigger remediation workflows, like scaling down non-production clusters outside business hours or sending notifications to responsible teams for investigation.
Troubleshooting Common Issues
Every AKS journey encounters challenges, and developing systematic troubleshooting skills accelerates problem resolution. Understanding where to look for information and which tools provide relevant diagnostics transforms frustrating debugging sessions into methodical investigations. Kubernetes' distributed nature means issues can originate from multiple layers: Azure infrastructure, Kubernetes control plane, node configuration, or application code.
Cluster Creation Failures
Cluster creation failures often stem from insufficient permissions, quota limits, or networking configuration issues. Azure CLI provides error messages during creation, but detailed information appears in Azure Activity Logs accessible through the portal. Common issues include subscription quotas preventing VM creation, service principal permission problems, or subnet size insufficiency for the requested node count.
Quota increase requests through the Azure Portal resolve capacity limits, though processing takes time. Verifying service principal or managed identity permissions before cluster creation prevents authentication-related failures. Network planning tools calculate required subnet sizes based on node count and networking plugin choice, preventing IP exhaustion issues that only manifest during scaling operations.
Pod Scheduling Problems
Pods stuck in Pending state indicate scheduling failures—Kubernetes cannot find a suitable node to run the pod. The kubectl describe pod [pod-name] command shows events explaining why scheduling failed: insufficient CPU or memory, unsatisfied node selectors, or taint/toleration mismatches. Addressing these issues might involve scaling the cluster to add capacity, adjusting pod resource requests, or modifying scheduling constraints.
"When troubleshooting, resist the urge to change multiple things simultaneously. Systematic, single-variable changes help identify root causes rather than masking symptoms."
ImagePullBackOff errors indicate problems retrieving container images, commonly caused by incorrect image names, missing registry credentials, or network connectivity issues. Verifying the image exists in the specified registry and checking image pull secrets resolves most cases. Azure Container Registry integration through managed identity eliminates credential management for ACR-hosted images, preventing authentication-related pull failures.
Application Connectivity Issues
Services not responding to requests despite healthy pods requires investigating multiple layers: pod readiness, service endpoints, network policies, and load balancer configuration. The command kubectl get endpoints [service-name] shows which pod IPs are included in the service's load balancing pool. Empty endpoints indicate no pods match the service's label selector or pods haven't passed readiness checks.
Testing connectivity from within the cluster isolates whether issues are external (load balancer, DNS) or internal (service configuration, network policies). Running a temporary debug pod with network tools: kubectl run debug --image=nicolaka/netshoot -it --rm provides an interactive shell for testing service connectivity using curl, nslookup, or ping. This internal perspective reveals whether services resolve correctly and respond to requests from within the cluster network.
Azure Load Balancer health probe configuration affects service availability when using LoadBalancer service types. Health probes must match the application's actual health check endpoint and protocol. Misconfigured probes cause the load balancer to mark all backend nodes as unhealthy, resulting in service unavailability despite pods running correctly. Reviewing load balancer configuration in the Azure Portal and comparing against application health check implementation identifies probe mismatches.
Advancing Your AKS Skills
Successfully creating and managing your first AKS cluster establishes a foundation for continued learning and increasingly sophisticated implementations. The Kubernetes ecosystem's breadth means there's always more to explore, from service meshes to GitOps workflows to advanced observability patterns. Prioritizing learning paths based on your specific needs and interests ensures time investment yields practical benefits.
Continuous Deployment Pipelines
Integrating AKS with Azure DevOps or GitHub Actions automates application deployment, reducing manual effort and human error. CI/CD pipelines build container images from source code, push them to Azure Container Registry, and update Kubernetes deployments automatically when code changes merge to main branches. This automation accelerates development velocity and ensures consistent, repeatable deployments across environments.
Helm, the Kubernetes package manager, simplifies application deployment through templated YAML files and version-controlled releases. Helm charts define all resources required for an application—deployments, services, config maps, secrets—in a single, parameterized package. Installing applications becomes a single command, and upgrades or rollbacks are equally straightforward. Public Helm repositories provide pre-built charts for common software like databases, monitoring tools, and ingress controllers.
Service Mesh Implementation
Service meshes like Istio or Linkerd add advanced traffic management, security, and observability capabilities to your cluster without modifying application code. Features include automatic mutual TLS between services, sophisticated traffic routing for canary deployments, distributed tracing for request flows across microservices, and circuit breaking to prevent cascade failures. The complexity service meshes introduce is justified for large, microservices-based applications where these capabilities provide significant operational value.
Azure Service Mesh Interface (SMI) provides a standard API across different service mesh implementations, preventing vendor lock-in and simplifying mesh adoption. Starting with basic features like encrypted service-to-service communication builds familiarity before implementing advanced patterns. Service mesh adoption represents a significant architectural decision that should align with actual needs rather than following trends without clear justification.
Multi-Cluster and Hybrid Scenarios
Enterprise requirements often demand multiple clusters for geographical distribution, environment isolation, or disaster recovery. Azure Arc extends Azure management capabilities to Kubernetes clusters running anywhere—on-premises, in other clouds, or at edge locations. This unified control plane simplifies policy enforcement, monitoring, and application deployment across heterogeneous infrastructure.
Federation technologies enable workload distribution across multiple clusters, providing high availability across regions or clouds. Traffic management solutions route requests to the nearest or healthiest cluster, improving performance and resilience. These advanced patterns require careful planning around data consistency, network latency, and operational complexity, but deliver significant benefits for globally distributed applications.
Frequently Asked Questions
What's the difference between AKS and self-managed Kubernetes on Azure VMs?
AKS is a managed service where Microsoft handles control plane maintenance, upgrades, and patching, while you only manage worker nodes and applications. Self-managed Kubernetes requires you to install, configure, and maintain all cluster components including the control plane, which demands significantly more expertise and operational overhead. AKS provides better integration with Azure services and includes features like automatic version upgrades and built-in monitoring at no additional charge for the control plane.
How much does AKS cost, and what factors affect pricing?
AKS control plane is free—you only pay for the virtual machines, storage, and networking resources consumed by worker nodes. Primary cost drivers include VM size and count, managed disk storage, load balancers, and outbound data transfer. Enabling optional services like Container Insights adds Log Analytics workspace costs based on data ingestion volume. Using autoscaling, spot instances, and appropriate VM sizing significantly impacts total cost.
Can I run Windows containers in AKS?
Yes, AKS supports Windows Server node pools alongside Linux node pools in the same cluster. Windows containers require Windows Server 2019 or newer node pools and have some limitations compared to Linux containers, including networking plugin requirements (Azure CNI only) and certain Kubernetes features not being available. Most organizations run mixed clusters with Linux nodes for system components and Windows nodes for legacy .NET Framework applications being containerized.
How do I upgrade my AKS cluster to a newer Kubernetes version?
AKS provides managed upgrades through Azure Portal or CLI using the az aks upgrade command. Upgrades proceed node by node, cordoning and draining each node before upgrading to minimize application disruption. Testing upgrades in non-production environments first identifies potential compatibility issues. AKS supports several Kubernetes versions simultaneously, allowing gradual migration, but older versions eventually reach end-of-support requiring mandatory upgrades.
What backup and disaster recovery options exist for AKS?
AKS cluster configuration can be backed up through infrastructure as code (Terraform, ARM templates), while application state requires persistent volume snapshots and database backups. Tools like Velero provide comprehensive cluster backup including Kubernetes resources and persistent volumes. For disaster recovery, maintaining infrastructure as code enables rapid cluster recreation in alternate regions, while application data restoration depends on backup strategies for persistent storage. Multi-region cluster architectures provide the highest availability but increase complexity and cost.
How many applications can run in a single AKS cluster?
There's no fixed limit on application count—capacity depends on resource requirements and cluster size. Kubernetes namespaces provide logical isolation between applications, and resource quotas prevent any single application from consuming excessive resources. Most organizations run dozens to hundreds of microservices in production clusters. The decision to use multiple clusters typically stems from organizational boundaries, security requirements, or geographical distribution needs rather than technical limitations.
What's the best way to manage secrets in AKS?
Azure Key Vault integration through the Secrets Store CSI driver provides the most secure secret management, storing sensitive data in Key Vault rather than Kubernetes etcd. Secrets mount as volumes in pods, with automatic rotation support. Kubernetes native Secrets work for non-sensitive configuration but store data base64-encoded rather than encrypted. Managed identities eliminate the need to store service credentials in secrets, improving security posture. Never commit secrets to source control or store them in container images.
How do I troubleshoot performance issues in my AKS cluster?
Start with Container Insights to identify resource utilization patterns and potential bottlenecks. High CPU or memory usage on nodes indicates capacity constraints requiring scaling. Application-level performance issues require examining pod logs, metrics, and potentially implementing distributed tracing. Network latency problems might stem from cross-availability-zone traffic or inefficient service mesh configuration. Kubernetes events (kubectl get events) often reveal scheduling issues, image pull problems, or resource constraints affecting performance.