What Are Pods and Nodes in Kubernetes?
Understanding Pods and Nodes in Kubernetes
Container orchestration has become the backbone of modern cloud-native applications, and understanding its fundamental building blocks is essential for anyone working with distributed systems. Whether you're a developer deploying microservices, a DevOps engineer managing infrastructure, or a technical leader making architectural decisions, grasping how Kubernetes organizes and manages containerized workloads will directly impact your ability to build resilient, scalable applications. The concepts of Pods and Nodes form the foundation upon which all Kubernetes operations rest, yet they're often misunderstood or oversimplified in ways that lead to configuration mistakes and operational challenges.
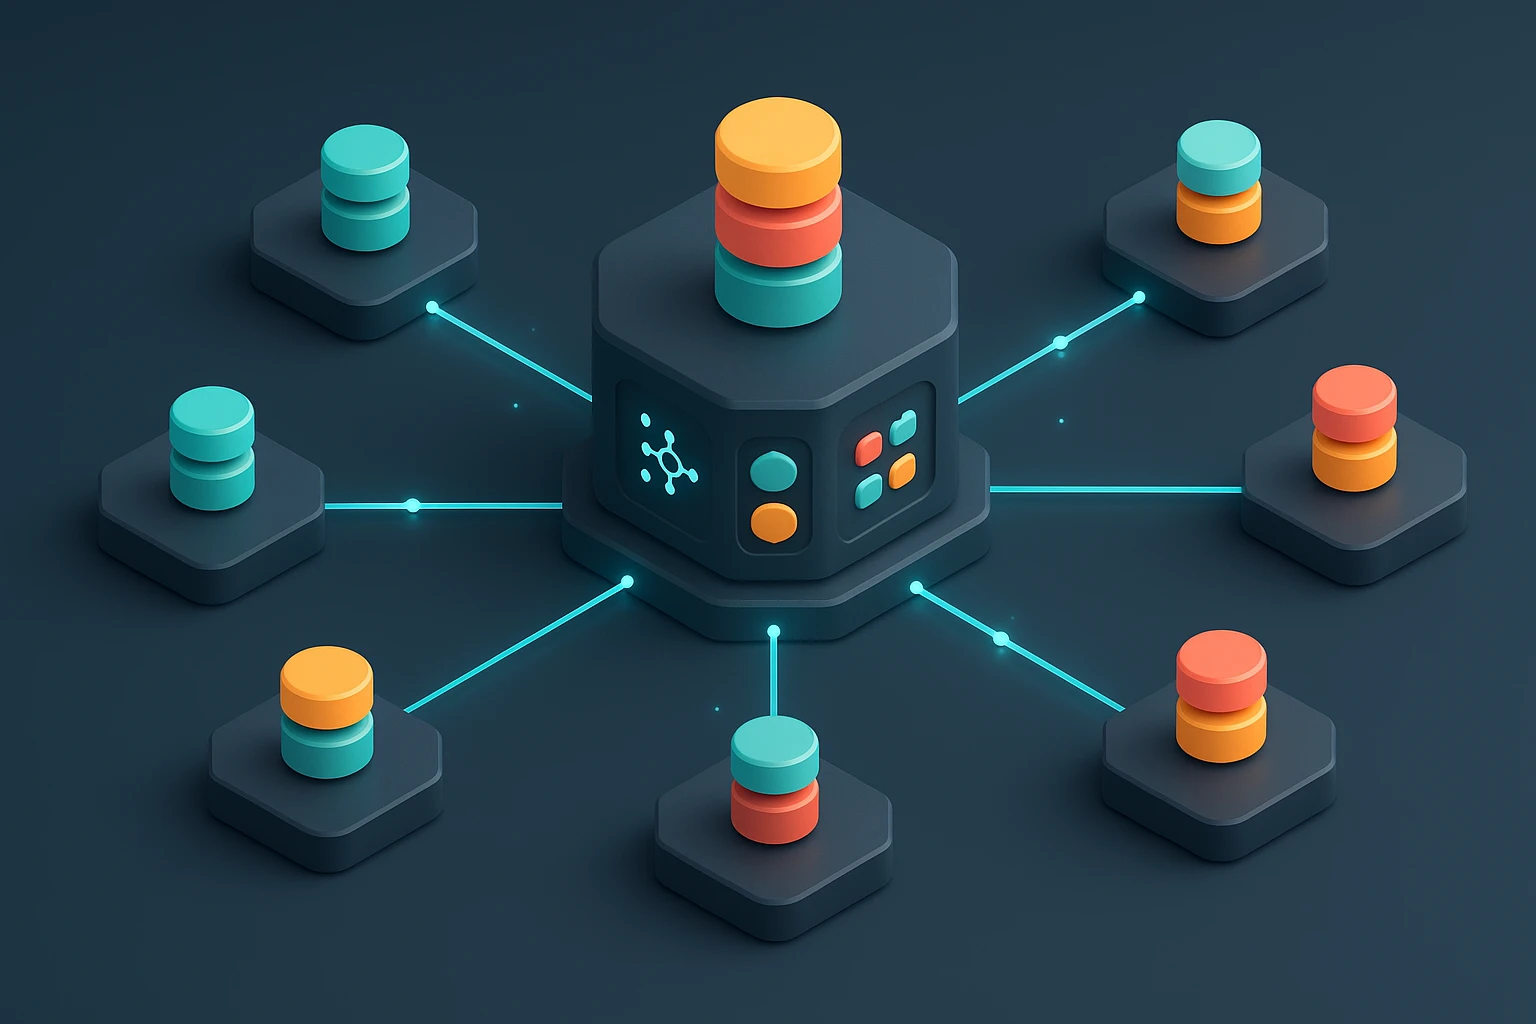
At its core, Kubernetes operates on a hierarchical model where Nodes represent the physical or virtual machines that provide computing resources, while Pods serve as the smallest deployable units that encapsulate one or more containers. This relationship between infrastructure and application components creates a flexible abstraction layer that separates concerns between where things run and what actually runs. Understanding this distinction opens up multiple perspectives on system design, from resource allocation strategies to networking patterns, from scaling behaviors to failure recovery mechanisms.
Throughout this exploration, you'll gain practical knowledge about how Pods and Nodes interact within a Kubernetes cluster, discover the architectural decisions behind their design, learn about real-world deployment patterns, and understand the operational considerations that affect performance and reliability. We'll examine the lifecycle of these components, their configuration options, networking implications, and the best practices that have emerged from production environments running at scale.
The Fundamental Architecture of Kubernetes Nodes
Nodes represent the worker machines in a Kubernetes cluster, providing the computational resources necessary to run containerized applications. Each Node can be either a physical server in a data center or a virtual machine in a cloud environment, and together they form the infrastructure layer that Kubernetes orchestrates. The cluster typically consists of multiple Nodes to provide redundancy, distribute workload, and ensure high availability of applications.
Every Node runs several critical components that enable it to participate in the cluster. The kubelet acts as the primary node agent, communicating with the Kubernetes control plane to receive instructions about which Pods should run on the Node and reporting back on their status. The container runtime (such as containerd, Docker, or CRI-O) handles the actual execution of containers, pulling images from registries and managing their lifecycle. Additionally, the kube-proxy maintains network rules that enable communication between Pods across different Nodes and implements the Service abstraction that provides stable networking endpoints.
"The Node is not just a machine running containers; it's an intelligent participant in a distributed system that makes autonomous decisions about resource allocation, health monitoring, and network routing while remaining coordinated with the cluster's overall objectives."
Node Components and Their Responsibilities
Understanding what runs on each Node helps clarify how Kubernetes maintains cluster health and executes workloads efficiently. The kubelet continuously monitors the Pods assigned to its Node, ensuring containers are running as specified and restarting them if they fail. It also performs health checks defined in Pod specifications, reporting results back to the control plane so that traffic routing and scheduling decisions can account for application health status.
The container runtime interface provides a standardized way for Kubernetes to work with different container technologies. This abstraction means you can choose the runtime that best fits your security requirements, performance characteristics, or organizational preferences without changing how you interact with Kubernetes itself. The runtime handles image management, container creation and deletion, and resource isolation through Linux namespaces and cgroups.
Network connectivity between Pods is facilitated by kube-proxy, which programs iptables rules or uses IPVS (IP Virtual Server) to route traffic according to Service definitions. This component ensures that when a Pod sends traffic to a Service, it reaches one of the healthy backend Pods, implementing load balancing and service discovery without requiring applications to know the physical location of their dependencies.
| Node Component | Primary Function | Interaction Point | Failure Impact |
|---|---|---|---|
| kubelet | Pod lifecycle management and health reporting | API Server communication | Node marked as NotReady, Pods rescheduled elsewhere |
| Container Runtime | Container execution and image management | kubelet via CRI interface | Cannot start new containers, existing ones may continue |
| kube-proxy | Network rules and service routing | API Server for Service/Endpoint updates | Service networking breaks, Pod-to-Pod may work |
| Operating System | Resource provisioning and kernel features | Direct hardware/hypervisor interface | Complete Node failure, all Pods lost |
Node Resources and Capacity Management
Each Node advertises its available resources to the Kubernetes scheduler, including CPU, memory, ephemeral storage, and extended resources like GPUs. The scheduler uses this information when deciding where to place new Pods, ensuring that Nodes aren't overcommitted beyond their capacity. Resource requests specified in Pod definitions represent the minimum resources a Pod needs, while resource limits define the maximum it can consume.
Kubernetes tracks both allocatable and capacity for each Node. Capacity represents the total resources available on the machine, while allocatable accounts for resources reserved for system daemons and Kubernetes components. This distinction prevents the system from scheduling so many Pods that the Node itself becomes unstable due to lack of resources for essential processes.
When a Node begins to run low on resources, Kubernetes implements eviction policies that terminate Pods to reclaim resources and maintain Node stability. Eviction considers Pod priority, resource usage relative to requests, and how long the Node has been under pressure. Understanding these mechanisms helps you design applications that gracefully handle eviction and configure resource requests that accurately reflect actual usage patterns.
Understanding Pods as the Atomic Unit of Deployment
Pods represent the smallest deployable units in Kubernetes, encapsulating one or more containers that share storage, network, and a specification for how to run them. While it's technically possible to run multiple containers in a single Pod, the most common pattern involves one primary container per Pod, with additional containers serving supporting roles like logging, monitoring, or proxying.
The Pod abstraction provides several critical capabilities that individual containers lack. All containers within a Pod share the same network namespace, meaning they can communicate with each other via localhost and share the same IP address. They also share storage volumes mounted into the Pod, enabling data exchange through the filesystem. This co-location and resource sharing makes Pods ideal for tightly coupled application components that need to work together as a single unit.
"A Pod is not just a wrapper around containers; it's a execution environment that provides shared context, enabling patterns like sidecar containers, adapter patterns, and ambassador patterns that would be difficult or impossible to implement with isolated containers."
Pod Lifecycle and States
Pods progress through several distinct phases during their lifetime, from creation to termination. Understanding these phases helps you troubleshoot issues and design applications that handle transitions gracefully. The Pending phase indicates the Pod has been accepted by the cluster but containers haven't started yet, often because images are being pulled or the scheduler is finding an appropriate Node.
Once containers start running, the Pod enters the Running phase. However, this doesn't necessarily mean the application is ready to serve traffic. Kubernetes provides liveness and readiness probes that allow applications to signal their health status. A liveness probe failure causes the kubelet to restart the container, while readiness probe failures remove the Pod from Service endpoints without restarting it.
The Succeeded and Failed phases apply to Pods that are designed to run to completion, such as batch jobs. Succeeded means all containers terminated successfully, while Failed indicates at least one container terminated with an error. Finally, the Unknown phase occurs when the Node stops communicating with the control plane, leaving the Pod's actual state uncertain.
Multi-Container Pod Patterns
While single-container Pods are most common, several well-established patterns leverage multiple containers within a single Pod to solve specific problems. The sidecar pattern involves a helper container that extends the primary container's functionality, such as a logging agent that collects and forwards logs from the main application container.
The adapter pattern uses a sidecar container to normalize or transform data from the main container, presenting a standardized interface to external consumers. For example, an adapter container might convert application metrics into a format expected by a monitoring system, allowing the main application to remain unaware of monitoring infrastructure details.
The ambassador pattern places a proxy container in the Pod that handles networking concerns on behalf of the main container. This proxy might implement connection pooling, retry logic, or service discovery, simplifying the main application's code by delegating these infrastructure concerns to a specialized container.
The Relationship Between Pods and Nodes
The Kubernetes scheduler establishes the relationship between Pods and Nodes by making placement decisions based on resource requirements, constraints, and cluster state. Once scheduled to a Node, a Pod remains there for its entire lifetime unless the Node fails or the Pod is explicitly deleted. This binding creates a stable execution environment while the Pod runs, though the Pod itself is considered ephemeral and disposable.
Several mechanisms influence Pod placement decisions. Node selectors provide a simple way to constrain Pods to Nodes with specific labels, such as requiring SSD storage or specific hardware capabilities. Node affinity offers more expressive rules that can specify preferences rather than hard requirements, allowing the scheduler to make tradeoffs when perfect matches aren't available.
"The scheduler doesn't just place Pods randomly; it runs a sophisticated algorithm that considers dozens of factors including resource availability, data locality, workload spreading, and custom constraints to make optimal placement decisions that balance efficiency with reliability."
Taints and Tolerations
While node selectors and affinity control which Nodes a Pod can run on from the Pod's perspective, taints allow Nodes to repel certain Pods. A taint marks a Node with a key-value pair and an effect (NoSchedule, PreferNoSchedule, or NoExecute), preventing Pods from being scheduled there unless they have a matching toleration.
This mechanism proves valuable for dedicating Nodes to specific workloads, keeping production and development environments separate, or preventing general workloads from running on Nodes with specialized hardware. For example, you might taint GPU Nodes and only add tolerations to Pods that actually need GPU access, preventing resource waste from Pods that would merely consume the Node's CPU and memory.
The NoExecute effect is particularly powerful because it affects already-running Pods, not just scheduling decisions. When you apply a NoExecute taint to a Node, Pods without matching tolerations are evicted, providing a way to drain specific workloads from a Node without affecting others.
Pod Disruption and Node Maintenance
Production environments require periodic Node maintenance for updates, hardware repairs, or capacity adjustments. Kubernetes provides Pod Disruption Budgets (PDBs) that specify how many Pods of an application can be unavailable simultaneously during voluntary disruptions. This ensures that maintenance operations don't accidentally take down too many replicas of a service, maintaining availability even during planned downtime.
When draining a Node for maintenance, Kubernetes respects PDBs by evicting Pods gradually, waiting for replacements to become ready before continuing. This coordination between Node operations and application availability requirements demonstrates how Kubernetes bridges infrastructure and application concerns, making it possible to maintain systems without service interruptions.
Networking Considerations for Pods and Nodes
Kubernetes networking follows a distinctive model where every Pod receives its own IP address, and all Pods can communicate with each other without Network Address Translation (NAT). This flat network structure simplifies application development because Pods can communicate using their IP addresses directly, similar to how VMs or physical hosts communicate on a traditional network.
The Container Network Interface (CNI) plugins implement this networking model, with various options like Calico, Flannel, Weave, and Cilium providing different features and performance characteristics. Some CNI plugins focus on simplicity and ease of setup, while others offer advanced features like network policies, encryption, or observability tools. The choice of CNI affects not just connectivity but also security posture and troubleshooting capabilities.
"Pod networking isn't just about connectivity; it's about creating a foundation for service discovery, load balancing, and security policies that operate at the application layer rather than requiring applications to understand infrastructure topology."
Services and Pod Discovery
While Pods have IP addresses, these addresses change when Pods are rescheduled or replaced. Services provide stable endpoints that abstract away individual Pod IPs, automatically updating their backend Pod list as Pods come and go. This indirection allows applications to discover and communicate with dependencies using DNS names that remain constant even as the underlying infrastructure changes.
Services can be exposed in different ways depending on requirements. ClusterIP Services are only accessible within the cluster, suitable for internal microservice communication. NodePort Services expose a port on every Node, making the Service accessible from outside the cluster through any Node's IP. LoadBalancer Services integrate with cloud provider load balancers to provision external IPs and distribute traffic across Nodes.
Network Policies and Security
By default, Kubernetes allows all Pods to communicate with all other Pods, which may not align with security requirements for production environments. Network Policies provide a way to define rules about which Pods can communicate with each other, implementing microsegmentation at the application layer.
Network Policies are namespace-scoped and use label selectors to identify Pods affected by the policy and the Pods they're allowed to communicate with. You can create policies that restrict ingress (incoming) traffic, egress (outgoing) traffic, or both, effectively creating firewall rules that move with your applications as they're rescheduled across Nodes.
| Networking Concept | Scope | Primary Use Case | Implementation Layer |
|---|---|---|---|
| Pod IP | Single Pod | Direct container-to-container communication | CNI Plugin |
| ClusterIP Service | Cluster-wide | Stable internal endpoints for microservices | kube-proxy + DNS |
| NodePort Service | External access via Nodes | Exposing services for external testing or access | kube-proxy + Node networking |
| LoadBalancer Service | External access via cloud LB | Production external service exposure | Cloud provider integration |
| Network Policy | Namespace or cluster | Traffic filtering and microsegmentation | CNI Plugin (must support policies) |
Resource Management and Quality of Service
Kubernetes classifies Pods into three Quality of Service (QoS) classes based on their resource requests and limits: Guaranteed, Burstable, and BestEffort. This classification determines how Pods are treated during resource contention, particularly when a Node runs out of memory and must evict Pods to maintain stability.
Guaranteed Pods have both requests and limits set for all containers, and the values are equal. These Pods receive the highest priority during scheduling and are the last to be evicted during resource pressure. Use this class for critical applications that require predictable performance and maximum stability.
Burstable Pods have requests set but limits either unset or higher than requests. They can use more resources than requested when available but may be throttled or evicted if the Node experiences pressure. This class works well for applications with variable resource usage that can tolerate occasional performance degradation.
"Resource requests and limits aren't just about preventing one Pod from starving others; they're a contract between your application and the platform that influences scheduling, eviction, and the overall reliability of your services."
CPU and Memory Considerations
CPU and memory behave differently when limits are reached. CPU is a compressible resource, meaning Kubernetes can throttle a container's CPU usage without terminating it. When a container reaches its CPU limit, it's simply prevented from using more CPU cycles, resulting in slower execution but continued operation.
Memory is an incompressible resource. When a container exceeds its memory limit, the kernel's Out of Memory (OOM) killer terminates the container. The kubelet then restarts the container according to the Pod's restart policy. This fundamental difference means memory limits should be set carefully based on actual application memory requirements, while CPU limits can be more aggressive since exceeding them doesn't cause termination.
Resource Quotas and Limit Ranges
At the namespace level, Resource Quotas restrict the total amount of resources that can be consumed by all Pods in the namespace. This prevents a single team or application from monopolizing cluster resources and provides a mechanism for fair resource distribution across multiple tenants or projects.
Limit Ranges define default resource requests and limits for containers that don't specify them, and can also enforce minimum and maximum values. This ensures that every Pod has resource specifications, enabling the scheduler to make informed decisions and preventing accidentally deploying Pods with unrealistic resource requirements.
Storage and Persistent Data
Pods are ephemeral by design, but many applications require persistent storage that survives Pod restarts and rescheduling. Kubernetes provides Volumes that mount into containers, with different volume types serving different purposes. Some volumes are tied to the Pod's lifetime, while others persist independently and can be reattached to new Pods.
EmptyDir volumes create temporary storage that exists as long as the Pod exists, shared among all containers in the Pod. This volume type works well for scratch space or caching but loses data when the Pod is deleted. HostPath volumes mount directories from the Node's filesystem into Pods, useful for accessing Node-level resources but creating a dependency on specific Nodes.
For truly persistent storage, Kubernetes offers Persistent Volumes (PVs) and Persistent Volume Claims (PVCs). PVs represent actual storage resources in your infrastructure, while PVCs are requests for storage by Pods. This abstraction separates storage provisioning from consumption, allowing developers to request storage without knowing the underlying infrastructure details.
"Storage in Kubernetes isn't just about persistence; it's about decoupling application requirements from infrastructure implementation, enabling portability across environments while maintaining data safety and performance characteristics."
StatefulSets and Pod Identity
While most applications deploy using Deployments that treat Pods as interchangeable, some applications require stable network identities and persistent storage that follows Pods across rescheduling. StatefulSets manage these stateful applications by providing ordered, predictable Pod names and stable DNS entries.
Each Pod in a StatefulSet gets a persistent identifier that it maintains across rescheduling, and can be associated with a PVC that persists even if the Pod is deleted. This makes StatefulSets suitable for databases, distributed systems, and applications that maintain local state or require peer discovery based on stable identities.
Monitoring and Observability
Understanding what's happening inside Pods and across Nodes requires comprehensive monitoring and logging strategies. Kubernetes exposes metrics about resource usage, Pod states, and cluster health through various APIs and tools. The Metrics Server collects resource metrics from kubelets and makes them available through the Kubernetes API, enabling features like horizontal Pod autoscaling and kubectl top commands.
For application-level monitoring, tools like Prometheus integrate with Kubernetes to scrape metrics from Pods and provide powerful querying and alerting capabilities. The service discovery mechanisms in Kubernetes make it straightforward for monitoring systems to discover new Pods automatically and begin collecting metrics without manual configuration.
Logging presents unique challenges in containerized environments because containers are ephemeral and logs can be lost when containers restart. Common patterns include running logging agents as DaemonSets on every Node to collect logs from all containers, or using sidecar containers to ship logs from specific Pods. Centralized logging platforms aggregate these logs, making them searchable and correlating them with metrics and traces.
Health Checks and Probes
Kubernetes provides three types of probes that allow applications to communicate their health status. Liveness probes determine if a container is running properly; failures cause the kubelet to restart the container. Readiness probes indicate whether a container is ready to serve traffic; failures remove the Pod from Service endpoints but don't restart it. Startup probes handle applications with long initialization times, preventing liveness checks from interfering with startup.
Probes can be implemented as HTTP requests, TCP socket checks, or command executions inside the container. Properly configured probes are essential for achieving high availability because they enable Kubernetes to detect and respond to application failures automatically, routing traffic away from unhealthy instances and restarting containers that have become unresponsive.
Scaling and Performance Optimization
Kubernetes provides multiple mechanisms for scaling applications to meet demand. Horizontal Pod Autoscaling (HPA) automatically adjusts the number of Pod replicas based on observed metrics like CPU utilization or custom application metrics. The HPA controller periodically queries metrics and adjusts the replica count of Deployments or StatefulSets to maintain target metric values.
Vertical Pod Autoscaling (VPA) adjusts the resource requests and limits of containers based on actual usage patterns. Rather than adding more Pods, VPA scales individual Pods up or down, which can be more efficient for applications that don't scale horizontally well or when cluster capacity is limited.
"Autoscaling isn't just about responding to load; it's about optimizing resource utilization and costs while maintaining performance, requiring careful tuning of metrics, thresholds, and scaling behaviors to avoid oscillation or insufficient capacity."
Cluster Autoscaling
When Pod autoscaling creates demand for more resources than the cluster can provide, Cluster Autoscaler can automatically add Nodes to the cluster by integrating with cloud provider APIs. This creates a complete scaling solution where application demand drives not just Pod count but the underlying infrastructure capacity.
Cluster Autoscaler monitors Pods that can't be scheduled due to insufficient resources and adds Nodes to accommodate them. It also removes underutilized Nodes when they're no longer needed, optimizing infrastructure costs. This dynamic capacity management requires careful configuration to balance responsiveness with stability, avoiding excessive Node churn while ensuring sufficient capacity for workload demands.
Security Considerations
Security in Kubernetes spans multiple layers, from Node hardening to container security to network policies. Pod Security Standards define three levels of security policies: Privileged (unrestricted), Baseline (minimally restrictive), and Restricted (heavily restricted). These standards help organizations enforce security best practices by preventing Pods from running with dangerous configurations.
Containers should run as non-root users whenever possible, and the root filesystem should be read-only to prevent runtime modifications. Security Contexts in Pod specifications allow you to configure these and other security-related settings, such as Linux capabilities, SELinux labels, and seccomp profiles.
Role-Based Access Control (RBAC) governs who can perform what actions on which resources within the cluster. By creating Roles that define permissions and RoleBindings that assign those roles to users or service accounts, you implement the principle of least privilege, ensuring that Pods and users only have access to the resources they genuinely need.
Secrets and Configuration Management
Applications often require sensitive information like database passwords or API keys. Secrets provide a way to store this information separately from Pod specifications, reducing the risk of exposing credentials in version control or logs. Secrets can be mounted as files or exposed as environment variables, and Kubernetes encrypts them at rest if etcd encryption is enabled.
ConfigMaps serve a similar purpose for non-sensitive configuration data, allowing you to externalize application configuration from container images. This separation enables using the same image across different environments with environment-specific configuration, following twelve-factor app principles.
Troubleshooting Common Issues
When Pods don't start or behave unexpectedly, systematic troubleshooting approaches help identify root causes quickly. Start by checking Pod status with kubectl get pods, which reveals whether Pods are running, pending, or in error states. The kubectl describe pod command provides detailed information about events, resource allocation, and error messages.
Container logs accessed through kubectl logs offer insights into application behavior and errors. For Pods with multiple containers, specify the container name to view logs from specific containers. If a container is crash-looping, the --previous flag shows logs from the previous container instance, which often contains the error that caused the crash.
Network connectivity issues require checking Service endpoints, DNS resolution, and Network Policies. Use kubectl exec to run diagnostic commands inside containers, testing connectivity with tools like curl or ping. Verify that Services have endpoints with kubectl get endpoints, ensuring that backend Pods are ready and properly labeled.
Node Issues and Diagnostics
Node problems manifest as Pods stuck in Pending state or NotReady Node conditions. Check Node status with kubectl get nodes and examine details with kubectl describe node. Common issues include resource exhaustion, disk pressure, network problems, or kubelet failures.
Node logs provide valuable diagnostic information, though accessing them requires SSH access to the Node or log aggregation systems. The kubelet, container runtime, and system logs often contain error messages that explain why Pods can't start or why the Node is reporting problems.
Best Practices and Recommendations
Successful Kubernetes deployments follow established patterns that have emerged from production experience. Always specify resource requests and limits for containers, basing values on actual usage patterns observed in testing or production. This enables the scheduler to make informed placement decisions and prevents resource contention issues.
Use liveness and readiness probes for all production Pods, implementing them in ways that accurately reflect application health. Avoid probes that simply check if the process is running; instead, verify that the application can perform its core functions. Set appropriate timeout and failure threshold values that account for normal application behavior during high load.
Organize resources using namespaces to separate different applications, teams, or environments. Apply labels consistently to enable flexible selection and organization of resources. Use annotations for non-identifying metadata like build information or contact details that don't affect resource selection but provide valuable context.
Implement Pod Disruption Budgets for applications where availability is critical, ensuring that voluntary disruptions don't reduce capacity below acceptable levels. Design applications to handle Pod termination gracefully, responding to SIGTERM signals by finishing in-flight requests and cleaning up resources before the forceful SIGKILL arrives.
Regularly update Node operating systems and Kubernetes versions to receive security patches and new features. Plan upgrade strategies that minimize disruption, using techniques like blue-green deployments or rolling updates. Test upgrades in non-production environments first, validating that applications continue to function correctly with new Kubernetes versions.
Frequently Asked Questions
What happens to Pods when a Node fails?
When a Node fails and stops communicating with the control plane, Kubernetes waits for a timeout period (typically 5 minutes) before marking the Node as NotReady. After another timeout period, the controller manager begins evicting Pods from the failed Node and rescheduling them on healthy Nodes. If the Node comes back online before eviction completes, the original Pods may continue running. For stateful applications using Persistent Volumes, new Pods can't start until Kubernetes confirms the old Pods are no longer running, preventing data corruption from multiple Pods accessing the same storage.
Can a Pod be scheduled on multiple Nodes?
No, a single Pod always runs entirely on one Node. All containers within a Pod are co-located on the same Node and share the same network namespace and storage volumes. If you need multiple instances of an application distributed across Nodes, you create multiple Pods (typically managed by a Deployment or StatefulSet), each scheduled independently. This design ensures that containers within a Pod can communicate efficiently via localhost and share resources without network overhead.
How do I choose between running one container or multiple containers per Pod?
Use multiple containers in a Pod only when containers are tightly coupled and need to share resources. The primary container should implement the core application logic, while additional containers provide supporting functionality like log forwarding, metrics collection, or proxying. If containers can operate independently and don't need to share volumes or communicate via localhost, deploy them as separate Pods. This separation provides more flexibility for scaling, updating, and managing each component independently.
What determines which Node a Pod gets scheduled on?
The Kubernetes scheduler evaluates multiple factors when placing Pods on Nodes. It first filters out Nodes that don't meet the Pod's requirements (insufficient resources, taints without tolerations, node selectors not matching). Among remaining Nodes, it scores each based on resource availability, Pod spreading preferences, data locality, and other factors. The Pod is scheduled on the highest-scoring Node. You can influence this decision through node selectors, affinity rules, taints and tolerations, and resource requests.
How does Kubernetes handle Pod IP addresses during rescheduling?
Pod IP addresses are not preserved when Pods are rescheduled or restarted. Each time a Pod starts, it receives a new IP address from the CNI plugin. This is why Services are essential—they provide stable IP addresses and DNS names that remain constant even as backend Pods change. Applications should communicate using Service names rather than Pod IPs directly. For stateful applications requiring stable network identities, StatefulSets provide predictable DNS names based on Pod names rather than IP addresses.
What's the difference between a Node becoming NotReady and a Node being drained?
A NotReady Node condition occurs when the Node fails health checks or stops communicating with the control plane, typically due to problems with the kubelet, container runtime, or network connectivity. Kubernetes automatically responds by eventually evicting Pods. Draining is a deliberate administrative action that safely removes Pods from a Node in preparation for maintenance, respecting Pod Disruption Budgets and graceful termination periods. Draining also marks the Node as unschedulable to prevent new Pods from being placed there.
Can I run Pods without specifying resource requests and limits?
While technically possible, running Pods without resource specifications is not recommended for production environments. Without requests, the scheduler can't make informed placement decisions and may overcommit Nodes. Without limits, a single Pod could consume all available resources and starve other Pods. Pods without resource specifications receive BestEffort QoS class and are first to be evicted during resource pressure. Use LimitRanges to enforce default values if developers don't specify them explicitly.
How many Pods can run on a single Node?
The maximum number of Pods per Node depends on several factors. By default, Kubernetes limits each Node to 110 Pods, but this can be configured via kubelet parameters. Practical limits depend on Node resources (CPU, memory, IP addresses available from the CNI plugin) and the resource requirements of your Pods. Cloud providers may impose additional limits based on instance types. Rather than maximizing Pod density, focus on leaving sufficient resources for system stability and burst capacity.