How to Use Podman as Docker Alternative
How to Use Podman as Docker Alternative
Container technology has revolutionized software development and deployment, but the landscape is evolving beyond a single dominant player. As organizations increasingly prioritize security, flexibility, and resource efficiency, the need for alternative containerization solutions has become critical. The tools we choose today directly impact our infrastructure's security posture, operational costs, and long-term maintainability.
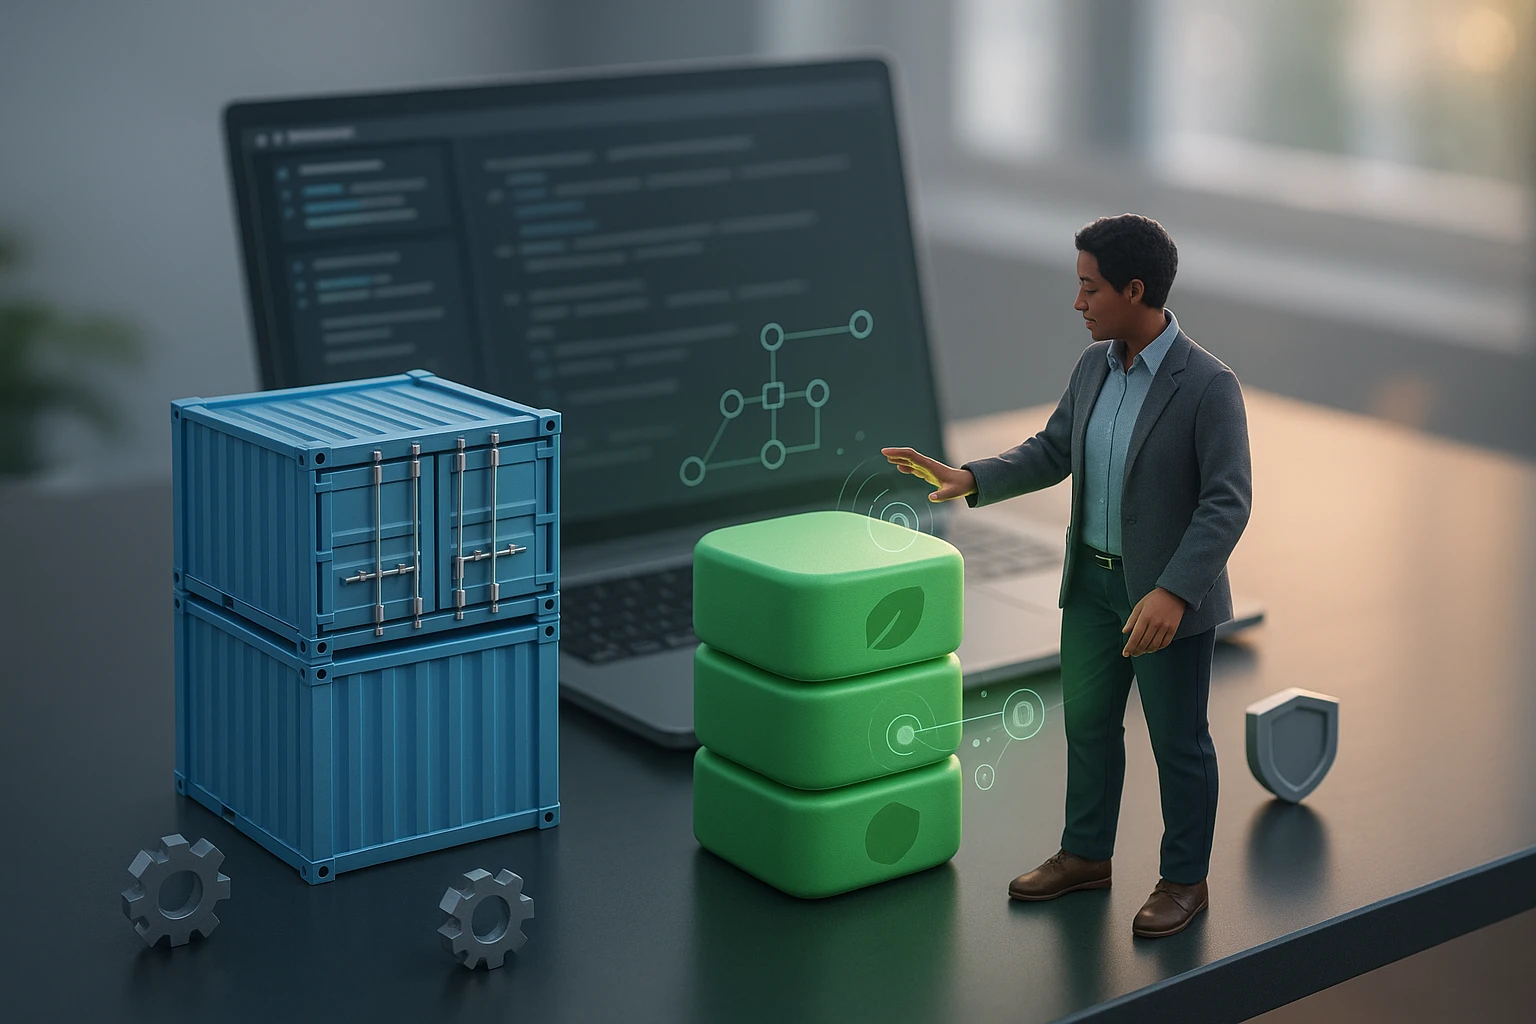
Podman represents a daemon-less, rootless container engine that provides a Docker-compatible command-line interface while addressing several architectural concerns inherent in traditional container runtimes. This alternative approach eliminates single points of failure, reduces security vulnerabilities associated with privileged processes, and offers native integration with systemd for better system management. Understanding both solutions empowers teams to make informed decisions based on their specific requirements rather than defaulting to conventional choices.
Throughout this comprehensive guide, you'll discover practical implementation strategies for transitioning to or adopting Podman, including installation procedures across different platforms, command equivalencies, networking configurations, and troubleshooting techniques. You'll learn how to leverage Podman's unique features like rootless containers and pods, understand the architectural differences that matter for production environments, and gain actionable insights for integrating this technology into existing workflows.
Understanding the Fundamental Differences
The architectural distinction between Podman and Docker fundamentally changes how containers interact with your operating system. Docker relies on a client-server architecture with a persistent daemon running as root, which manages all container operations. This daemon acts as a central point of control but also represents a potential security vulnerability and single point of failure. Every interaction with containers must pass through this privileged process, creating an attack surface that security-conscious organizations find concerning.
Podman eliminates the daemon entirely, executing containers as child processes of the Podman command itself. This daemon-less architecture means containers run directly under the user who invoked them, without requiring a background service. The implications extend beyond security—system resources aren't consumed by an idle daemon, containers can be managed using standard systemd units, and the absence of a centralized process eliminates an entire class of potential failures.
"The shift from daemon-based to daemon-less architecture represents more than technical preference; it fundamentally reimagines how containers should integrate with modern Linux systems."
Rootless operation constitutes another defining characteristic. While Docker requires root privileges for most operations, Podman allows ordinary users to create, run, and manage containers without elevated permissions. This capability leverages user namespaces and other kernel features to provide isolation without compromising the host system. Development teams can work with containers in environments where they lack administrative access, and production systems benefit from reduced privilege escalation risks.
The compatibility layer Podman provides deserves particular attention. The command-line interface mirrors Docker's syntax so closely that many users can simply alias 'docker' to 'podman' and continue working without modification. This design decision dramatically reduces the learning curve and facilitates gradual migration. However, beneath this familiar interface lies a completely different implementation that handles image storage, networking, and process management through distinct mechanisms.
Installation Across Different Platforms
Installing Podman varies significantly depending on your operating system, with Linux distributions offering the most straightforward experience. For Red Hat Enterprise Linux, CentOS Stream, and Fedora systems, Podman comes pre-installed or available through default repositories. The installation process involves a single command that pulls in all necessary dependencies and configures the environment appropriately. These distributions have invested heavily in Podman development, ensuring tight integration with system tools and optimal performance characteristics.
For RHEL/CentOS/Fedora systems:
- Execute
sudo dnf install podmanto install the latest stable version - Verify installation with
podman --versionto confirm successful setup - Check rootless configuration by running
podman infoas a regular user - Review storage configuration in
/etc/containers/storage.conf
Ubuntu and Debian users require slightly more preparation since these distributions don't include Podman in their default repositories for all versions. Recent Ubuntu releases (20.04 and newer) provide Podman through the official package manager, while older versions necessitate adding the Kubic repository maintained by the OpenSUSE project. This repository provides regularly updated Podman packages compatible with Debian-based systems.
For Ubuntu/Debian systems:
- Update package lists with
sudo apt update - Install Podman using
sudo apt install podmanon Ubuntu 20.04+ - For older versions, add the Kubic repository before installation
- Configure subuid and subgid mappings for rootless operation
macOS presents unique challenges since containers fundamentally require Linux kernel features. Podman addresses this through a virtual machine approach, running a lightweight Linux environment that hosts the actual container runtime. The installation process uses Homebrew or the official installer package, which sets up both the Podman client and the necessary virtual machine infrastructure. This architecture means macOS users interact with Podman commands locally, but containers execute within the Linux VM.
"Cross-platform consistency in container tooling enables teams to maintain identical workflows regardless of their development environment, reducing friction and improving productivity."
Windows support follows a similar pattern, utilizing Windows Subsystem for Linux (WSL2) to provide the Linux kernel functionality containers require. The integration leverages WSL2's ability to run a genuine Linux kernel within Windows, offering better performance than traditional virtualization approaches. Users install Podman within their WSL2 distribution, then interact with it through either the Linux terminal or Windows-native command prompts configured to communicate with the WSL2 environment.
| Platform | Installation Method | Rootless Support | Native Performance |
|---|---|---|---|
| RHEL/Fedora/CentOS | DNF package manager | Full native support | 100% (native Linux) |
| Ubuntu/Debian | APT package manager | Full native support | 100% (native Linux) |
| macOS | Homebrew or installer | Through VM | ~90% (virtualized) |
| Windows | WSL2 integration | Through WSL2 | ~85% (WSL2) |
Command Equivalencies and Migration Strategies
Transitioning from Docker to Podman becomes remarkably straightforward once you understand the command mapping. The Podman development team deliberately designed the CLI to match Docker's syntax, meaning most commands translate directly with only the executable name changing. Running containers, building images, managing networks, and handling volumes all use identical or nearly identical syntax between the two tools.
🔄 Basic container operations translate one-to-one between platforms. Commands like podman run, podman ps, podman stop, and podman rm function identically to their Docker counterparts. The flags and options remain consistent, allowing existing scripts and documentation to work with minimal modification. This compatibility extends to Dockerfile syntax—Podman builds images from the same Dockerfile format without requiring any changes to the build instructions themselves.
Image management follows the same pattern of compatibility. Pulling images from registries, tagging them, pushing to remote repositories, and inspecting image layers all use familiar commands. Podman can pull from Docker Hub, Quay.io, and other OCI-compliant registries without special configuration. The underlying image format follows the Open Container Initiative specification, ensuring complete interoperability between tools.
Common command translations include:
docker runbecomespodman runwith identical flag supportdocker buildbecomespodman buildusing the same Dockerfile syntaxdocker-composefunctionality available throughpodman-composedocker execbecomespodman execfor running commands in containers
The alias approach provides the simplest migration path for individuals and small teams. Adding alias docker=podman to your shell configuration allows existing muscle memory and scripts to function unchanged. This technique works remarkably well for development environments where compatibility concerns are minimal. However, production environments require more careful consideration of the architectural differences and their implications for monitoring, logging, and orchestration.
"The best migration strategies acknowledge that while commands may look identical, the underlying execution model differs in ways that impact system integration and operational practices."
Handling Docker Compose Workloads
Docker Compose represents one area where direct command translation requires additional tooling. The podman-compose project provides a Python-based implementation that reads standard docker-compose.yml files and translates them into appropriate Podman commands. While not perfectly feature-complete compared to Docker Compose, it handles the vast majority of common use cases including multi-container applications, volume management, and network configuration.
Podman's native pod concept offers an alternative approach that aligns more closely with Kubernetes paradigms. Rather than using Compose files, you can define pods that contain multiple containers sharing network and storage resources. This approach provides better integration with systemd and more straightforward paths to Kubernetes deployment, though it requires learning pod-specific concepts and syntax.
⚙️ For production workloads, consider generating systemd unit files from your containers and pods. Podman includes built-in functionality to create these unit files, enabling containers to start automatically at boot, restart on failure, and integrate with standard system management tools. This approach leverages existing system administration knowledge and tools rather than requiring specialized container orchestration platforms.
Networking Configuration and Considerations
Networking represents one of the most significant operational differences between Docker and Podman. Docker's daemon manages a default bridge network and handles port forwarding through a centralized service. Podman's daemon-less architecture requires different approaches, particularly for rootless containers where network namespace manipulation requires special handling.
Rootless networking in Podman uses slirp4netns by default, which provides user-mode networking without requiring elevated privileges. This approach works reliably but introduces some performance overhead compared to kernel-level networking. Containers can communicate with the external network and expose ports, but the traffic passes through an additional user-space layer. For development and testing, this overhead rarely matters, but high-throughput production workloads might notice the difference.
🌐 CNI (Container Network Interface) plugins provide advanced networking capabilities for rootful Podman installations. These plugins enable bridge networks, macvlan configurations, and custom network topologies that mirror Docker's networking features. The configuration files reside in /etc/cni/net.d/ and define network properties including IP ranges, gateways, and DNS settings. Understanding CNI configuration becomes essential for complex multi-container applications requiring specific network architectures.
Network creation and management commands:
podman network createestablishes new network definitionspodman network lslists available networks and their configurationspodman network inspectreveals detailed network settingspodman network connectattaches running containers to networks
Port publishing follows familiar syntax but behaves differently under the hood. The -p or --publish flag maps container ports to host ports just as in Docker, but rootless Podman cannot bind to privileged ports (below 1024) without additional configuration. The net.ipv4.ip_unprivileged_port_start sysctl setting controls which ports unprivileged users can bind, defaulting to 1024 on most systems.
"Networking architecture choices ripple through every aspect of container deployment, from development convenience to production performance and security characteristics."
DNS and Service Discovery
Container-to-container communication within Podman networks supports automatic DNS resolution, allowing containers to reach each other by name rather than IP address. This feature requires using user-defined networks rather than the default network configuration. Creating a network with podman network create mynetwork and launching containers with --network mynetwork enables this name-based discovery.
Pods provide an alternative networking model where all containers within a pod share the same network namespace. This means they can communicate via localhost, simplifying service discovery and eliminating the need for inter-container networking configuration. The pod concept aligns with Kubernetes networking models, making applications more portable between development and production environments.
| Networking Feature | Rootful Podman | Rootless Podman | Performance Impact |
|---|---|---|---|
| Default Bridge Network | CNI bridge plugin | slirp4netns | Low (rootful), Moderate (rootless) |
| Port Publishing | All ports available | Ports 1024+ by default | Minimal |
| Container DNS | Full support | Full support | Negligible |
| Custom Networks | CNI plugins | Limited CNI support | Varies by plugin |
Storage and Volume Management
Storage architecture differs substantially between Docker and Podman, particularly regarding where images and container data reside. Docker stores everything under /var/lib/docker with root ownership, requiring administrative privileges for most storage operations. Podman separates rootful and rootless storage, with rootless containers storing data in the user's home directory under ~/.local/share/containers.
This separation provides security benefits but can cause confusion when switching between rootful and rootless modes. Images pulled as root won't appear in rootless listings and vice versa. Understanding this separation helps avoid frustration when images seem to disappear or when storage consumption doesn't match expectations. The podman info command reveals which storage location is currently active and provides details about the storage driver in use.
💾 Storage drivers determine how container layers are stored and managed. Podman supports multiple drivers including overlay, vfs, and btrfs, with overlay being the most common choice for production systems. The driver selection impacts performance, disk usage, and compatibility with different filesystems. Configuration happens through /etc/containers/storage.conf for rootful containers and ~/.config/containers/storage.conf for rootless operations.
Volume management follows Docker's conceptual model with named volumes and bind mounts. Creating volumes with podman volume create establishes persistent storage that survives container deletion. Bind mounts allow containers to access specific host directories, useful for development workflows where code changes need immediate reflection inside containers. The -v or --volume flag handles both scenarios with syntax identical to Docker.
Volume operation essentials:
podman volume create myvolumeestablishes a new named volumepodman volume lsdisplays all available volumespodman volume inspect myvolumeshows volume details and mount pointspodman volume rm myvolumeremoves unused volumes
Image Storage and Layer Sharing
Image layers use content-addressable storage, meaning identical layers are stored only once regardless of how many images reference them. This deduplication significantly reduces disk usage when running multiple containers based on similar base images. Podman's storage system maintains this efficiency while providing better isolation between users in multi-tenant environments.
The storage graph driver manages these layers and their relationships. Overlay filesystems provide the most efficient implementation, using kernel features to present multiple layers as a single unified filesystem. When containers write to their filesystem, changes are captured in a writable layer that doesn't affect the underlying image layers. This copy-on-write mechanism enables fast container startup and efficient storage utilization.
"Proper storage configuration represents the foundation for reliable container operations, affecting everything from startup performance to data persistence and system resource utilization."
Working with Pods
Pods constitute Podman's most distinctive feature, providing a Kubernetes-compatible grouping mechanism absent from Docker. A pod encapsulates one or more containers that share network, IPC, and optionally UTS namespaces. This shared context allows containers within a pod to communicate via localhost, share storage volumes, and coordinate lifecycle events. The pod concept bridges the gap between single-container workflows and full Kubernetes orchestration.
Creating pods starts with podman pod create, which establishes the shared namespace infrastructure. Subsequent container creation commands use the --pod flag to join containers to the pod. Each pod automatically includes an infra container—a minimal pause container that holds the namespaces and keeps the pod alive even when application containers restart. This infrastructure container consumes minimal resources while providing the namespace foundation other containers share.
🎯 Port publishing happens at the pod level rather than individual containers. When creating a pod, specify -p flags to expose ports, then any container within the pod can bind to those ports on localhost. This approach simplifies service architectures where multiple containers need to expose different services—a web server and an API backend, for example, can each listen on their respective ports within the shared pod network.
Pod lifecycle management commands:
podman pod create --name mypod -p 8080:80creates a pod with port mappingpodman run --pod mypod nginxadds a container to the existing podpodman pod start mypodstarts all containers in the podpodman pod stop mypodstops all containers gracefullypodman pod rm mypodremoves the pod and all its containers
Generating Kubernetes YAML from Pods
Podman includes built-in functionality to generate Kubernetes-compatible YAML definitions from running pods. The podman generate kube command inspects a pod and produces a YAML file that can be deployed directly to Kubernetes clusters. This feature provides a migration path from local development to production orchestration without manually translating container configurations into Kubernetes syntax.
The reverse operation also works—Podman can consume Kubernetes YAML files and create corresponding pods and containers locally. The podman play kube command reads Kubernetes pod definitions and instantiates them using Podman's pod infrastructure. This bidirectional compatibility enables developers to test Kubernetes configurations locally before deploying to clusters, reducing the feedback loop and catching configuration errors earlier in the development process.
"Pods represent more than a technical feature; they embody a philosophical shift toward cloud-native development patterns that prioritize portability and consistency across environments."
Security Considerations and Best Practices
Security advantages constitute one of Podman's primary value propositions, stemming directly from its daemon-less, rootless architecture. Running containers without a privileged daemon eliminates an entire attack vector that has plagued Docker installations. Compromising a container running under Podman doesn't provide access to a root-level daemon that controls all containers—the blast radius of security incidents shrinks dramatically.
Rootless containers operate within user namespaces, mapping container root to an unprivileged user on the host. This mapping means even if an attacker gains root access inside the container, they possess only the privileges of the regular user who launched the container. Breaking out of the container namespace requires exploiting kernel vulnerabilities rather than simply compromising a userspace daemon. This defense-in-depth approach significantly raises the bar for successful attacks.
🔒 SELinux integration provides additional security layers on systems where it's enabled. Podman applies SELinux contexts to containers and volumes, enforcing mandatory access controls that limit what containers can access even if other security mechanisms fail. The --security-opt flag allows fine-tuning SELinux settings, though the defaults provide strong protection for most use cases.
Image security scanning should remain part of your workflow regardless of the container runtime. Podman doesn't include built-in vulnerability scanning, but integrates with external tools like Trivy, Clair, and Anchore. These scanners analyze image contents for known vulnerabilities in installed packages and libraries, providing actionable security intelligence before deploying containers to production. Incorporating scanning into CI/CD pipelines catches security issues early when they're cheapest to fix.
Security-focused configuration recommendations:
- Prefer rootless operation unless specific requirements mandate root privileges
- Use read-only root filesystems where application architecture permits
- Apply resource limits to prevent denial-of-service scenarios
- Regularly update base images to incorporate security patches
- Implement image signing and verification for supply chain security
Capability Management and Privilege Dropping
Linux capabilities provide granular control over privileged operations, allowing containers to perform specific tasks without full root access. Podman supports adding and dropping capabilities through the --cap-add and --cap-drop flags. Understanding which capabilities your application requires enables minimal privilege configurations that reduce security exposure while maintaining functionality.
The principle of least privilege should guide capability decisions. Start with the minimal set of capabilities and add only what's necessary for the application to function. Many containers run successfully with all capabilities dropped, relying solely on rootless user permissions. Applications requiring network binding, system time modification, or raw socket access need specific capabilities, but these should be granted judiciously and documented clearly.
"Security isn't a feature to be added later; it's a foundation that must be built into every layer of the containerization strategy from the beginning."
Integration with Systemd
Systemd integration represents one of Podman's most powerful features for production deployments, enabling containers to behave as native system services. Unlike Docker, which requires its own daemon management, Podman containers can be controlled directly through systemd unit files. This integration leverages existing system administration knowledge and tools, reducing operational complexity and improving reliability.
Generating systemd unit files from running containers happens through the podman generate systemd command. This command inspects a container or pod and produces a systemd service definition that can start, stop, and restart the container using standard systemctl commands. The generated units include dependencies, restart policies, and all the configuration needed for systemd to manage the container's lifecycle.
📋 User-level systemd services enable rootless containers to start automatically when users log in, without requiring system-level service configuration. These user services run under ~/.config/systemd/user/ and are managed with systemctl --user commands. Enabling user lingering with loginctl enable-linger allows these services to start at boot even before the user logs in, providing server-like behavior without root privileges.
Systemd integration workflow:
- Create and configure containers or pods using standard Podman commands
- Generate systemd units with
podman generate systemd --name mycontainer - Install unit files to
/etc/systemd/system/or~/.config/systemd/user/ - Reload systemd configuration with
systemctl daemon-reload - Enable and start services using
systemctl enable --now mycontainer.service
Dependency Management and Ordering
Systemd's dependency resolution ensures containers start in the correct order and only when their prerequisites are available. Network dependencies, storage mounts, and other containers can all be specified through standard systemd directives like After=, Requires=, and Wants=. This declarative approach to dependency management proves more reliable than script-based startup sequences.
Health checking and restart policies integrate seamlessly with systemd's service management. The Restart= directive controls whether failed containers automatically restart, with options like always, on-failure, and unless-stopped. Combined with RestartSec= to control restart timing, these settings provide sophisticated failure recovery without external orchestration tools.
"Systemd integration transforms containers from isolated processes into first-class system services, bridging the gap between traditional and cloud-native administration paradigms."
Building Images with Buildah
While Podman can build images using the podman build command, Buildah provides more advanced image creation capabilities. Buildah specializes in building OCI-compliant container images without requiring a daemon, offering both Dockerfile-based builds and scriptable image construction through direct manipulation of image layers. Understanding when to use each tool optimizes your image building workflow.
Buildah's scriptable approach allows building images through shell scripts rather than Dockerfiles. This method provides fine-grained control over layer creation, enabling optimization strategies difficult or impossible with Dockerfile syntax. You can mount containers, modify their filesystems directly, commit changes as layers, and control exactly what ends up in the final image. This flexibility proves valuable for complex build scenarios or when integrating image creation into larger automation frameworks.
🏗️ The Dockerfile compatibility mode makes Buildah a drop-in replacement for Docker builds. The buildah bud (build using Dockerfile) command processes standard Dockerfiles, producing OCI-compliant images without requiring Docker installation. This compatibility eases migration while providing access to Buildah's performance optimizations and security features like rootless builds.
Common Buildah operations:
buildah fromcreates a working container from a base imagebuildah runexecutes commands inside the working containerbuildah copyadds files to the container filesystembuildah configsets image metadata and runtime configurationbuildah commitsaves the container as a new image
Multi-Stage Builds and Optimization
Multi-stage builds reduce image size by separating build-time dependencies from runtime requirements. The pattern involves using one image with compilers and build tools to create artifacts, then copying only the necessary artifacts into a minimal runtime image. Both Podman and Buildah support multi-stage Dockerfiles, enabling this optimization strategy without changing your existing build definitions.
Layer caching significantly impacts build performance, particularly in CI/CD environments where images are built frequently. Understanding how layer caching works helps structure Dockerfiles to maximize cache hits. Place frequently changing instructions like COPY for application code near the end of the Dockerfile, while stable dependencies installed through package managers appear earlier. This ordering ensures dependency layers remain cached even when application code changes.
Troubleshooting Common Issues
Permission errors represent the most frequent obstacle when transitioning to Podman, particularly with rootless configurations. Messages about inability to bind ports, access files, or create network interfaces typically stem from insufficient user permissions or incorrect subuid/subgid mappings. Verifying these mappings in /etc/subuid and /etc/subgid resolves most permission-related issues. Each user needs a range of subordinate UIDs and GIDs allocated for user namespace mapping to function correctly.
Storage issues manifest as errors during image pulls, build failures, or containers failing to start. The podman system reset command provides a nuclear option that removes all containers, images, and volumes, resetting storage to a clean state. While destructive, this approach quickly resolves corrupted storage states that resist other fixes. For less drastic intervention, podman system prune removes unused data while preserving active containers and images.
🔧 Networking problems in rootless mode often trace back to slirp4netns configuration or firewall rules. Checking that slirp4netns is installed and accessible provides a good starting point. Firewall configurations that work with Docker might block rootless Podman traffic since it doesn't use the same network paths. Temporarily disabling the firewall helps diagnose whether rules are causing connectivity issues.
Diagnostic commands for troubleshooting:
podman inforeveals configuration details and identifies misconfigurationspodman logsshows container output for debugging application issuespodman inspectprovides detailed JSON output about containers and imagespodman system dfdisplays storage usage and identifies space issuespodman eventsstreams real-time events for monitoring container activity
Performance Tuning and Optimization
Performance characteristics differ between rootful and rootless Podman, with rootless operations incurring overhead from user namespace mapping and slirp4netns networking. For workloads where this overhead becomes problematic, rootful Podman or alternative network configurations like pasta (a more performant slirp4netns replacement) provide solutions. Measuring actual performance impact before optimization prevents premature optimization based on assumptions rather than data.
Storage driver selection impacts both performance and compatibility. The overlay driver provides the best performance for most workloads but requires specific filesystem features. Systems using XFS, ext4, or similar filesystems with overlay support benefit from this driver. Older systems or those with unsupported filesystems fall back to vfs, which is slower and uses more disk space but works universally. Checking podman info reveals the active storage driver and whether it's optimal for your system.
"Effective troubleshooting requires understanding not just what commands to run, but how the underlying architecture influences behavior and where problems are likely to originate."
CI/CD Integration Strategies
Integrating Podman into continuous integration and deployment pipelines requires adapting workflows designed around Docker. Most CI/CD platforms support custom container runtimes, making the technical integration straightforward. The challenge lies in handling differences like rootless operation, separate image storage, and systemd integration. Understanding these differences helps design pipelines that leverage Podman's strengths rather than fighting against its architecture.
GitLab CI, GitHub Actions, and Jenkins all support Podman as a container runtime. Configuration typically involves installing Podman in the CI environment and adjusting build scripts to use podman commands instead of docker. For GitLab CI, this might mean using a custom runner image with Podman installed. GitHub Actions can use setup actions that install Podman on the runner. Jenkins requires configuring the agent with Podman and potentially adjusting pipeline scripts.
⚡ Rootless Podman in CI environments provides security benefits by running builds without elevated privileges. This approach limits the damage from compromised build processes or malicious code in dependencies. However, it requires properly configured subuid/subgid mappings on CI runners and may need adjustments to networking configurations. Some CI platforms provide pre-configured environments with rootless container support, simplifying setup.
CI/CD best practices with Podman:
- Use image caching to accelerate builds by reusing layers
- Implement image scanning in the pipeline before deployment
- Generate systemd units as artifacts for deployment automation
- Tag images with commit SHAs for traceability
- Clean up temporary containers and images to prevent storage exhaustion
Registry Integration and Image Distribution
Pushing images to registries works identically between Docker and Podman, using the same authentication mechanisms and registry URLs. The podman login command authenticates with registries, storing credentials in ~/.docker/config.json (yes, the same location Docker uses). This compatibility means existing registry configurations and credentials transfer directly to Podman without modification.
Private registries require TLS certificates or explicit configuration to allow insecure connections. The /etc/containers/registries.conf file controls registry behavior, including search order, mirror configurations, and security settings. For development environments, marking registries as insecure allows testing without proper certificates, though production deployments should always use properly secured registries with valid TLS.
Migration Planning and Execution
Successful migration from Docker to Podman requires careful planning rather than hasty replacement. Start by inventorying your current Docker usage—which containers run where, what dependencies exist, how they're orchestrated, and what automation relies on Docker-specific features. This inventory reveals the scope of migration and identifies potential complications before they become blocking issues.
Phased migration reduces risk by limiting the blast radius of unexpected issues. Begin with development environments where problems impact fewer people and fixes can be tested quickly. Move to staging environments once confidence builds, using this phase to validate that production-like workloads function correctly. Finally, migrate production systems with careful monitoring and rollback plans prepared.
📊 Testing compatibility should cover more than just whether containers start. Validate networking behavior, storage persistence, performance characteristics, and integration with monitoring tools. Pay particular attention to areas where Docker and Podman differ architecturally—daemon-based monitoring tools need alternatives, networking configurations might require adjustment, and systemd integration changes operational procedures.
Migration checklist items:
- Audit current Docker usage and document dependencies
- Test critical workloads in isolated Podman environments
- Update documentation and runbooks for Podman commands
- Train team members on Podman-specific features and differences
- Establish rollback procedures before production migration
Handling Docker-Specific Dependencies
Some tools and integrations assume Docker's presence and don't work seamlessly with Podman. Docker Desktop features like Kubernetes integration, GUI management, and file sharing have different equivalents or workarounds in the Podman ecosystem. Identifying these dependencies early prevents surprises during migration. In some cases, maintaining Docker alongside Podman during transition periods provides a safety net while teams adapt.
Third-party tools that integrate with Docker often work with Podman through the Docker-compatible socket. Podman can provide a Docker-compatible API through podman system service, which listens on a socket that mimics Docker's API. Tools that use the Docker socket can point to Podman's socket instead, maintaining compatibility without code changes. This approach bridges the gap between Docker-centric tooling and Podman's architecture.
"Migration success depends less on technical capability and more on thorough planning, comprehensive testing, and realistic timelines that accommodate learning curves and unexpected complications."
Advanced Features and Use Cases
Podman's secret management provides secure handling of sensitive data like passwords, API keys, and certificates. The podman secret create command stores secrets encrypted at rest, making them available to containers without exposing them in environment variables or configuration files. Containers access secrets through mounted files, reducing the risk of accidental exposure through logs or process listings.
Checkpoint and restore functionality enables container migration and sophisticated debugging workflows. Podman can checkpoint a running container, capturing its complete state including memory contents and file descriptors. This checkpoint can be restored later, potentially on a different host, resuming execution from the exact point where it was checkpointed. This capability supports live migration scenarios and enables debugging techniques like time-travel debugging.
🚀 Auto-update features allow containers to automatically pull and restart with new image versions. By labeling containers with auto-update policies and running podman auto-update (typically through a systemd timer), you can implement continuous deployment patterns where containers automatically update when new images appear in registries. This approach works particularly well with systemd integration, where the service management handles restarts gracefully.
Advanced feature applications:
- Use secrets for database passwords and API credentials
- Implement checkpoint/restore for container migration between hosts
- Configure auto-update for development environments
- Leverage pod health checks for sophisticated monitoring
- Employ custom network plugins for complex networking requirements
Monitoring and Observability
Monitoring Podman containers requires different approaches than Docker since there's no daemon to query for system-wide metrics. The podman stats command provides real-time resource usage information similar to Docker's stats command. For persistent monitoring, integration with tools like Prometheus requires exporters that collect Podman metrics and expose them in Prometheus format.
Logging follows standard output conventions, with container logs accessible through podman logs. Systemd integration provides additional logging capabilities through journald, where container logs appear in the system journal with appropriate metadata. This integration enables centralized log management using existing journald-compatible tools and doesn't require specialized container logging solutions.
FAQ: Common Questions About Podman
Can I use Podman and Docker simultaneously on the same system?
Yes, Podman and Docker can coexist on the same system without conflicts. They use separate storage locations and don't interfere with each other's operations. However, they maintain separate image stores, so images pulled by Docker won't appear in Podman listings and vice versa unless you explicitly export and import them.
Does Podman support all Docker Compose features?
Podman-compose supports most common Docker Compose features, but some advanced functionality may not work identically. For full compatibility, consider using pods as an alternative to Compose files, or generate Kubernetes YAML that Podman can consume natively. Most development and testing workflows transition smoothly to podman-compose.
How do I run containers as services that start at boot?
Generate systemd unit files from your containers using podman generate systemd, then install these units in the appropriate systemd directory. Enable the services with systemctl enable to ensure they start automatically at boot. For rootless containers, enable user lingering with loginctl enable-linger to allow services to start before login.
Why can't my rootless container bind to port 80?
Ports below 1024 are privileged ports that require root access by default. Rootless Podman cannot bind to these ports without additional configuration. Solutions include using higher ports and proxying through a reverse proxy, or adjusting the net.ipv4.ip_unprivileged_port_start sysctl setting to allow unprivileged binding to lower ports.
What's the performance difference between rootless and rootful Podman?
Rootless Podman incurs some overhead from user namespace mapping and slirp4netns networking, typically 5-15% for most workloads. CPU-intensive tasks see minimal impact, while network-heavy workloads experience more noticeable differences. For most development and many production scenarios, this overhead is acceptable given the security benefits. High-performance production workloads may benefit from rootful operation or alternative network configurations.
Can I migrate running Docker containers to Podman without downtime?
Direct migration of running containers isn't supported, but you can minimize downtime through careful planning. Export container configurations, prepare equivalent Podman setups, and perform rapid cutover during maintenance windows. For critical services, consider blue-green deployment strategies where Podman containers start before Docker containers stop, enabling near-zero downtime transitions.